Act i ivs server 1 user’s manual – ACTi IVS Server 1 V2.02.06 User Manual
Page 32
ACT
i IVS Server 1 User’s Manual
3.
Move your cursor over to the area showing video stream, at which point it will appear
as a drawing pen. To draw the rectangle that will mark the area for detection, click and
drag your cursor to draw a green rectangle.
4.
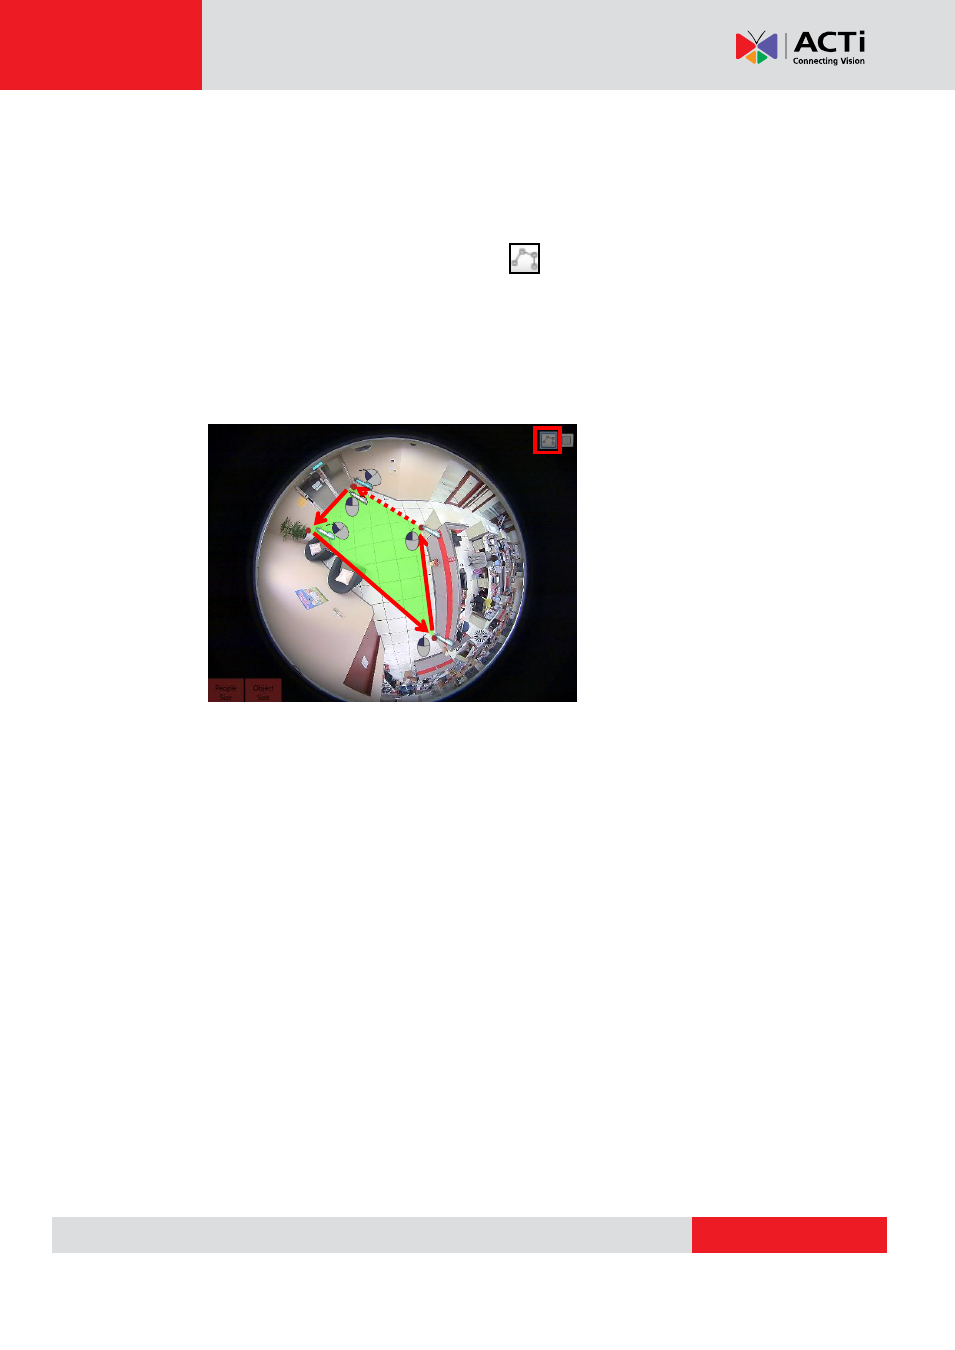
If the area you want to mark does not fit to the form of a rectangle, you may also
choose to draw a polygon by selecting the icon on the upper right corner of your
Live View Display
area. To draw the lines for the sides of your polygon, click your
cursor to mark the endpoints of each line.
Double-click
on the final endpoint of the
final line to confirm and highlight the polygon in green, as shown in the illustration
below. Make sure your lines connect (a minimum of 3 lines) to form a closed shape.
5.
To adjust the marked area, you can drag the highlighted area to keep its original shape
or
right-click
on the area, select
“remove”
, and re-draw. For polygons, you may
toggle the endpoints of the lines that make up the sides of your polygon.
6.
If you would like to record all moving objects on your camera view while running the
analysis, mark the box for
“Record Moving Object”
.
7.
Click
“Start Smart Search”
to start running your analysis.
x2