Step 4: install the camera to the tilted mount, Step 5: prepare for waterproof installation – ACTi Outdoor Hemispheric / Fisheye Dome on Corner with Tilted Mount (PMAX-0310) User Manual
Page 6
Installation Guide
Step 4: Install the Camera to the Tilted Mount
1.
If necessary, insert a memory card into the card slot of the camera.
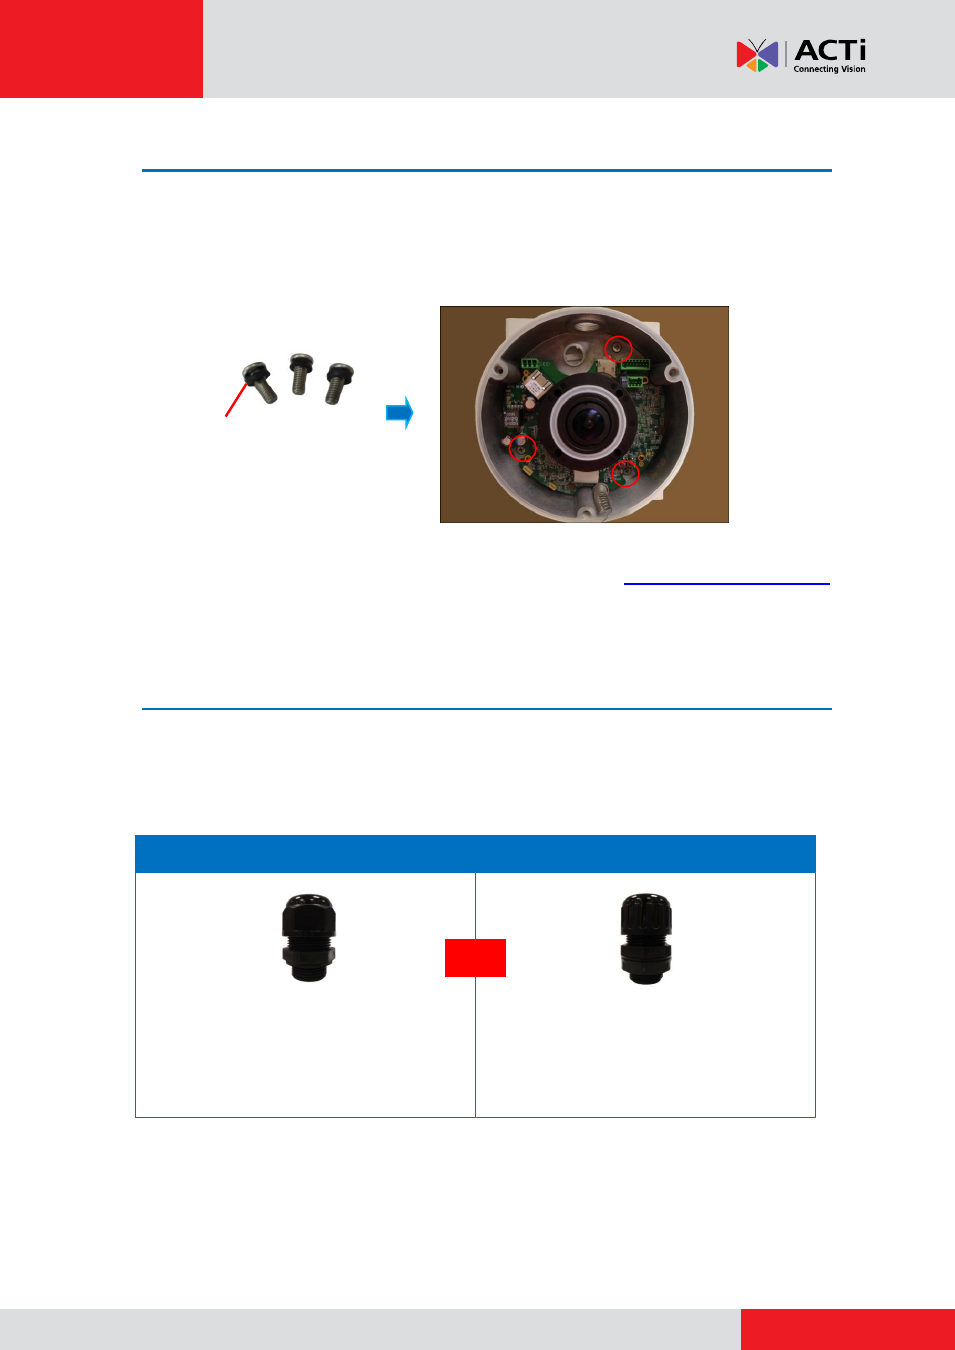
2.
Attach the camera to the tilted mount using the three (3) screws supplied in the tilted mount
package.
NOTE:
Make sure the mounting screws have rubber rings. If the screws you received do not
have rubber rings, please contact your local sales agents or our
for support.
Step 5: Prepare for Waterproof Installation
The camera comes with two (2) glands used for waterproof installation: Cable gland and Conduit
Gland. Determine the type of waterproof solution that is applicable to your installation
requirements and prepare the necessary accessories or purchase extra materials.
Cable Gland
Conduit Gland
For use with an
EXTERIOR-GRADE
Ethernet cable. Exterior-grade Ethernet
cables are already waterproof.
For use with
3/8”
flexible conduit.
Recommended when an exterior-grade
Ethernet cable is not available or when other
input/output devices or an external power
adaptor will be connected to the camera.
and
Rubber Ring