Chassis assembly 2-2, Unit configuration 2-2, Configuration switch s2 2-2 – Verilink 2100 (34-00187) Product Manual User Manual
Page 10: Unit configuration, Chassis assembly, Configuration switch s2
2-2
Installation
2100 CSU
2. Replace the standalone front panel with a front panel
module. The unit can now slide into one of the 12 CSU
slots on the chassis front.
Chassis Assembly
Up to 12 modular units may be inserted into a chassis and
the chassis may be installed in a 19-inch or 23-inch rack
using four screws. Connections are made from the rear of
the chassis. Refer to Figure 2-6 on page 2-5.
Unit Configuration
The TxPORT 2100 CSU is hardware configured using two
DIP switches and a jumper located on the side of the circuit
boards. These are shown in Figure 2-1 except for Switch S2
which is located on the front panel (see Figure 2-2). The
numbering system used for each switch position is as fol-
lows: Position 2 of Switch S3 is referred to as Switch S3-2,
and so on.
Before installation, verify each configuration switch setting.
Differences in the switch settings between the chassis-
mount and standalone units are shown on their respective
configuration guides.
Configuration Switch S2
Front panel Switch S2 (Figure 2-2) is used to set the config-
uration parameters listed in the following paragraphs.
Sealing Current
Position S2-1 is used to apply a sealing current of 20 mA to
the network interface for applications where the telco pro-
vides a dry (no power interface and sealing current is
needed. For most applications (where the telco provides line
power or where sealing current is not required), this switch
should be left in the Off position.
Sealing current is any low-level current passing through a
splice, joint, or wire-wrap connection. It seals the joints on a
span line. The action of the current flow prevents the joint
from becoming a source of high impedance.
Prior to divestiture, the CSUs were owned and powered by
the telephone company, ensuring sealing current on all joints
up to the CSU. Since divestiture, the telephone company
may sometimes loop the power back at the last repeater or at
the network interface. This removes power from the final
section, which in turn removes sealing current from those
joints. The dry spans can cause mechanical contacts to even-
tually fail. Providing sealing current to a span reduces this
corrosion.
Left: sealing current is Off.Right: sealing current is On.
WARNING: Enabling sealing current
with telco line power present could dam-
age the unit and/or cause improper operation.
Zero Suppression
Position S2-2 implements ones-density insertion after the
preset number of zeros has been received from the DTE and
the Keep Alive mode is activated.
Left: 15 zeros
Right: 175 zeros
Test Pattern
Position S2-3 sets the framing of the SET, RESET, and
BERT test signals.
Left: Framed
Right Unframed
Line Coding
Position S2-4 sets the network line coding. If set to AMI, the
unit indicates a BPV error for each event. The B8ZS code
coming from the network and sets the test signals to B8ZS.
Left: B8ZS
Right: AMI
Test Mode
Position S2-5 either sets or clears the test pattern. The BERT
position allows the CSU to send a BERT pattern after the set
signal (LOOP) is sent. Clear passes the traffic from the DTE
through the network and allows network access via test
jacks to run bit error tests (affects network tests only).
Left: BERT
Right: Clear
1 2
7
6
5
4
3
Optional Alarm Card
Alarm Relay
KX
TX
Switch S4 is set
at the factory—
do not change.
Switch S4
Switch S3
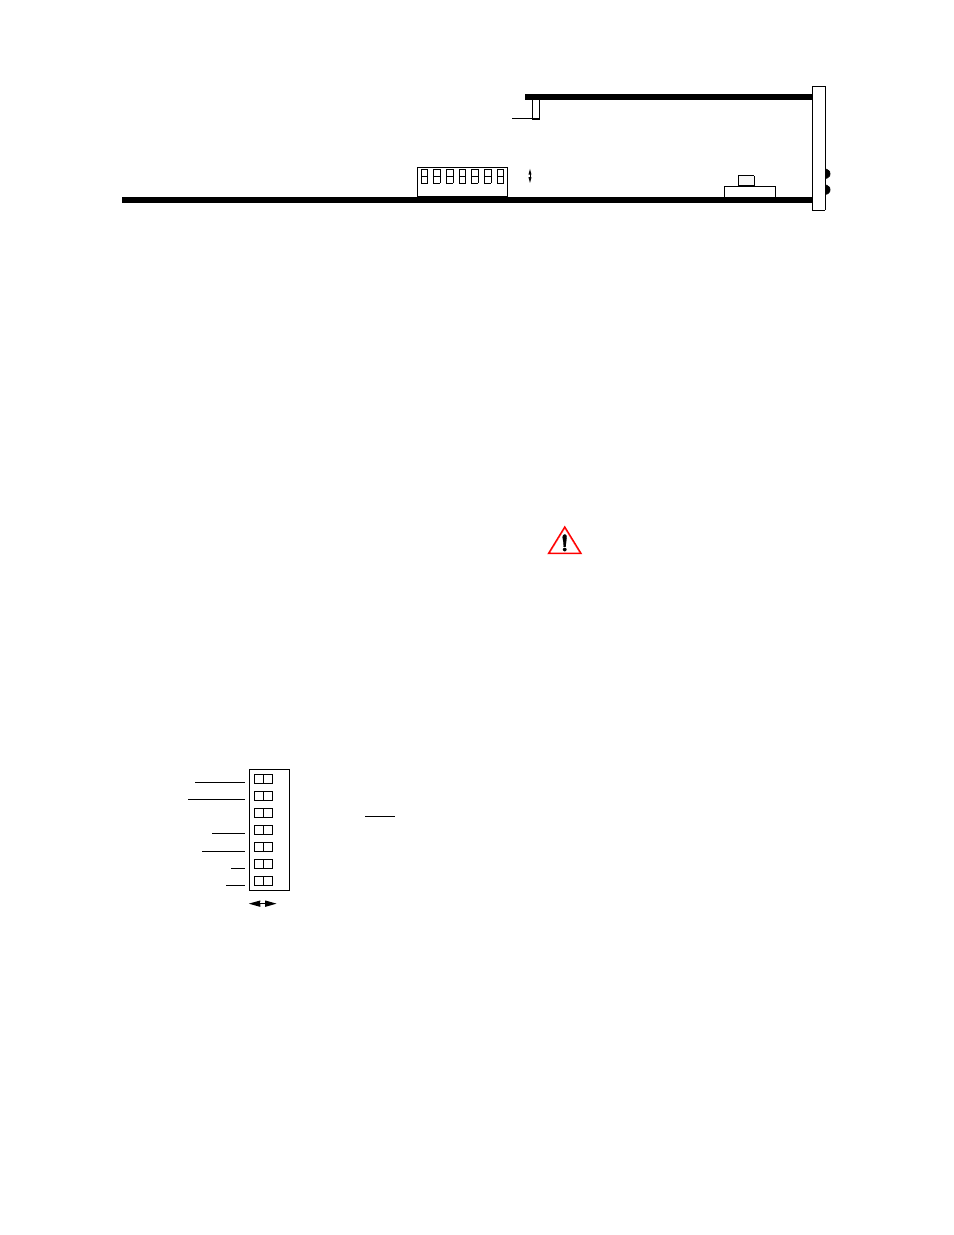
Figure 2-1
Bottom-Edge View of the 2100 CSU
Up
Down
12
7
6
5
4
3
Keep Alive - Loopback
Keep Alive - Framed
Test Mode - Clear
Line Mode - AMI
Test Pattern - Unframed
Zeros - 175
Sealing Current - On
Keep Alive - All Ones
Keep Alive - Unframed
Test Mode - BERT
Line Mode - B8ZS
Test Pattern - Framed
Zeros - 15
Sealing Current - Off
Left
Right
Figure 2-2
Switch S2