Configuration, Configuration, Microphone preamplifier gain and phantom power – Studio Technologies 216 User Manual
Page 13
Model 216 User Guide
Issue 1, July 2014
Studio Technologies, Inc.
Page 13
Configuration
For the Model 216 to support the needs
of specific applications a number of op-
erating parameters must be configured.
These include microphone preamplifier
gain, phantom power on/off, pushbutton
operation, headphone control assignment,
and operating modes. Two pushbutton
switches and a 12-position DIP switch as-
sembly are used to establish the desired
configuration. A 2-digit LED display will
indicate the gain of the microphone pream-
plifier and the phantom power on/off sta-
tus. The pushbutton switches, LED display,
and DIP switches are accessed through
an opening in the bottom of the Model
216’s enclosure. The enclosure does not
have to be disassembled to gain access.
To prevent unauthorized personnel from
changing the configuration settings, a
security panel is attached to the bottom
of the Model 216’s enclosure. For conve-
nience, the security panel provides a sum-
mary of the configurable parameters and
related information. Refer to Appendix A for
a representative view. The security panel
is held in place by means of four rubber
bumpers (“feet”) that have built-in screws.
Using your fingers, remove the four bum-
pers so that the panel can be removed.
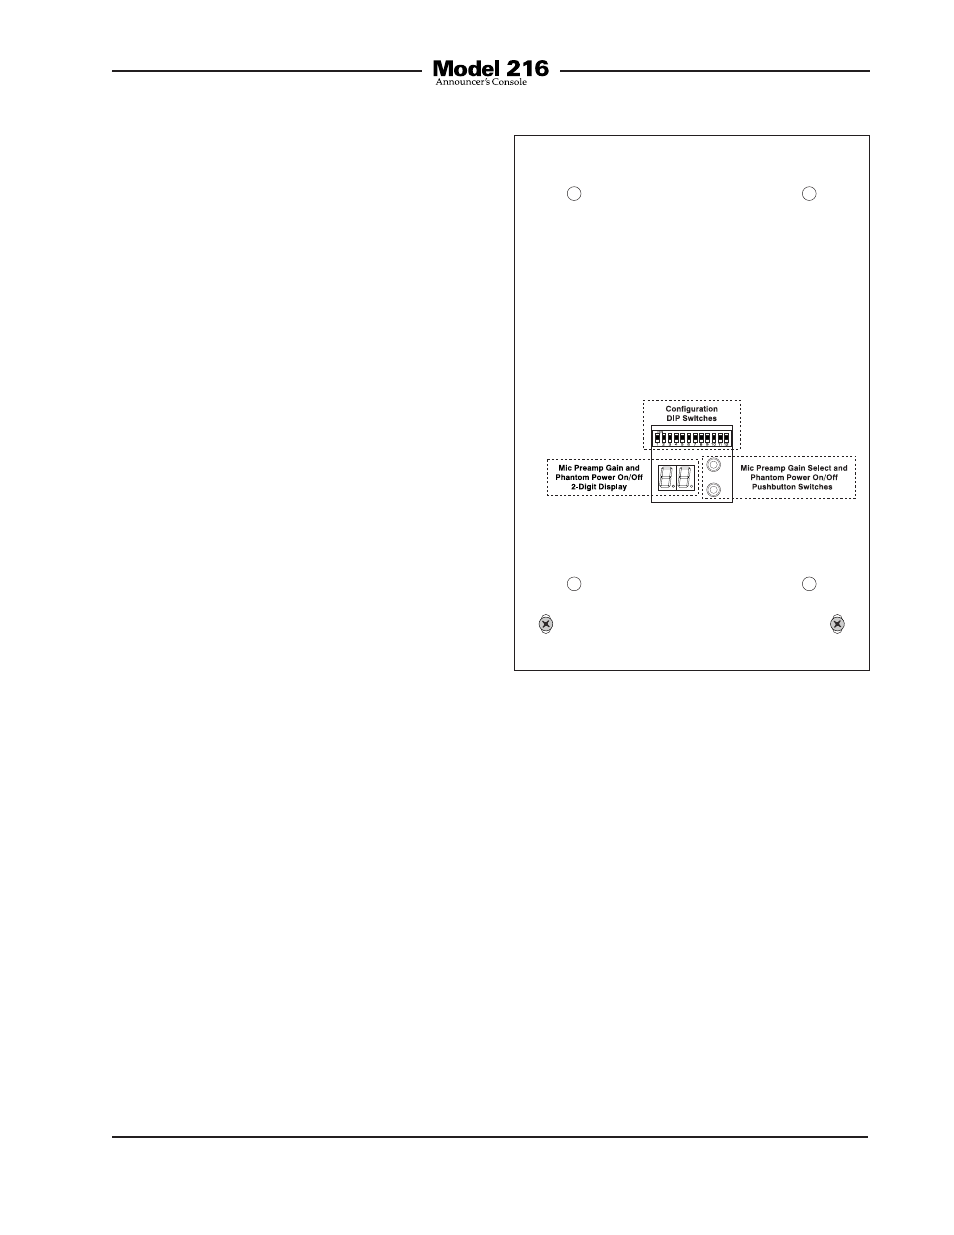
Refer to Figure 2 for a detailed view of the
configuration switch assemblies.
Microphone Preamplifier Gain
and Phantom Power
Two pushbutton switches, located on the
bottom of the Model 216, are used to set
the gain of the microphone preamplifier
and select the on/off status of the phantom
power source. A 2-digit LED display pro-
vides a status indication of both functions.
LED Display Time-Out
As previously mentioned, a 2-digit LED
display provides an indication of the gain
of the microphone preamplifier as well as
the on/off status of the phantom power
supply. As a power-saving measure the
display will automatically stop lighting
approximately 100 seconds after the last
time that either of the bottom pushbutton
switches is pressed. A different time-out
interval applies after the Model 216 has
had power applied and neither pushbutton
is pressed; the display will light for approx-
imately 10 seconds and then turn off.
In most cases this display auto-off function
will lead a technician or installer to initially
Figure 2. Bottom view of Model 216 showing
configuration switches and 2-digit display