Spohn SEL-F3K1 User Manual
Page 3
REAR SWAY BAR END LINK INSTRUCTIONS
1. Safely raise the rear of the car to an adequate working height, then support the
chassis securely with jack stands.
2. Loosen and remove your rear sway bar end links from both ends of the rear sway
bar.
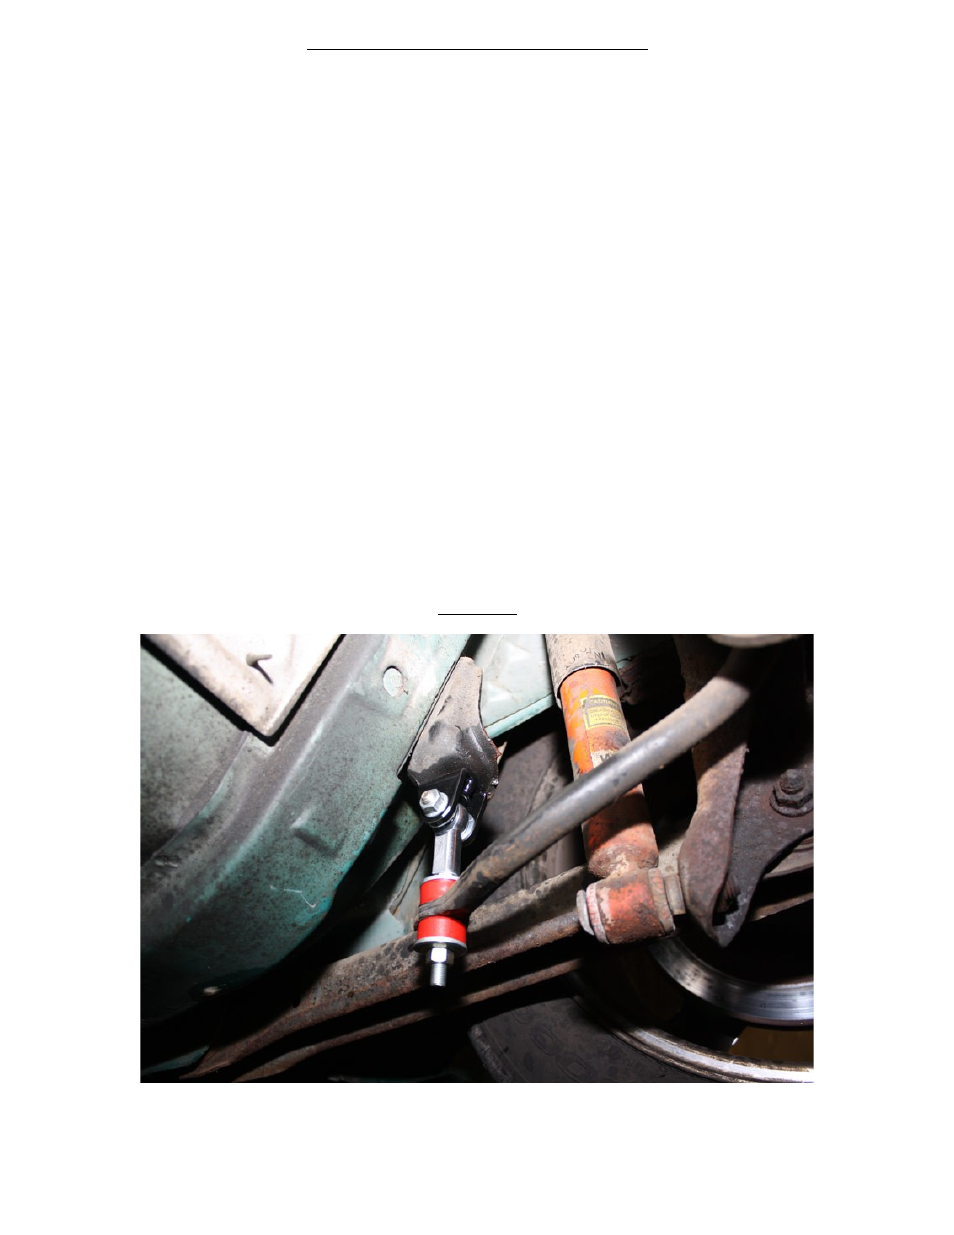
3. Bolt both of the u-shaped clevises to the rear upper end link chassis mounts using
the supplied 5/8” steel top lock nuts. Use an adjustable wrench to hold the clevis at
its properly clocked orientation and a 15/16” socket on the lock nut and fully tighten
the nuts. See Picture 3 below.
4. Loosely connect the other end of both rear sway bar end links to the rear sway
bar. Remove the Nylock® nut from the bottom of the end links and then sandwich
the sway bar between the two bushings (same as the factory end link). Then re-
install the 3/8” Nylock® nut and make it snug using a 9/16” wrench, but not fully
tightened. See Picture 3 below.
5. Safely lower the vehicle to the ground.
6. With the vehicle on the ground and the suspension loaded, using a 9/16” wrench,
tighten the 3/8” Nylock® nut on the bottom of both of the end links. Tighten the
nuts until you see the bushings starting to deform, then STOP.
7. Installation is complete.
Picture 3
3