Sea Eagle Classic Motormount SE-8 and 9 (SE 8, Classic SE 9) User Manual
Page 8
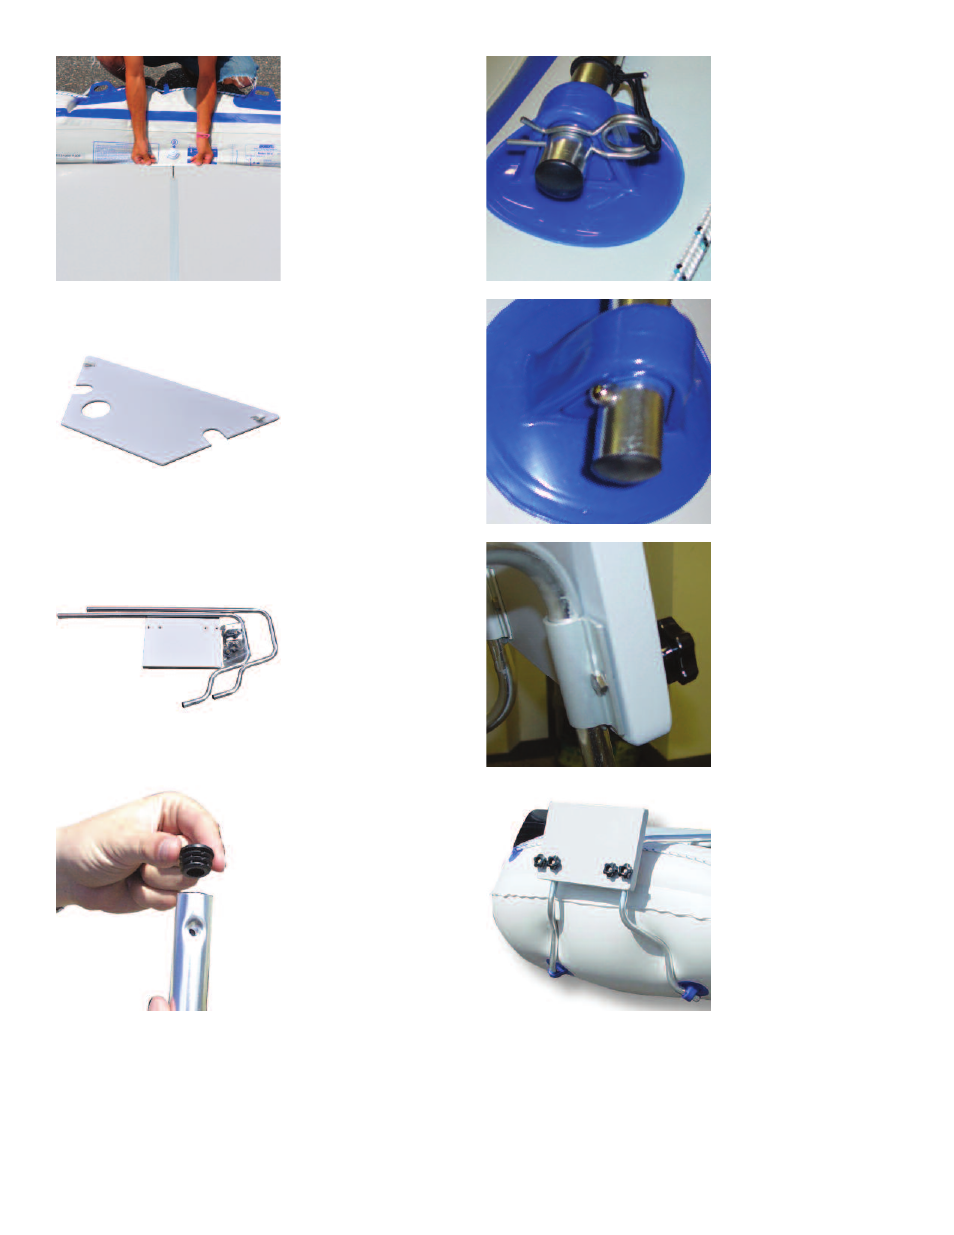
Make sure the side
struts meet up with the
middle strut. After both
floorboards are in place
you can install your
motor mount. If you’re
not installing a motor
mount, proceed to finish
the inflation on the main
chambers as instructed
in this manual.
MSB
(OPTIONAL)
Place the Motormount
Support Bench in the
stern of the boat before
the motormount is
installed. The velcro
straps should be on the
top side and the pre-
drilled hole in the seat
should be placed di-
rectly over chamber #1.
Motormount
(OPTIONAL)
Your boat should be
around 75% inflated
which gives the boat
some structure but still
keeps it pliable for an
easy install. We highly
recommend using both
the MSB and floorboard
set if you plan on using
the motormount.
Begin by inserting the
closur caps into both
ends of each of the two
aluminum rods. These
rods are bent inward to
transfer pressure from
the motormount.
Insert the long, straight
end of the rods through
the grommets at the
stern of your boat (over
the MSB). Secure them
using the velcro straps
on the MSB and by
inserting the included
clevis pin through the
pre-drilled hole at the
end of the rod.
Insert the shorter, bent
end of the rods through
the grommets at the
stern which are located
underneath the boat.
Push the rods in far
enough so that the push
pins secure the rod into
place.
To attach the wooden
motormount block, hold
it to the back of the two
aluminum rods and
place the “U” shaped
clamps between the
rods and the boat and
then secure them using
the bolts and knurled
nuts.
Make sure that the
mount is at the highest
possible position when
installed on your boat
for the best results
when using a motor.
7