Assembly & inflation – Sea Eagle Classic Motormount SE-8 and 9 (SE 8, Classic SE 9) User Manual
Page 6
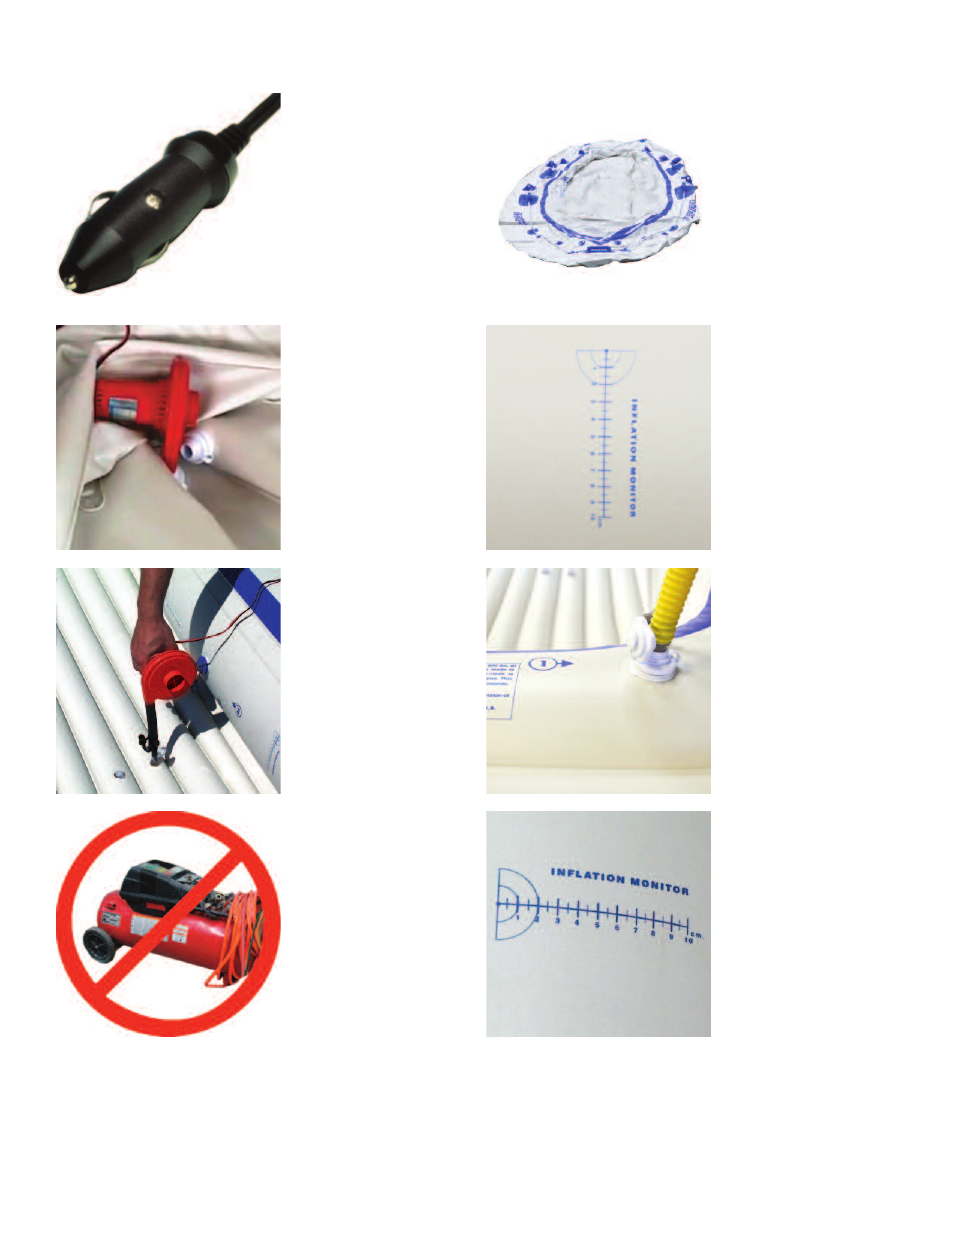
Assembly & Inflation
First, make sure your
pump is switched OFF
and then insert the
power adapter into the
power outlet. If you
have a weak battery
you may want to keep
your engine running
while you’re using the
pump.
No extra nozzles are
needed to inflate the
main air chambers of
your boat, just insert the
pump into the valve and
switch it on. Do not drop
or suddenly move the
pump while it is
To inflate the floor
chambers using the
MB-80 you will need to
attach the tube extender
and large cone nozzle
to the end of the pump.
Air compressors that
are designed for other
uses like tire inflation
(usually around 50 PSI)
can easily harm your
Sea Eagle which works
at a much lower pres-
sure of 1.1 PSI. For this
reason we recommend
only using Sea Eagle
pumps.
Assembly & Inflation
To begin unroll your
boat on a clean, flat
surface. Locate the
three main air chambers
(they are numbered 1-3)
and screw the deluxe
one-way air valves to
them. Make sure not to
cross the threads when
screwing the valve into
the base or when tight-
ening the outer cap.
Chambers #1 & #3
feature a diagram of the
plastic inflation monitor
that is included with this
boat. As you begin to
inflate, the hull material
will stretch so that the
diagram matches the
clear plastic inflation
monitor.
Begin by inflating the
two pipe valves on the
floor and then proceed
to the main chambers
beginning with chamber
#1 which is the upper
safety chamber. This
guarantees that its fully
inflated which is vital in
the unlikely event that
another chamber loses
air.
Next inflate chambers
#2 & #3 and use the
printed diagram on
chambers #1 & #3 to
match the pattern with
the clear plastic inflation
monitor. Note that
chamber #1 will not be
an exact match until #3
is fully inflated.
5