Assembling fence to ta b l e – Delta 31-750 User Manual
Page 7
7
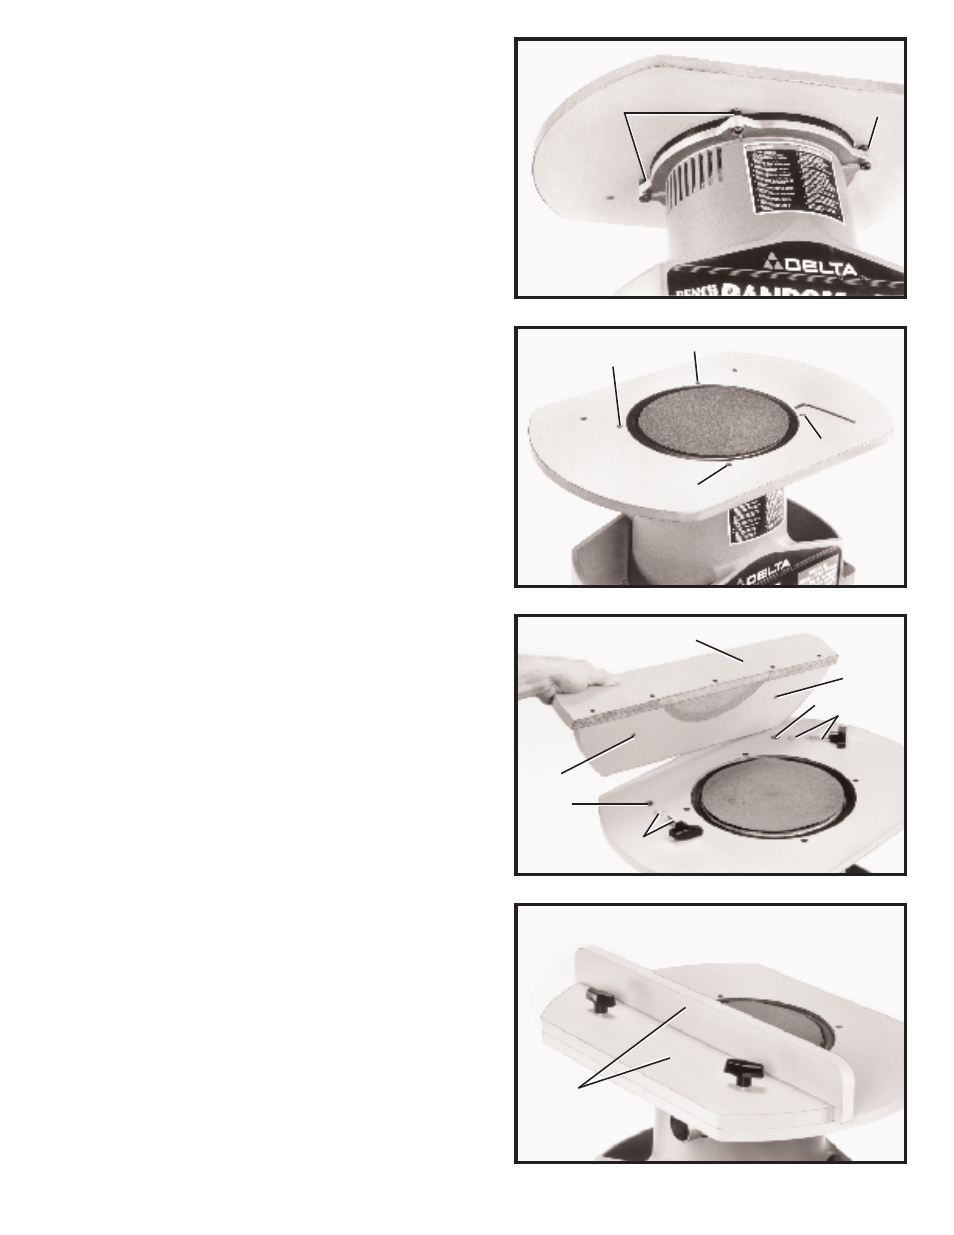
Fig. 8
Fig. 9
2.
If an adjustment is necessary, loosen four lock nuts
located underneath the table, three of which are shown
at (F) Fig. 8.
3.
W ith allen wrench supplied, tighten or loosen adjust-
ment screws (D) and (E) Fig. 9, as necessary. Recheck
the table height and repeat the adjustment if needed,
until the table surface is slightly lower than the abrasive
disc.
4.
Tighten four lock nuts (F) Fig. 8, after table height
adjustment.
F
F
D
E
D
E
Fig. 10
Fig. 11
ASSEMBLING FENCE
TO TA B L E
Align two holes (A) Fig. 10, in the underside of fence (B)
with two holes (C) in the table and fasten fence (B) to the
table from the top, with two lock knobs and flat washers (D).
Fig. 11, illustrates the fence (B) assembled to the sander.
A
C
D
A
C
D
B
B