For the installer – Scotsman IS100 User Manual
Page 4
FOR THE INSTALLER
1. Locate the Ice Station on the counter.
Allow vertical clearance above unit for the
removal of the cover, and for pouring ice
into the hopper.
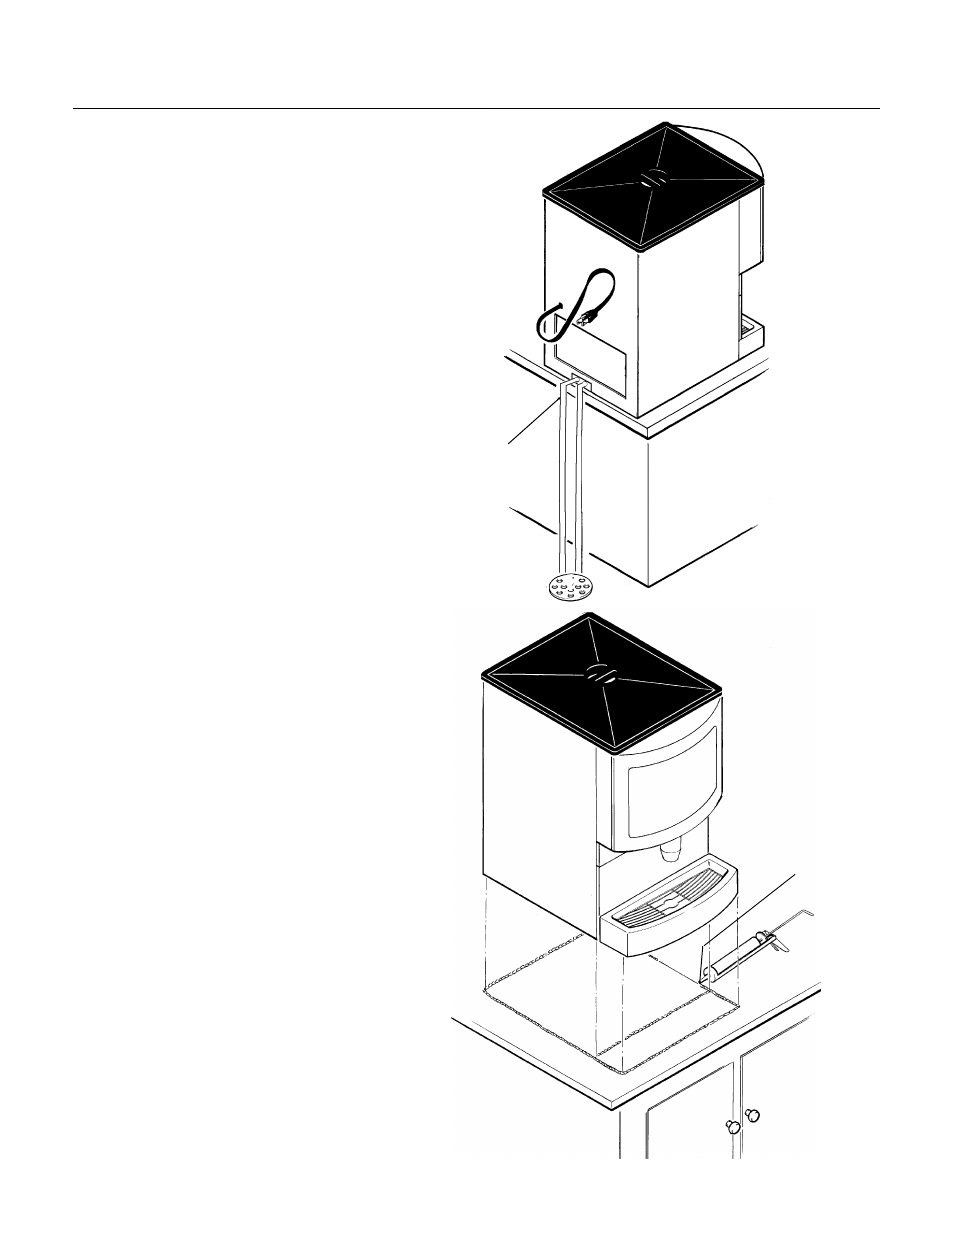
2. Plan the unit drain. Two tubes (5/8" and
3/4" I.D.) are located at the back of the
cabinet. Routing is either thru the back or
base. Sufficient fittings are indluded with
the unit to install in most cases.
3. In order to comply with National
Sanitation Foundation (NSF)
requirements, this unit must be either
elevated above the counter top sufficiently
to provide space for cleaning under the
unit or sealed to the counter top.
Elevating the unit may be accomplished
by using the optional legs. They will screw
into threaded holes in the base of the unit.
If the unit is to be sealed to the counter
top, the drain and soda tubing should be
available and planned such that the
connections may be finished after the unit
has been sealed to the counter.
Sealing may be accomplished by the use
of room temperature vulcanizing (RTV)
rubber sealant such as General Electric
IS 808 Industrial Sealant, Dow Corning
731 (Scotsman part number 19-0529-01)
or the equivalent.
With the unit located on the counter as
desired:
A. Tilt or lift the unit to expose the bottom
flanges of the base frame.
B. Apply the sealant to cover the bottom
flanges of the base frame.
C. Return the unit to the desired position
on the counter top.
D. Add sealant around the base frame
and counter top to provide a seal with a
radius of 1/2". Follow the sealant
manufacturer’s instructions on the
package for working with the sealant, and
cleaning up.
E. Seal around all access holes in the
counter top with Permagum or Mortite
caulk or an equivalent material.
USE LEGS OR
SEAL TO
COUNTERTOP
CABINET DRAIN
TUBES
IS100 and IS150
October 1993
Page 4