RLE FMS Quick Start User Manual
Page 2
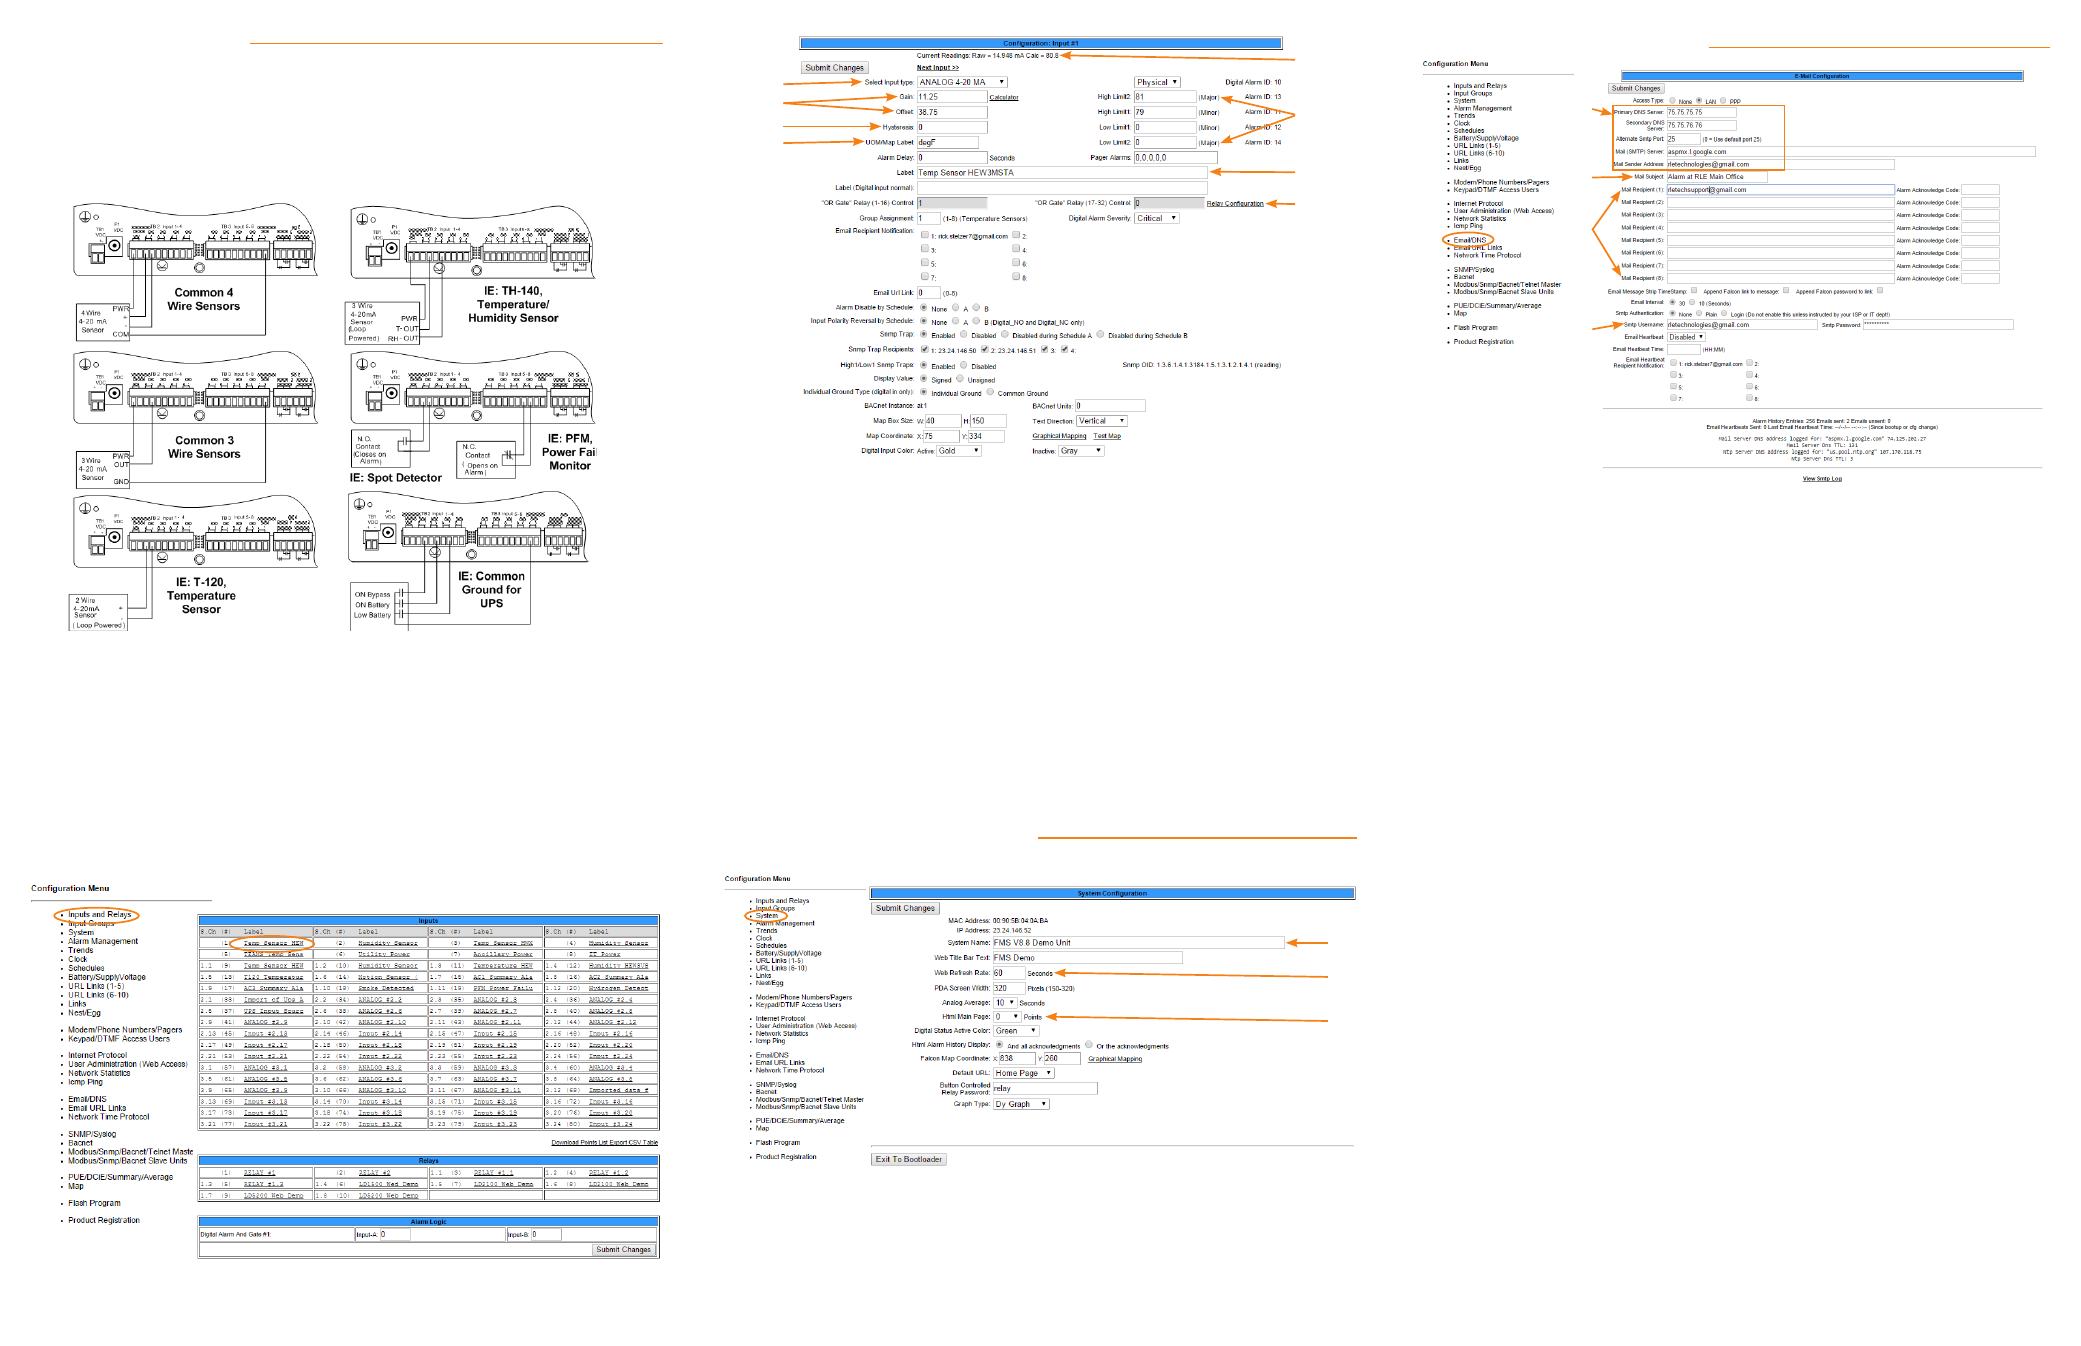
Configure the Inputs
The eight non-isolated universal inputs are connected to TB2 and TB3. Universal
input channels can be individually configured through the FMS to monitor a 4-20mA
signal, a normally open (NO) dry contact relay, or a normally closed (NC) dry
contact relay.
Make the Physical Connections
The following figure shows examples of input wiring:
Once you have wired the inputs, make note of the following:
• Sensor type (analog or digital) connected to each channel
• For each analog sensor - the high and low alarm thresholds.
• For each digital sensor - the non-alarm state: normally open (NO) or normally
closed (NC).
Configure the Inputs
Use the Inputs and Relays page of the configuration menu to configure the inputs.
Click on the underlined label for the input you would like to configure.
A.
An input can be Analog 4-20 mA or Digital NO, NC, or Status
B.
Applies only to analog inputs. Gain and offset are used by the FMS to
convert temperature, humidity, etc. readings to a 4-20mA signal.
C.
Applies only to analog inputs. Hysteresis is the amount the reading of an
alarming input must change before it’s reported as returned to normal.
D.
Applies only to analog inputs - use Deg F, Deg C, %RH, Amps, Volts, PSI,
etc. The UoM field displays on main menu and in alarm notifications.
E.
The raw reading as reported by the FMS and the calculated value based
on the gain and offset settings.
F.
Applies only to Analog inputs. Set the one or two high and low alarm
thresholds to designate the range you would like to monitor.
G.
The input label displays on the main menu and in the configuration menu.
H.
This link configures corresponding relay output behavior for this input.
Configure System Information
Use the System link on the Configuration menu to configure system information.
A.
The system name appears on the FMS main menu and is included as part
of email and pager notifications.
B.
The rate at which the web pages refresh within the browser. Use a
number greater than 5.
C.
Designate the number of points you’ll display on the main menu. Typically
users enter 0 here to display all points.
Configure Email Notification
A.
Refer to the information you collected from your IT administrator.
B.
Select subject text that you will easily recognize as notification from the
FMS.
C.
Enter up to eight email recipients - either individual email addresses or
distribution lists.
D.
This information is used for ESMTP email authentication. Refer to the
information you collected from your IT administrator.
Complete the Installation
Once you have completed the tasks in this quick start guide, the FMS can
communicate over the network and monitor the inputs you configured.
Consult the FMS User Guide at http://www.rletech.com for information about
completing these additional tasks:
• System clock settings
• Network time protocol settings
• SNMP/Syslog settings
• Modbus/Telnet settings
• BACnet settings
• User administration
• URL links to IP-addressable devices
• Nest/Egg configuration (for additional FMS appliances that will be monitored by
a central FMS appliance)
• Trends
• Alarm management
• Product registration
A
B
C
D
E
F
G
H
A
B
C
A
B
C
D