Applying power to the ld5100, Using the lcd interface – RLE LD5100 Quick Start User Manual
Page 2
©2010 RLE Technologies. All rights reserved. RLE is a registered trademark, and
SeaHawk, Falcon, and Raptor are trademarks of RLE Technologies. All other
trademarks or registered trademarks are the property of their respective companies.
Although the information contained in this document is believed to be accurate and
correct, RLE Technologies assumes no responsibility, and disclaims all liability, for
any damages resulting from the use of this information or any error or omission in this
document. RLE Technologies does not warrant, guarantee, or make any
representations as to the performance, fitness for use, safety, or reliability of any
existing or future wiring, equipment, additions or modifications to equipment, or any
other component of the original or modified system. Specifications are subject to
change without notice. Part number 110045 Rev. 2.0 6/2010
104 Racquette Drive
Fort Collins, CO 80524
970.484.6510
www.rletech.com
4
Applying Power to the LD5100
Note: Wire colors are typical, but may vary.
The LD5100 operates on either 100 VAC to 240VAC power. An AC power
source must be run to the location of the unit. RLE recommends having the
LD5100 on dedicated circuit. UPS backup is preferred.
1
Before applying power to the unit, make sure the AC breaker switch is
turned off.
2
Once the power is turned off, strip the end of the AC supply so the three
wires inside are exposed. Strip the end of each of the three wires and
feed the end of the power supply into the LD5100 enclosure.
3
Insert the line (white) wire, neutral (black), and ground wires into the
terminal block in the lower right corner of the enclosure.
4
As labeled in the enclosure, place the neutral power line inside the left
hand position of the terminal block (Neut).
5
Place the Line into the opening on the center of the terminal block (Line).
6
Place the earth ground line into the opening on the right hand side of the
terminal block (Gnd).
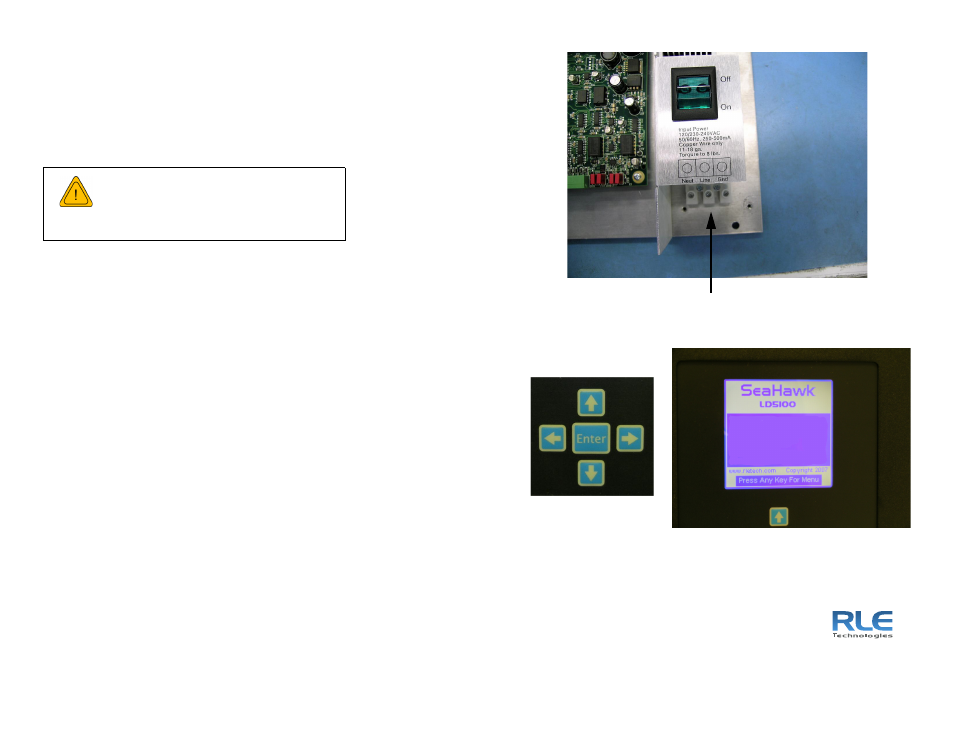
7
Once all the wires are placed inside the terminal block, turn the AC
power supply back on.
The LD5100 begins booting up.
8
Wait approximately one minute. No alarm should be present.
5
Using the LCD Interface
On the LCD, press any key for the main menu. Through the LCD submenus,
you may set the clock, system name, alarm configuration, feet/meters, etc.
Enter the Cable Status menu. The cable length is displayed. If this reading
varies by more than ±5% of the actual length of cable installed, verify the
installation.
For more information about calibration, cable mapping, and the LCD interface,
refer to the LD5100 User Guide available at
e default
password for the system setup menu is 1234.
WARNING
A dedicated circuit breaker must be
provided within close proximity to the
LD5100 and be clearly marked as the
disconnecting device for the LD5100
leak detection controller.
Power terminal block
Keypad
LCD