Remko, Way switching valve dn 40, Installation – REMKO DN 40 User Manual
Page 6
6
REMKO
3-WAY SWITCHING VALVE DN 40
Assembly
Installation is generally possible in any
position. However, the actuator should
not be installed upside-down, as far
as possible.
■
The 3-way switching valve and the
actuator are delivered packaged
separately. At first, leave the actuator
in the package and begin with the
hydraulic installation of the 3-way
switching valve.
Installation
Installation should only be
performed by authorised
specialists.
NOTE
Do not use any boiler accessories,
soldering material or wet materials
of a mineral oil basis, mineral oil
or hydrocarbon.
NOTE
■
Only fit the actuator and make
electrical connection to the heat
pump manager after completion
of all hydraulic installation work and
successful leak test.
■
Allow for sufficient space for
the 3-way switching valve.
In the process, also plan for sufficient
space for the pipe insulation.
That is important on the one
hand for the problem-free fitting
of the actuator and on the other hand
for any later maintenance work.
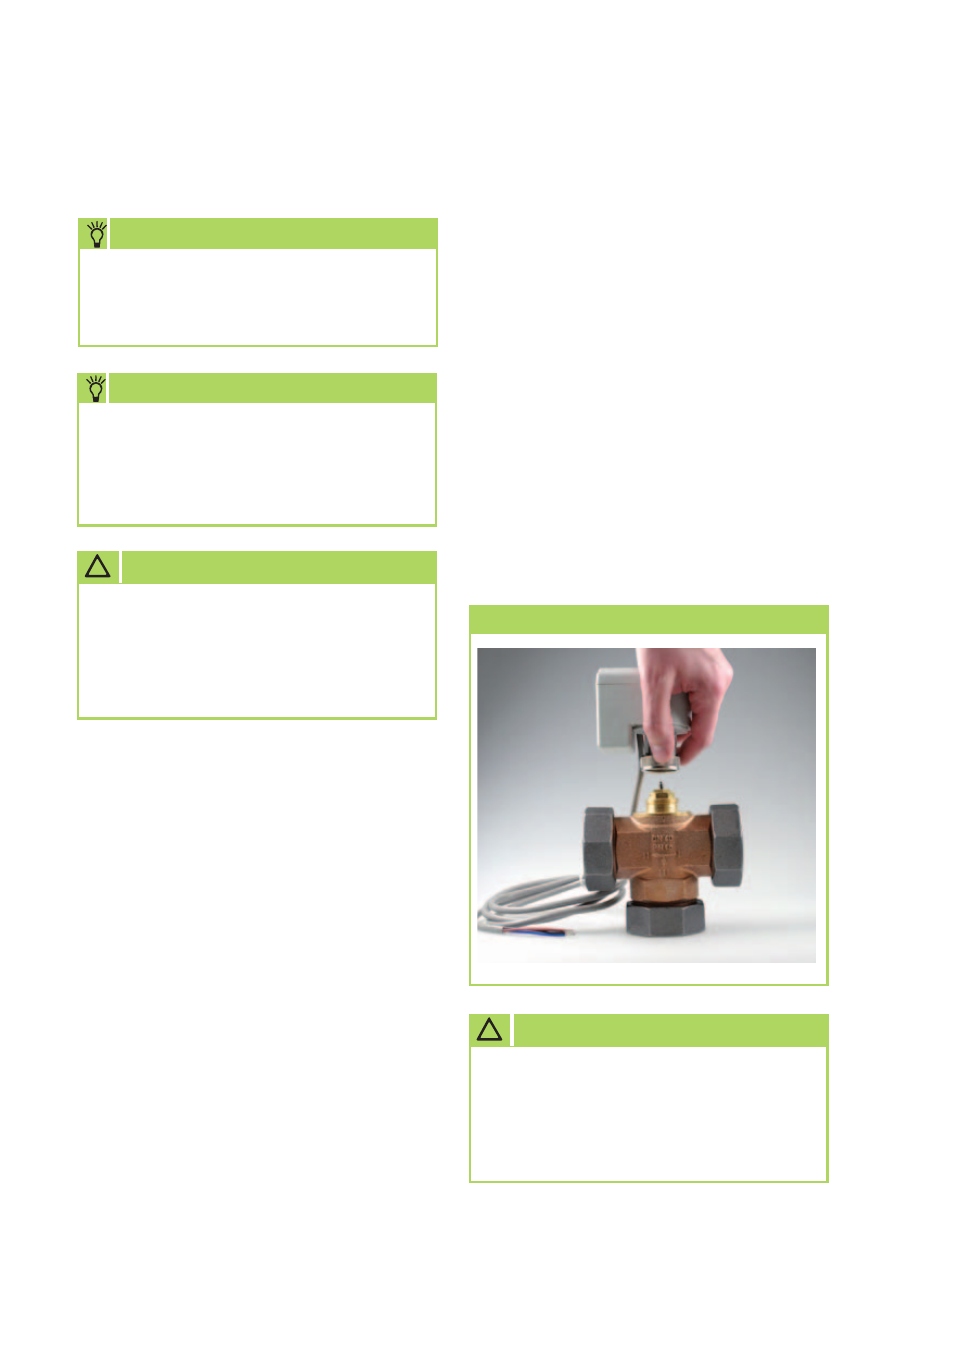
Mounting the actuator
!
CAUTION
The valve may only be fitted
in a horizontal or vertical
orientation. The actuator must not
be positioned under the valve block
!
CAUTION
Pay attention to the flow direction
before installation. (Correct position
of the axis and installation position
in accordance with the REMKO
hydraulic diagram.)