REMKO HTK 100 User Manual
Page 11
11
Cleaning the combustion chamber
1. Unplug unit from the power source.
2. Remove the burner cover 6 after opening the two quick
release fasteners.
6. Place the burner next to the unit.
7. Disassemble the burner flange.
8. Do not damage the flange gasket 10.
Damaged flange gasket can cause air to be suc-
tioned in incorrectly.
8.
Clean combustion chamber through the burner
opening using a vacuum cleaner.
Special cleaning sets can be purchased as acces-
sories for the REMKO industrial vacuum cleaner.
10. Assemble the burner flange and burner as de-
scribed in the following section.
4. Clean waste gas passes 5.
A special cleaning brush (Ref. No. 1103110) can be
purchased as an accessory.
5. Clean waste gas suppressors or replace them if
necessary.
6. Check gaskets 3 and revision cover 2 and replace
them if necessary.
7. Reassemble the unit in the reverse order.
Important information about the revision cover
à Make sure that the gaskets and the revision covers
are placed correctly.
à During assembling take care of uniform tightening
of the fixing nuts for clamping of the revision cover.
Uneven tightening may result in leakages of waste
gas.
11
6
8
9
7
10
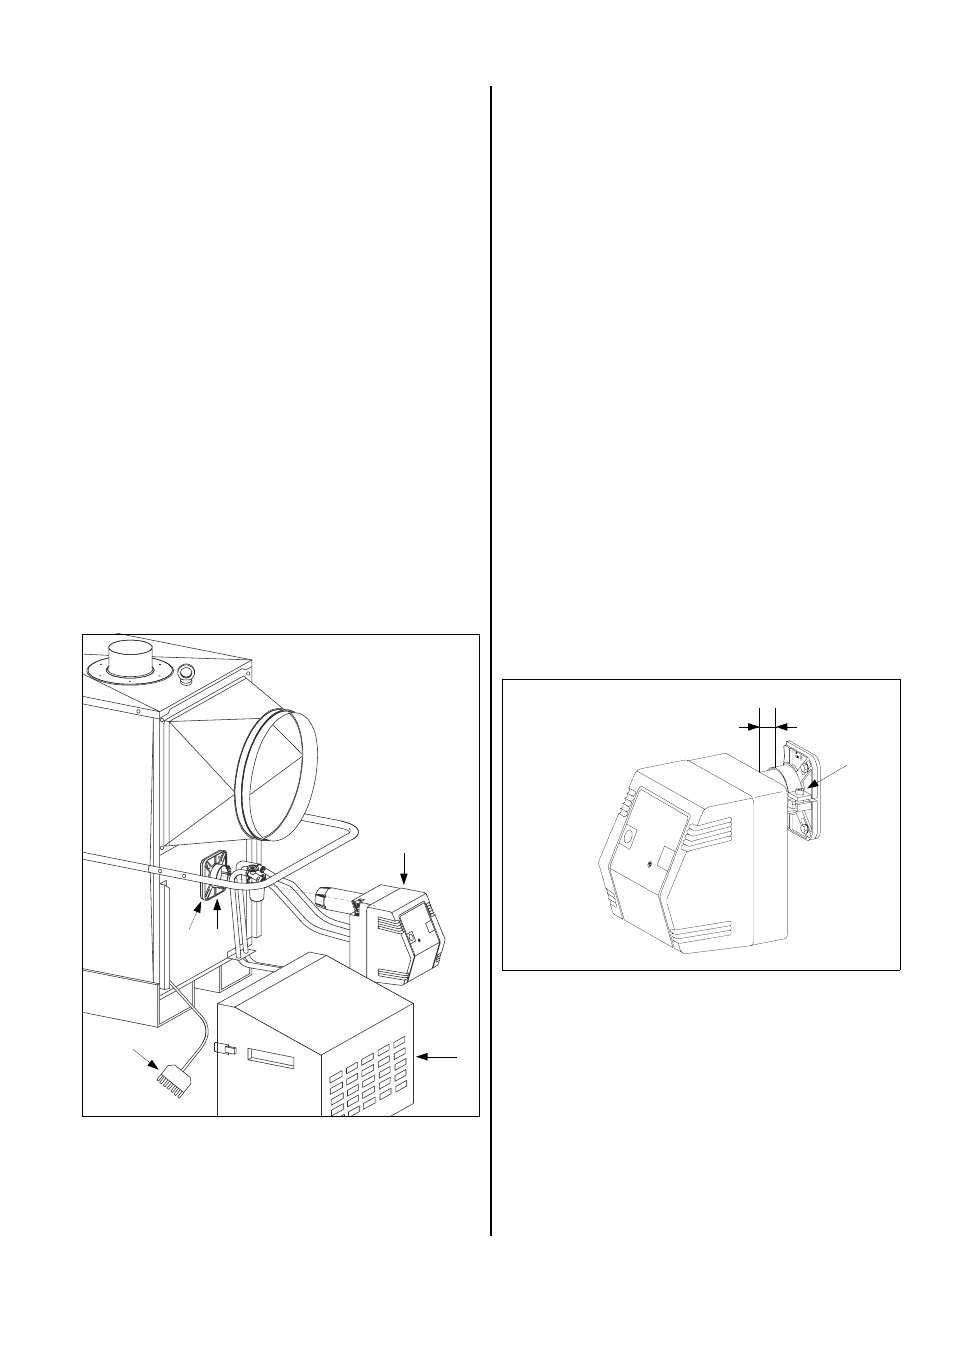
3. Pull the plug 7 from the burner 8.
4. Loosen the 2 lower fixing screws on the burner
flange 9.
5. Loosen the tightening bolt 11 on the burner flange 9
and remove the burner by pulling it towards you.
Assembling the burner flange and the burner.
1. Check the flange gasket 10 and replace it if neces-
sary.
2. Attach the burner flange to the unit housing with the
four bolts.
Pay attention to the “UP“ (UP, HAUT) label!
3. Tighten the upper fixing screws.
4. Turn the lower fixing screws but do not tighten them
so that the burner flange can still be put together.
5. Slide the flame tube of the burner into the burner
flange.
Take note of measurement X in the diagram.
6. Attach the flame tube with the tightening bolt 11 to
the flange by lifting the burner slightly (3° incline).
Use a hexagon socket screw key.
7. Finally, tighten the lower fixing screws.
8. Replace the burner cover and attach securely with
the quick release fasteners.
X
Burner HTK 100: X = 20 mm
Burner HTK 160: X = 30 mm