Maintenance and service – REMKO HTK 100 User Manual
Page 10
10
Maintenance and Service
Regular maintenance and observance of some basic
principles are required to ensure a long service life and
to keep the unit functioning properly.
à The unit must be maintained and cleaned at regular
intervals.
à The unit must be kept free of dust and other deposits
and may only the cleaned using a dry or damp cloth.
Do not use a direct stream of water
à Do not use any aggressive cleaning agents or those
which are harmful to the environment.
à Do not use cleaning agents which contain solvents.
Use only clean heating oil or diesel.
Make sure to keep paraffin from accumulating.
Cleaning
The complete unit including heat exchanger, combus-
tion chamber and forced-air burner, is to be cleaned
from dust and dirt after every heating period, or before if
necessary, depending on the operating conditions.
Parts subject to wear and tear, such as waste gas sup-
pressors, gaskets, oil filter inserts, and oil nozzles are to
be checked and replaced if necessary.
Cleaning the heat exchanger
1. Unplug the unit from the power source.
5
3 2
4
1
à Check oil filters regularly for dirt and foreign objects.
Replace dirty ones.
à Check the unit for mechanical damage; replace de-
fective parts when necessary.
à Check vane wheel and combustion chamber with
heat-exchanger at regular intervals and clean when
dirty.
à Check the initial tension of the fan belt.
The impression depth of the fan belt should be ap-
prox. 10 mm (thickness of your thumb).
à Check oil tanks regularly for dirt and foreign objects
and clean when necessary.
à Make sure that the waste gas and combustion air
can always be properly expelled.
à Regularly check safety devices to ensure that they
are working properly.
à Always keep safety devices free of dust and dirt.
Have the waste gas values of the burner checked
regularly by authorized personnel.
For safety purposes, we recommend entering into a
maintenance contract!
G
Prior to doing any work on the unit, make sure to
unplug it from the power source!
G
Adjustments and maintenance work may only be
performed by authorised personnel.
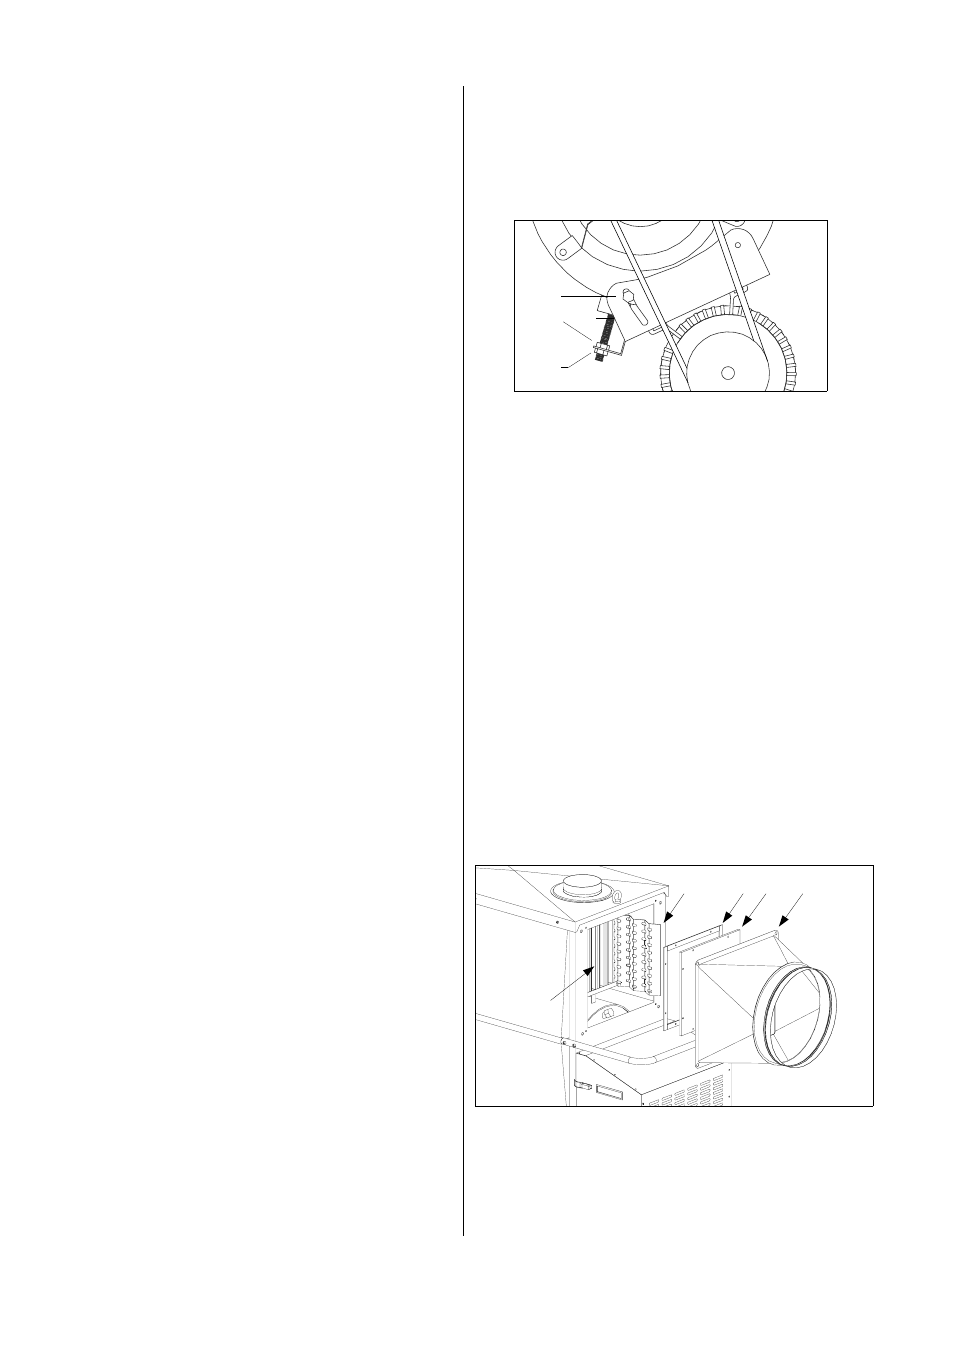
3. With screws 8 and 9, adjust the initial tension of the
fan belt.
4. Please note that the impression depth of the V-belt
should be approximately 10 mm.
Thickness of your thumb.
5. Secure screws 8 and 9 and tighten both fixing
screws 7 again.
6. Assemble both air suction grills.
Stretching the fan belt
1. Disassemble the two both air suction grilles.
2. Loosen the screws 7.
The screw on the opposite side is not shown below.
8
7
9
Additional maintenance information.
à Maintenance work on the burner may only be done
by authorised personnel.
à Make sure to comply with waste gas emission limits
in accordance with regulations.
à After maintenance work is complete, conduct an
electrical safety test.
2. Unscrew the 4 fixing screws and remove the blow-out
cone 1.
If there are warm air hoses, they do not have to be
removed.
3. Remove revision cover 2 and take the waste gas
suppressor 4 out of unit.