Label rewinding, External halt control – QuickLabel RW-P8 User Manual
Page 2
CAUTION: Avoid Accidents! THE RW-P8 Rewinder
weights up to 28-pounds (13-Kg) plus the weigh of the
labels, so choose only a sturdy surface on which to set
your Rewinder.
(4) Set the Unit in place near the label exit path of the printer. The
RW-P8 is bi-directional and can wind labels in either direction.
(5) Verify that the
“DIRECTION”
Switch on the Control Panel is in the
“OFF”
position.
(6) Plug the Power Lead from the Power Supply into the power Input Jack on the
rear of RW-P8 Drive Unit. Plug the AC Power Cord into the Power Supply and into
an appropriate AC power outlet.
Your Rewinder is now ready for use.
LABEL REWINDING
(1) Place the
“DIRECTION”
Switch on the RW-P8 control panel in the center
“OFF”
position.
(2) Slide an empty 3-inch (76-mm) label core over the core holder until the core is
against the Inner Flange plate.
(3) If desired, slide the outer Label Flange plate (Nylon Hub with ball bearing screw)
over the Rewind Shaft and up against the label rewind core.
(4) Feed the label web from the printer and secure it to the take-up roll core with
masking tape. Manually rotate the take-up reel a couple of turns.
(5) Check that the RW-P8 Unit is square with the printer.
(6) Place the RW-P8
“TORQUE RANGE”
Switch in the
Normal/Rewind
position.
NOTE: WHEN THE TORQUE RANGE SWITCH IS IN THE “HIGH (SLIT)” POSI-
TION, THE RW-P CAN DEVELOP HIGH TORQUE. USE THE HIGH (SLIT) POSI-
TION FOR LABEL SLITTING OR WHEN REWINDING LARGE DIAMETER ROLLS.
(7) Rotate the
“TORQUE”
Control Knob to the minimum position (fully counter-
clockwise).
(8) Place the RW-P8
“DIRECTION”
Switch in the position desired to run left or right.
(9) Start the printer and adjust the
“TORQUE”
Control Knob for the desired take-up
tension. Use only the minimum
Torque
setting needed to rewind labels properly.
Excessive torque might pull the labels too hard and cause the printer to lose registra-
tion.
(10) When rewinding is finished, place the
“DIRECTION”
Switch in the
“0”
(Off)
position. Remove the Outer Flange and label roll from the Unit being careful to avoid
telescoping of the labels.
EXTERNAL HALT CONTROL
QuickLabel Systems has provided an
External Halt Control
if you wish to stop or
start your Rewinder using an external control. If an external device, such as a
printer, label slitter counter, or other device, opens the control circuit, the RW-P8
Drive Unit will disconnect power to the motor and apply braking.
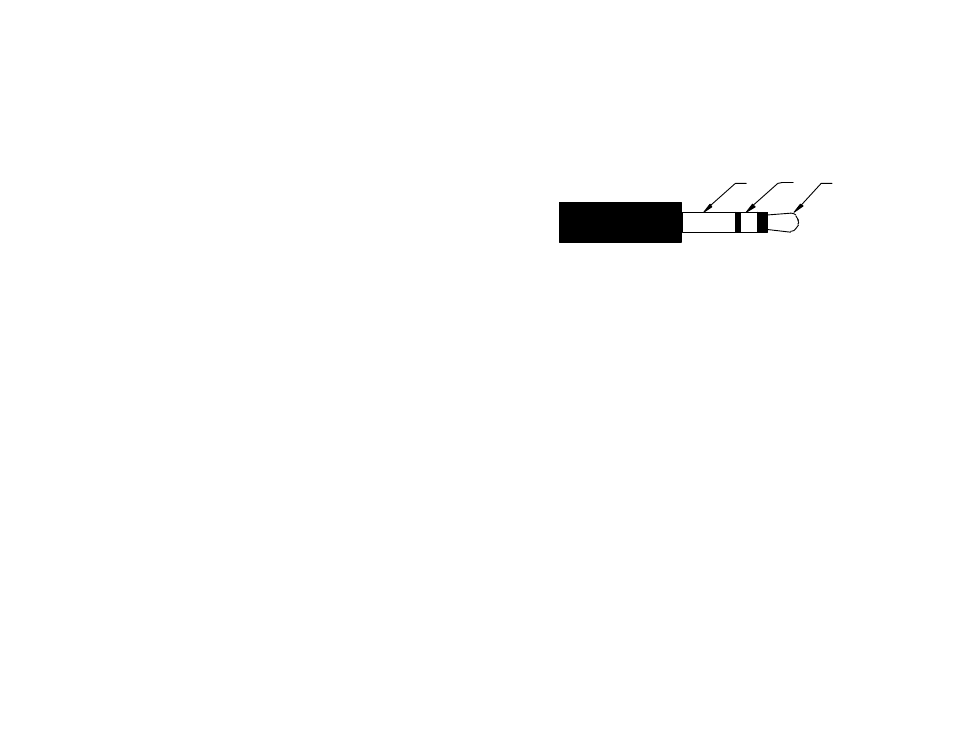
Use a 3.5 mm dual circuit plug and cable plugged into the
External Halt Control
Jack
. The RW-P8
Control Plug
connections are described below.
3.5mm External Halt Control Plug (dual circuit)
CONTACTS 2 & 3 OPEN: RW-P HALTS
CONTACTS 2 & 3 CLOSED: RW-P RUNS
1 = No connection (Not Used)
2 = Normally Closed (NC) contact return
3 = Normally Closed (NC) contact
MAINTENANCE
Your RW-P8 Label Rewinder requires no periodic or preventative maintenance.
2
3
1