QuickLabel RW-P1 User Manual
Page 2
SETUP
(1) Place The Unit so that the rewind shaft is perpendicular to the web of the labels
to be rewound, and near where the labels come out of the printer. The Unit is bi-
directional, so can be operated in either direction, as you prefer. See Step 6.
(2) Verify that the Power Switch (0 - 1) on the rear of The Unit is in the 0 (OFF)
position.
(3) Set the VOLT CHANGE SW slide switch on the Power Supply Module to 4.5 as
an initial setting.
(4) Insert the Power Cord into the Power Jack on the rear of The Unit.
(5) Plug the Power Supply Module into a suitable 120 VAC / 60Hz electrical outlet. It
can be left plugged in at all times.
(6) The Rewinder has a combination Power and Direction Switch on the rear panel.
The Center Position of the Switch is “OFF” (0). To make the Rewinder run to the
right (looking from the rear of the Rewinder), press the Power / Direction Switch in
the direction of the right arrow. To make the Rewinder run to the left, press the
Power / Direction Switch in the direction of the left arrow.
LABEL REWINDING
Rewinding Directly Onto the Shaft - “Coreless” (See Fig. 2)
(1) Slide the hook-shaped metal Bail onto The Unit Shaft. The straight end goes into
the hole in the plastic Flange plate. The curved end fits into the small hole in the
outer end of the Shaft.
(2) Insert the label web under the metal Bail and turn the rewind Shaft by hand to
secure the labels.
(3) Place The Unit Power Switch (0 - 1) in the 1 (ON) position. If necessary, reverse
The Unit rotation direction as described in SETUP section, step 6.
(4) Start the printer and observe that the labels are being rewound correctly. You can
adjust the VOLT CHANGE SW slide switch on the Power Supply Module to provide
more or less rewind force. A lower numerical setting results in less force and a
higher numerical setting results in greater force.
(5) When rewinding is finished, place The Unit Power Switch (0 - 1) in the 0 (OFF)
position.
(6) To remove the labels, first pull out the hook-shaped Bail from the center of the
label roll. Then remove the labels.
Rewind onto a 3” Cardboard Core (See Fig. 1)
(1) To use a 3” cardboard core, install the three stainless steel Fins onto the Shaft
of The Unit using the six screws provided. DO NOT USE THE LOCKWASHERS.
The curved sides of the Fins face the Shaft. For narrow cores, orient the Fins next
to the plastic Flange. Slide an empty cardboard core over the Fins and up against the
plastic Flange Plate.
(2) If the core is too loose, remove one of the Fins and place a supplied Lockwasher
on each screw between the vane and the shaft. Retighten the screws securely. Add
Lockwashers under additional Fins if necessary.
(3) Use a piece of masking tape to secure the label web to the cardboard.
(4) Place The Unit Power Switch (0 - 1) in the 1 (ON) position. If necessary, reverse
The Unit rotation direction as described in SETUP section, step 6.
(5) Start the printer and observe that the labels are being rewound correctly. You can
adjust the VOLT CHANGE SW slide switch on the Power Supply Module to provide
more or less rewind torque.
(6) When rewinding is finished, placeThe Unit’s Power Switch (0 - 1) in the 0 (OFF)
position.
(7) Slide the cardboard core and the labels off The Unit.
UNWINDING LABELS
(1) Verify that The Unit’s Power Plug is set to wind away from the printer (See
SETUP section, step 6). Place the Power Switch (0 - 1) to the 0 (OFF) position and
set the VOLT CHANGE SW to 1.5.
(2) Slide the roll of labels to be unwound over the Fins on the Rewind Shaft and up
against the plastic Flange Plate.
(3) Feed the labels into the printer and start the printer.
(4) To provide a small amount of back tension on the label supply roll, place The
Unit Power Switch (0 - 1) in the 1 (ON) position.
MAINTENANCE
The Unit requires no periodic or preventative maintenance.
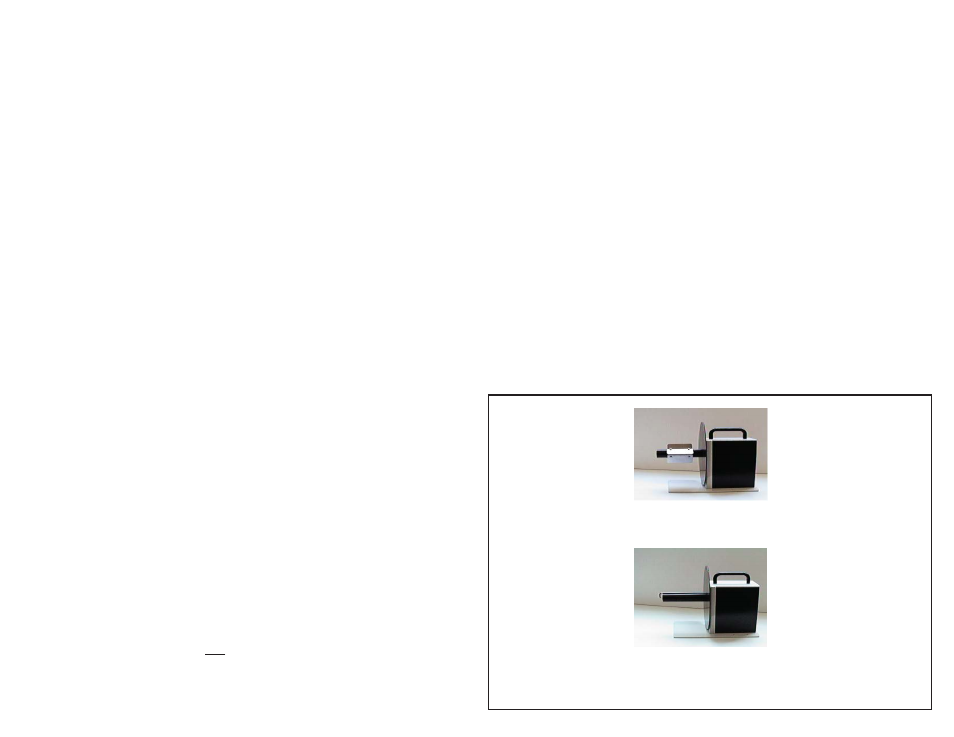
Fig. 1 The Unit with Fins installed to accept a
standard 3” core for rewinding or unwinding.
Fig. 2 The Unit shown with supplied Bail for
direct “on-shaft,” “coreless” label rewinding.