Posiflex PD-300R User Manual
Page 4
Part 4
occupied. The RS232 input port is a DB9 female connector. Connect the
attached RS-232 signal cable to this port and one of the COM port in the host
system. Set the RS-232 communication protocol for this port to 9600 bps, no
parity, 8 bits, 1 stop bit with hardware handshaking. Connect the power
adaptor to the rightmost power connector. Turn on the switch in the front side
of the base.
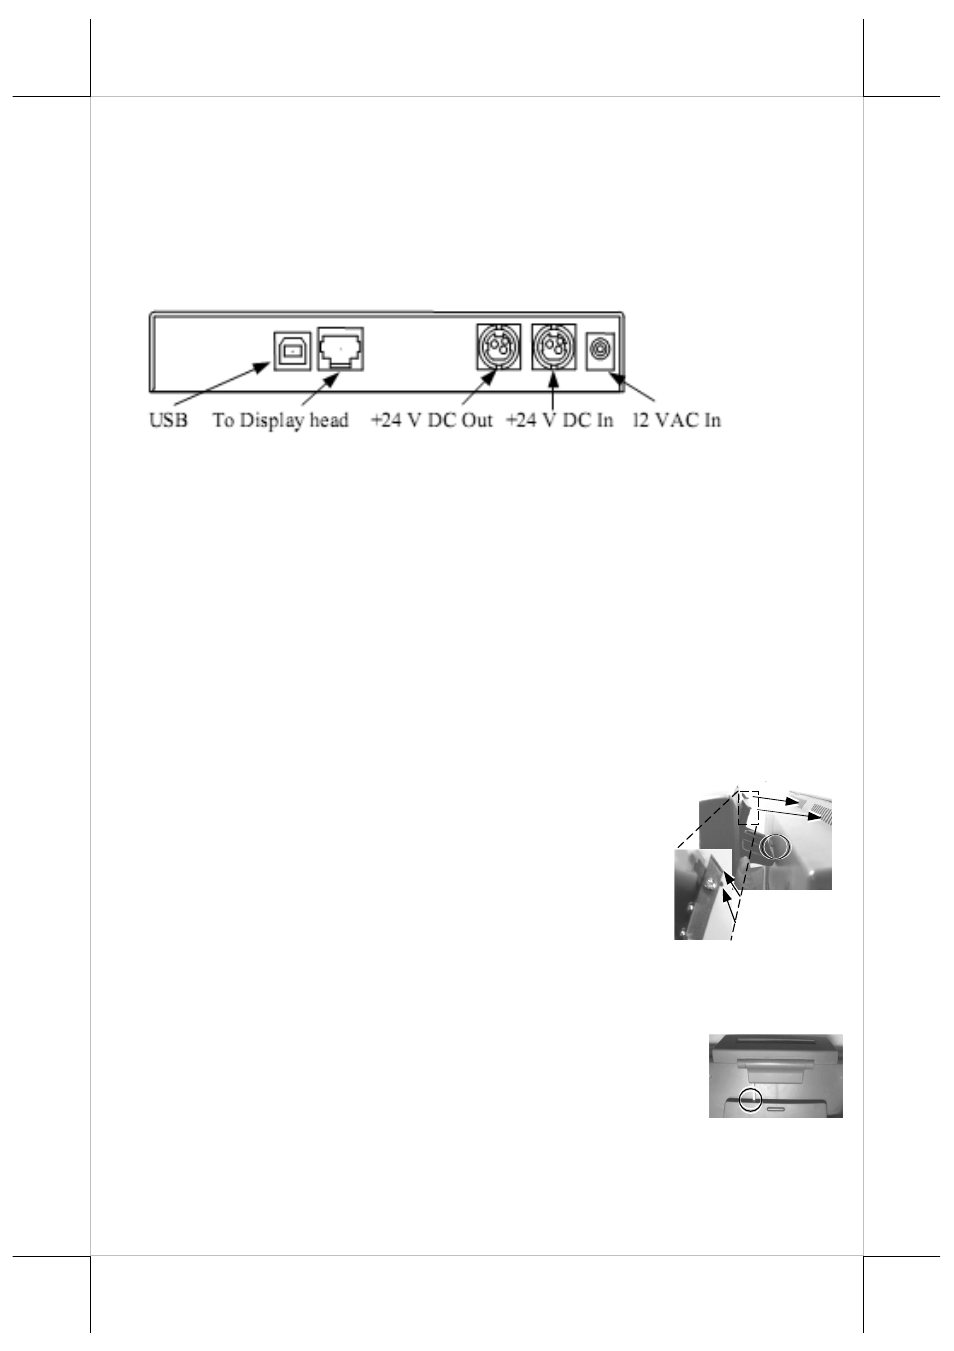
For PD-300U model:
The RJ45 type modular connector is for internal use and is also already
occupied. Connect the “B” type connector of the interface cable to “USB” in
connector area and the “A” type end to USB port of the host. Insert the 2 pin or
3 pin power connector from either 12 V AC or +24 V DC power adaptor to
the“12 V DC In” or “+24 V DC In” jack in the connector area. Insert either
end of the power cable to “+24 V DC Out” jack in the connector area and
insert the other end to the power connector of Posiflex POS printer if needed.
Be sure to hear a click at each connection to obtain a firm contact. You may
now place the base on a horizontal surface and prepare to power on and adjust
the direction of the display head for best viewing effect in application.
PD-302:
1.
Aim the bottom center cavity of PD302 series toward the latch stub at
rear of TP series main unit as circled in the right picture.
Then aim both metal and plastic hooks at rear of the
PD302 series toward the suitable ventilation openings
on top rear of the main unit. Please use a phillips head
(“+” sign) screw driver to fasten the screws on the
metal hook but not to overdo it so that the metal hooks
hold the ribs of the ventilation holes from inside.
2.
Plug the DB9 female connector to the COM port with power DC supply
from the TP series. Please remove the COM1 terminator and save it at a
safe place for future use if COM1 is to be used for PD302.
3.
Route the cable to go through the notch on back of the
stand assembly of touch terminal as indicated in the
picture. Reassemble the main unit and stand assembly.
(Guidance for future un-installation: Please use screw
driver to release the metal hook before removing PD302 from the
ventilation holes.)
Metal Hook
Plastic Hook