Setting up the ds-210 printer – Posiflex DS-210 User Manual
Page 17
17
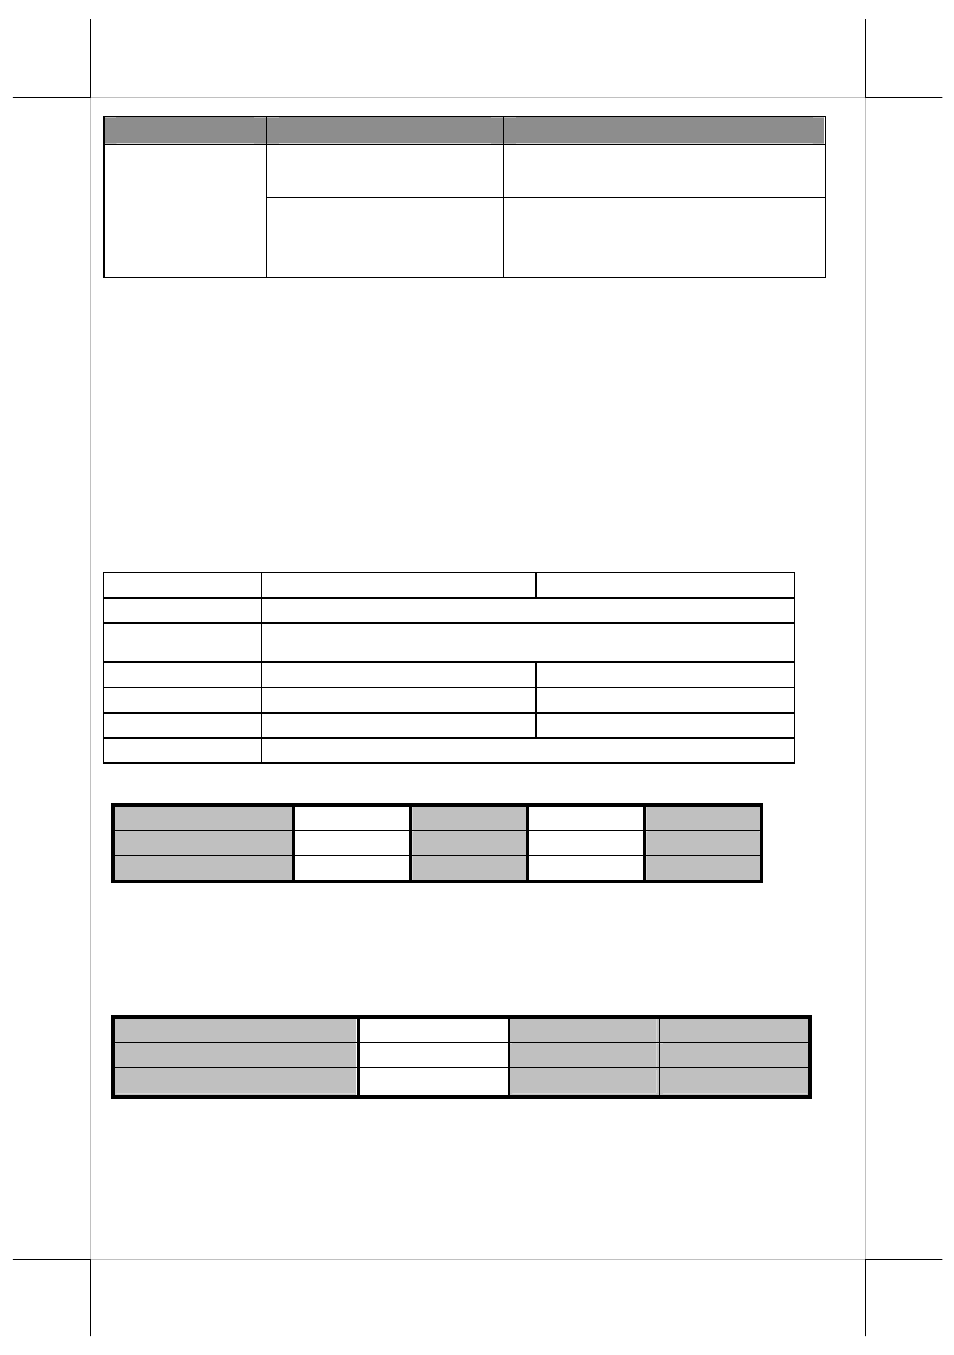
LED
Status
Description
Flash green twice
/10 seconds
Connection to AP and low
packet receiving and sending
Flash green twice at
first seconds and then
solid green
Connection to AP and high
packet receiving and sending
Setting up the DS-210 Printer
There are two different ways to set up the DS-210 printer. The first way of
setup is implemented through the hardware DIP switch installed in the DS-210
printer for setting up functions such as baud rate, paper width and others. It is
NOT suggested that the end users implement the setup through the hardware
DIP switch; it is preferable that the hardware setup is implemented by
professional technicians. The second one is implemented through a software
utility to adjust the switch, such as printer density and other functions.
These
switch settings are described below.
DIP Switch Position Behavior
Switch position
ON
OFF
1~2
Baud rate definition (Refer to the table below)
3~4
Paper Width & Printable Width (Refer to the table below)
5
Print speed (200 mm / sec)
Print speed (170 mm / sec)
6
USB interface (Default)
Other interface
7
Auto Cutter Disable
Auto Cutter enable
8
(Reserved)
Effect of positions 1 & 2 on baud rate, defined in table below:
SW1 Pos. 1
OFF
OFF ON ON
SW1 Pos. 2
OFF
ON OFF ON
Baud rate setup
19200 bps
115200 bps
9600 bps
38400 bps
Please note that when the switch positions are used in USB mode and
preferably virtual serial port, please place the SW1-1 & 2 to ON position in
order to use the virtual COM port.
Effect of positions 3 and 4 on Paper & Printable Width, defined as below:
SW1 Pos. 3
OFF
ON
OFF
SW1 Pos. 4
OFF
OFF
ON
Paper & Printable Width
80 mm /512 dot 80 mm / 576 dot 58 mm / 424 dot
Toggle SW1 Pos. 5 to “ON” for the print speed of 200 mm/sec or to “OFF” for
the print speed of 170 mm/sec.