Save these instructions warning, Instructions for use, Ash vacuum – Osburn AC02582 User Manual
Page 3
6. Release the flexible hose from the air intake duct. A Small
amount of ash may be generated so be carefull (see 6
following).
7. Verify ash is cold! Allow to cool further if needed, then dump
debris. Ash is a great garden supplement!
8.
Every 3 to 5 uses, clean HEPA filter while outside and away
from valuables. Screw off the filter wing nut and HEPA seal
plate (not shown). Take the filter out for cleaning (see step
below) or change. Follow the three steps below for taking off
the filter.
9. Cleaning filter - to limit dust place HEPA filter inside a plastic
bag (not included). To clean filter, tap gently against a hard
surface. Empty plastic bag and inspect filter. Dust within
the filter pleats may require gentle flexing of the filter by
squeezing the filter’s rubber seals so as to make the filter oval
instead of round. Tap filter while “Out of round” to get deeply
set dust out of pleats.
Follow steps below for re-assembly of the filter :
10. IMPORTANT - with filter installed and lid in place turn
vacuum on at a dry outside location to test filter seal. Look
for dust at the exhaust port. A small amount is normal after
cleaning filter. Vacuum up a small amount of ash while still
outside to give final assurance of a good seal and to verify
filter integrity. Replace filter if dust passes though at this point.
INSTRUCTIONS FOR USE
IMPORTANT NOTES:
* Each use, verify that HEPA filter is in place and that HEPA seal plate
wing nut is tight. Always test seal by vacuuming up a small amount of
ash while located away from living areas
** Do not attempt to use vac to remove large piles of ash from a fireplace
or wood stove. Instead remove bulk of ash with a shovel and ash can
(or hod) and then use the ash vac for final cleanup.
1. Plug cord into outlet, (see photo 1 bellow).
2. Press the on/off button to switch the appliance on (see photo
2 bellow).
3. For fireplaces and wood burning stoves see “important
note **”, above. Place nozzle in firebox. Keep nozzle pressed
against the flat surfaces of stove or fireplace to limit entrance
of large chunks into pickup tube. Use the built-in vibrating
filter cleaning feature after approximately each 1 cup of ash
is removed or when suction is reduced. Shaker instructions
are below. If large chunks are picked up, turn off machine to
dislodge.
HOW TO USE THE BUILT-IN VIBRATING FILTER CLEANING
FEATURE
When the suction is reduced or after about 1 cup of ash has been
removed use the vibration knob to help remove ash from filter
without taking off the lid.
A. Turn off machine!
B. Hold can down and retract shake off knob fully.
C. Release so knob bangs top lid.
D. This will send vibrations through the top lid to the filter to
help clear debris. Repeat 5 to 10 times. Suction should now
improve at star-tup.
4. When finished cleaning turn switch off, photo (see photo 4
following) .
5. Remove the plug from the outlet (see 5 following) and take
vacuum to an outside location away from valuables and
breezes.
6. Do not pull or carry by cord, use cord as a handle, close lid
on cord, or pull cord around sharp edges or corners. Do not
run vacuum cleaner over cord. Keep cord away from heated
surfaces.
7. When you want to pull the plug from the wall contact, please
do this at the plug itself and not by means of the electrical
cable.
8. Do not handle plug or vacuum cleaner with wet hands.
9. Do not put any object into openings. Do not use with any
opening blocked. Keep exhaust free of dust, lint, hair and
anything that may reduce airflow.
10. Keep hair, loose clothing, fingers and all parts of body away
from openings and moving parts.
11. Turn off all controls before unplugging.
12. Use extra care if used when cleaning stairs.
13. Do not use to pick up flammable or combustible liquids, such
as gasoline, or use in areas where they may be present.
14. Hold plug when rewinding onto cord reel. Do not allow plug
to whip when rewinding.
15. Unplug before connecting the hose.
16. Do not pick up hot embers, hot ash or anything that is burning
or smoking, such as cigarettes or matches.
17. Do not use without filter in place.
18. If the supply cord is damaged, it must be replaced by qualified
person in order to avoid a hazard.
SAVE THESE INSTRUCTIONS
WARNING
-
To reduce the risk of electric shock, this vacuum
cleaner has a polarized plug (one blade is wider than the other). This plug
will fit in a polarized outlet only one way. If the plug does not fit fully
in the outlet, reverse the plug. If it still does not fit, contact a qualified
electrician to install the proper outlet. Do not change the plug in any way.
PRECAUTIONARY MEASURES
If the opening that sucks in the air or the suction pipe is
blocked, you should switch off the vacuum cleaner at once.
First clear the blocked substance before you attempt to start
the vacuum cleaner again.
1. Do not operate the vacuum cleaner too close to heaters and
items like radiators, cigarettes, etc.
2. Before you insert the plug into the wall contact, make sure
your hand is dry.
3. When you want to pull the plug from the wall contact, please
do this at the plug itself and not by means of the electrical
cable.
SPECIAL NOTE: THIS VACUUM’S MOTORS ARE EQUIPPED WITH THERMAL
“OVERHEAT” PROTECTION. IF THE MOTORS RUN TOO HOT THEN THEY
WILL SHUT DOWN. YOU MUST WAIT FOR MOTOR TO COOL AND UNPLUG
UNIT IN ORDER TO RE-START VACUUM. CLEANING THE FILTER WILL HELP
PREVENT A REPEAT OF THIS CONDITION.
Model #:
AC02582
Voltage
120 V
Frequency
60 Hz
Power
800 W
Max Vacuum
17 Kpa
Sound Level Max
<84 dB
Max Airflow
85-CFM
TIGHTEN
WING NUT
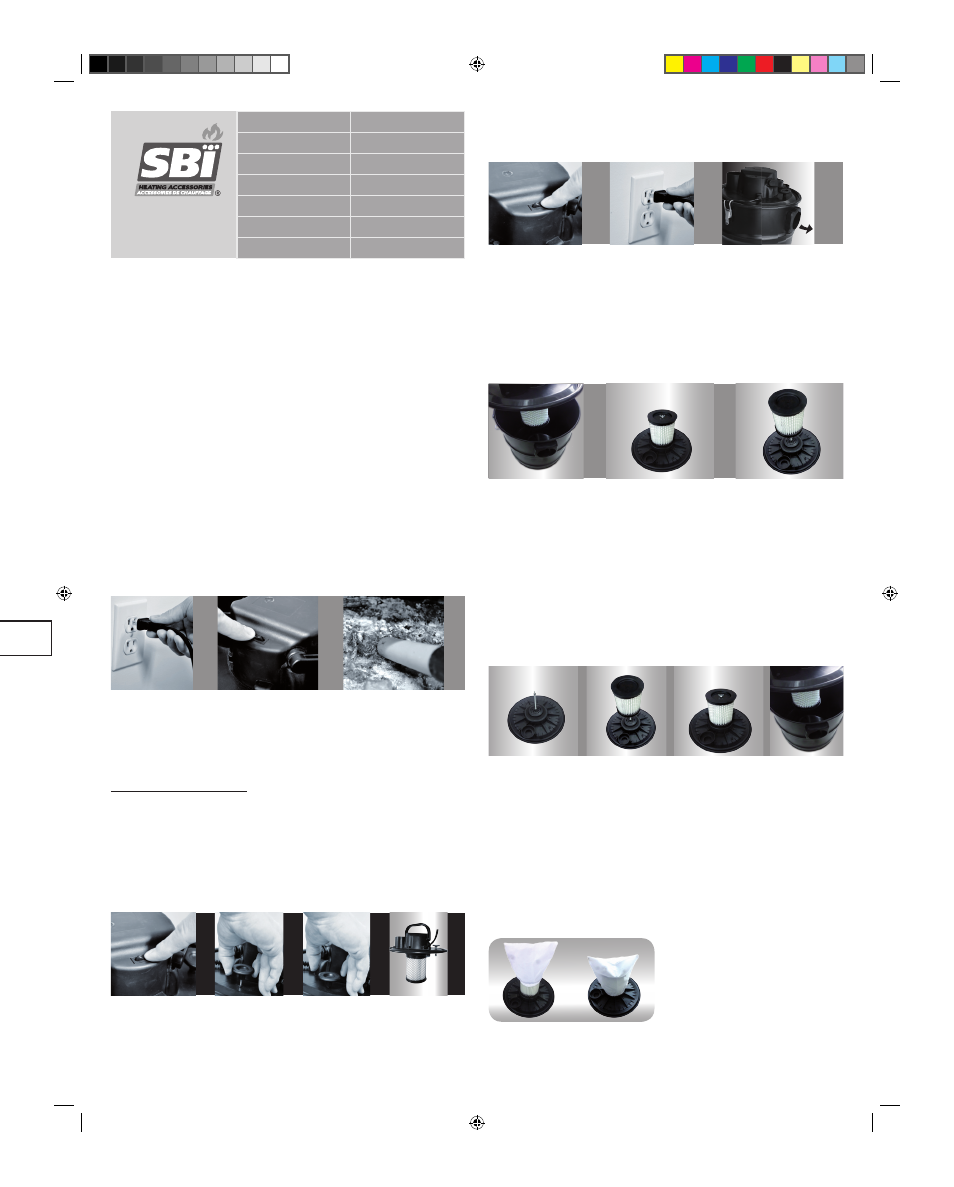
SootStop Pre-filter extends the life of HEPA filter. Most helpful
with pellets stoves.
INSTALLATION - Start with a new
or cleaned HEPA filter, seal plate
and wing nut .Place elastic over
the seal plate and pull down.
Pull SootStop filter fully so the
elastic contacts the rubber part.
FILTER CARE: Filter may be washed or simply shaken out. Replace
if holes in fabric develop.
LOOSEN
WING NUT
NOTE: This process will be dusty. Pictures depict a clean machine
for illustrative purposes.
ASH
VACUUM
1
2
3
A
B
C
D
4
5
6
3
AC02585_User guide.indd 3
10/25/2013 2:28:36 PM