2 factory reset function, 1 rotary switch and push buttons – Nevion ARC-SD-DMUX User Manual
Page 21
ARC-SD-DMUX
Rev. B
nevion.com | 21
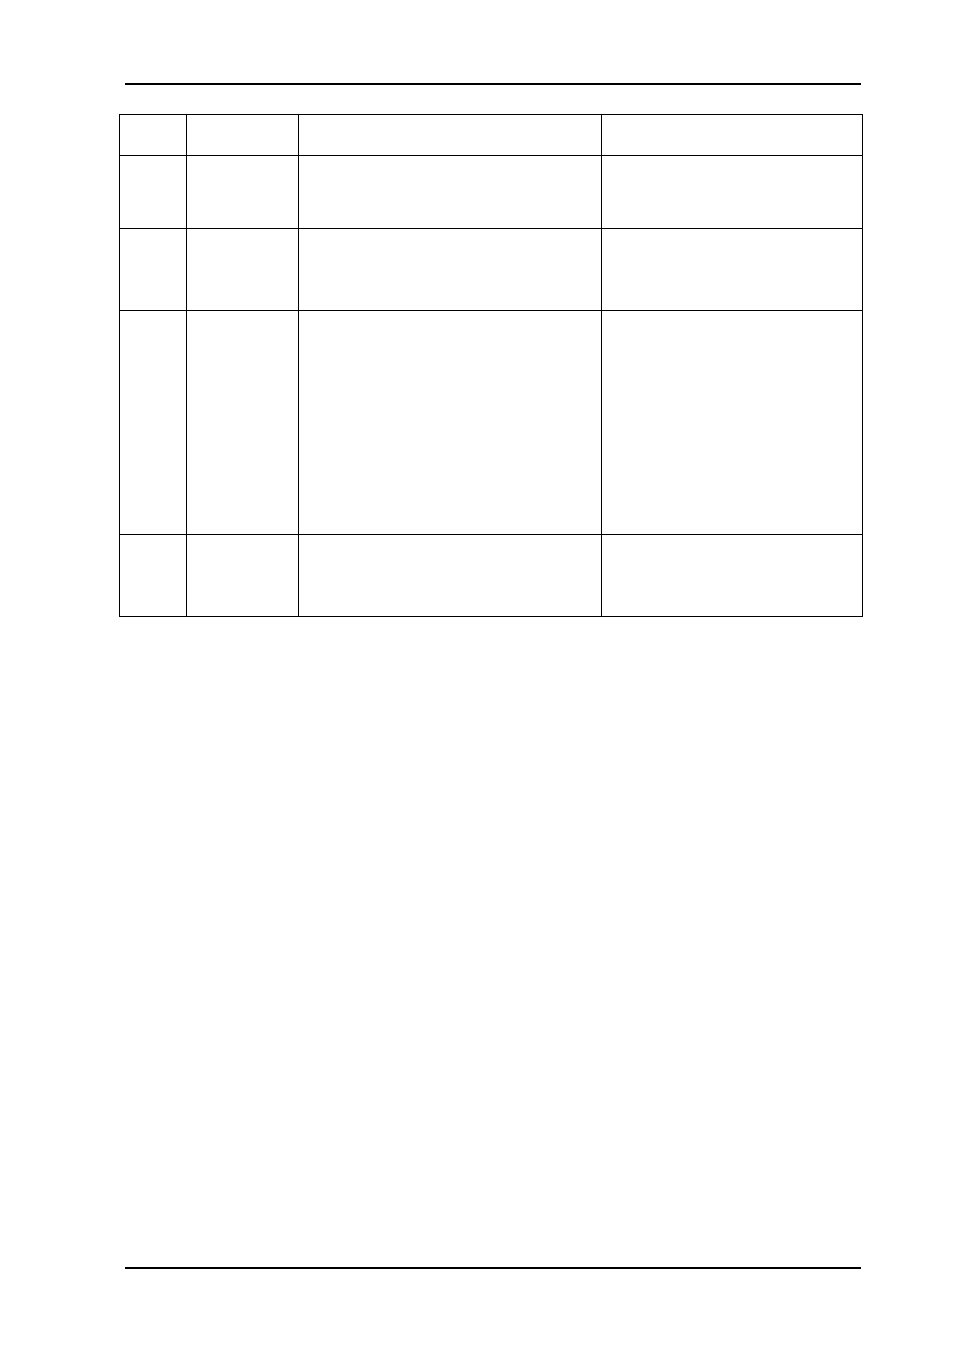
Switch
#
Function
name
Function DIPs
Comment
13
AES +
ADAC
channel
Off: Ch1
On: Ch2
(from selected group)
This switch selects the audio
channel pair within the selected
group.
14
AES/Data
link
Off: AES3 out on AES output
On: Data link out on AES output
The two slide switches on the
bottom side of the board must
also be switched.
See ch. 4.2.2 below.
15
RESET
Off: Use values preset by
MULTICON GYDA
On: RESET to factory defaults
This DIP is only read during
boot. The board will not start
when DIP 16 and this DIP are
both set to On. After returning
the DIP to normal position, the
card must be restarted and kept
powered for a minimum of 10s
to complete the reset.
The reset will only affect
settings not pertaining to DIPs
and the rotary switch.
16
OVR
Off: MULTICON GYDA mode
On: Manual mode
This DIP is only read at power
up.
OVR is short term for
MULTICON GYDA override.
4.2 FACTORY reset function
A factory reset is a 3 step process:
1. Set DIP 15
and DIP 16 to ‘on’ and boot the card.
2. Remove power and set DIP 15
to ‘off’.
3. Power up card once again. The operation of the card will immediately reflect the
freshly loaded default settings. However, the card must be kept powered for at least
10 seconds to ensure that these settings are stored locally to be retrieved again at
the next start-
up. The card’s operational environment must also be kept static during
those 10 seconds (i.e. no change in incoming video standard, no commands
issued). Failing to meet this requirement could result in an incomplete reset and
require the user to restart the factory reset sequence.
4.2.1 Rotary switch and push buttons
These functions are available.
The rotary switch, labeled DLY, adjusts the phase delay from -5 to +4 video lines. It is only
functional when a sync signal is present at the sync input. The rotary switch is accessible
from the board front.
The push buttons, labeled INC and DEC, are used to fine adjust the phase delay by
samples. It can adjust ±½ video line. Pressing a button and keeping it pressed will
accelerate the change. The LED adjacent to the button will flash for a short period of time
when the end of the adjustment range has been reached. Pressing both buttons at the
same time will return to the middle of the adjustment range and the board will acknowledge
by flashing the INPUT and SYNC LEDs simultaneously.