Power connection, Software installation – Measurement Computing TempBook rev.4.0 User Manual
Page 15
TempBook User’s Manual
04-26-01
Introduction and Quick Start 1-5
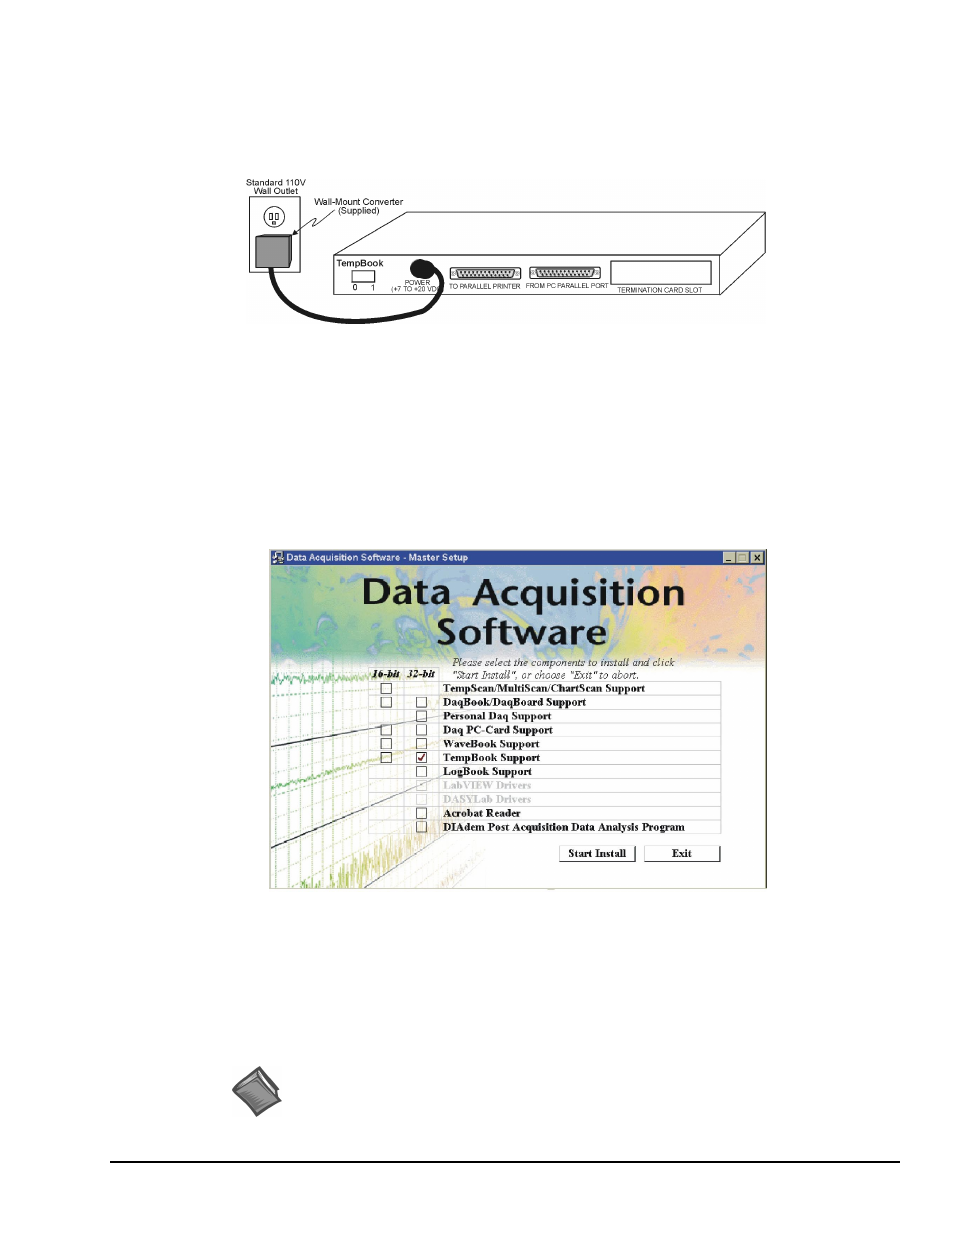
Power Connection
The TempBook is typically powered from the supplied wall-mount converter or from an optional DBK30A
battery module. The wall-mount converter plugs into any standard 110 VAC wall outlet and its other end
plugs into the circular DIN5 receptacle on the TempBook's rear panel. If using the battery module, please
refer to the section
in chapter 2.
TempBook Power Connection
Software Installation
If you are using Windows 3.x, select 16-bit TempBook Support from the Data Acquisition Software Master
Setup screen, otherwise select 32-bit (see following figure).
The TempBook/66 comes with a Microsoft Windows-based application (32-bit DaqView) that provides the
easiest means to collect data from the TempBook. To install the software insert the installation CD into
your PC’s CD drive. After agreeing with the legal statement a master setup screen will appear (see
following figure).
Selecting TempBook Support (32-Bit) from the Master Setup Screen
After selecting TempBook Support [and Acrobat Reader and DIAdem, if desired], click Start Install and
follow the on-screen prompts.
Once the setup program has installed the software, a TempBook program group will appear within
Windows. To start DaqView, click on its program icon. The main window will soon display a spreadsheet
of channels in rows and channel parameters in columns.
For information regarding the use of DaqView, refer to the
DaqView document module.
Reference Note: Users of 32-bit TempBook Support should refer to the
DaqView
,
DaqViewXL
, and
DIAdem
document modules for detailed information regarding these
documents. Users of 16-bit TempBook Support should refer to the
TempView
and
PostView
document modules for detailed information