Maytag MMV5100AAB Installation User Manual
Page 11
11
DRILL HOLES IN THE WALL AND UPPER CABINET TEMPLATE
•
Turn off electricity at the fuse box for any outlets or circuits located in the
area you will be drilling or cutting.
•
Check if points D and E or F and G on wall template are over a wall stud.
If points are over a wall stud, drill
3/
16
"
holes. If points are over drywall,
drill
3
/
4
"
holes.
•
If there are no wall studs at points D, E, F, G or at only one set of points, find
within area H and I the screw points closest to the center of wall stud.
Drill
3/
16
"
holes into wall stud. If there is no stud, drill
3
/
4
"
holes.
The microwave must be connected to at least one wall stud. Make sure to
use 2 wood screws in a stud, and 4 toggle bolts in the drywall or the plaster
to secure mounting plate to wall. IF THERE IS NO STUD WITHIN THE
AREAS MARKED H, I AND NOT BEHIND POINTS D, E, F AND G, DO NOT
INSTALL MICROWAVE OVEN.
•
Find the points on the upper cabinet template labeled J, K and N. Drill
3
/
8
"
diameter holes.
•
The marked points J, K will be used to secure microwave oven to upper
cabinet.The marked point N will be used to secure microwave oven
temporarily.
DANGER: Special care must be taken when drilling holes into the wall.
Electrical wires could be concealed behind the wall covering and if the drill
hits them you could get an electric shock.
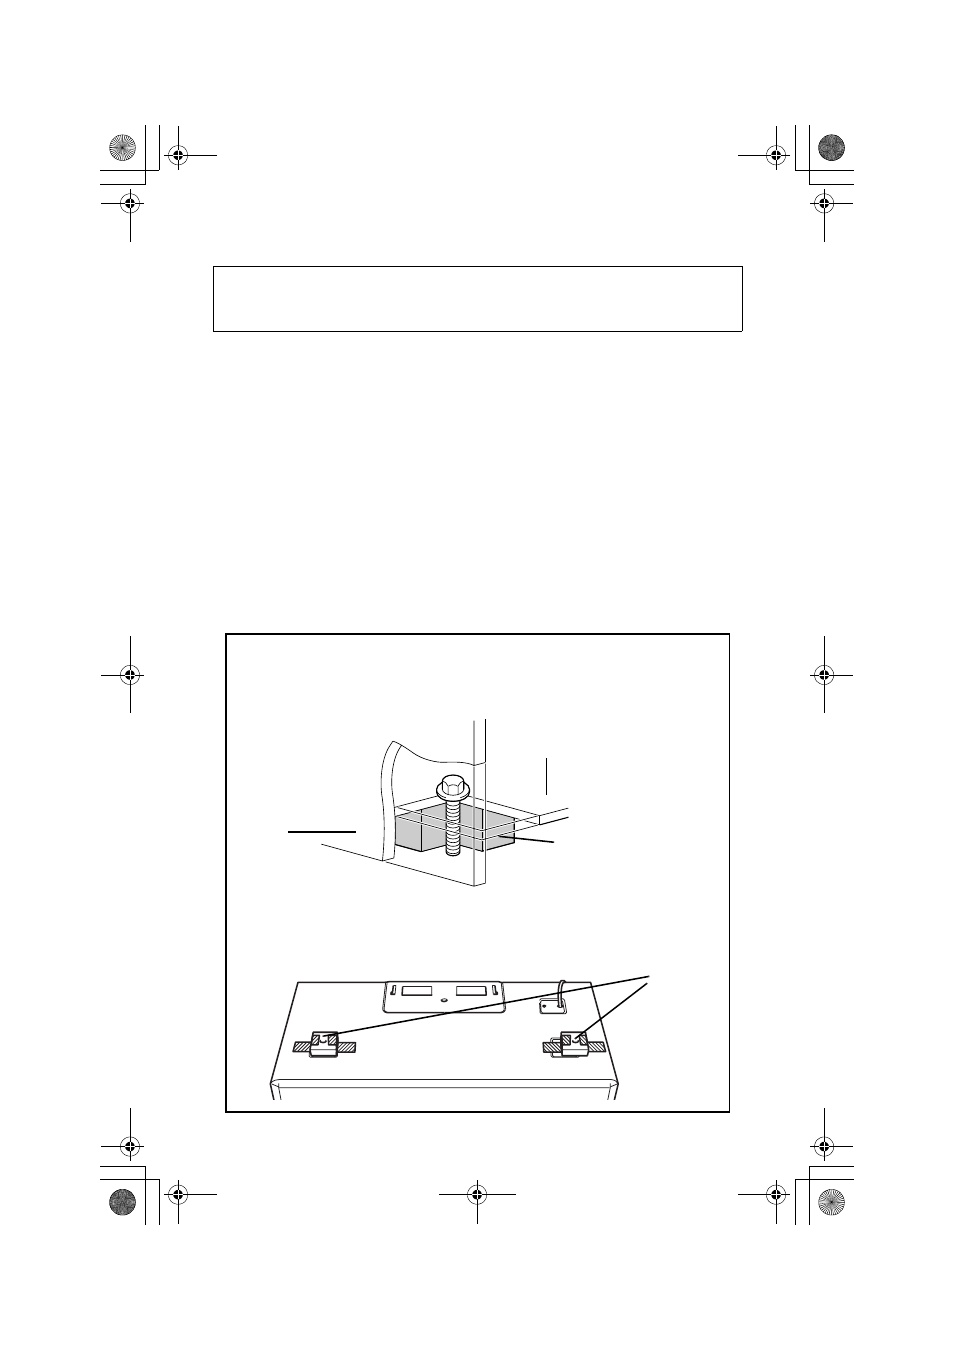
Filler Block
•
If the bottom of the upper cabinet is recessed
3
/
4
"
or more, you must use
2" x 2" filler blocks (not included) to provide additional support for the
bolts.
•
Mark the center of each filler block and drill a
3
/
8
"
diameter hole at the
marks.
•
Align filler blocks over the two openings in the top of the microwave
oven cabinet and attach to cabinet with masking tape.
,
,,
Cabinet bottom shelf
Filler block
Filler
blocks
Cabinet
front
OTR-Installation-M1.fm Page 11 Wednesday, September 27, 2000 4:03 PM