Set-up – Kreg Jig HD User Manual
Page 5
www.kregtool.com
800-447-8638
Set-up
To create the strongest joint possible, position the
Stop Collar on the Kreg Jig
®
HD Drill Bit, following
these three simple steps.
1
Set-up
Attach the Stop Block
If you are using a Kreg Face Clamp, slide the
large clamp pad into the T-slot recess on the
back of the Drill Guide. Then install the Stop
Block by sliding the tapered keys on the Stop
Block into the mating slots in the bottom of the
Drill Guide. This captures the face clamp pad so
the clamp stays in place on the Kreg Jig
®
HD as
®
you move it from one location to another. When
using an F-style clamp or C-clamp, simply install
the Stop Block. These clamps do not interlock
with the Kreg Jig
®
HD.
®
2
3
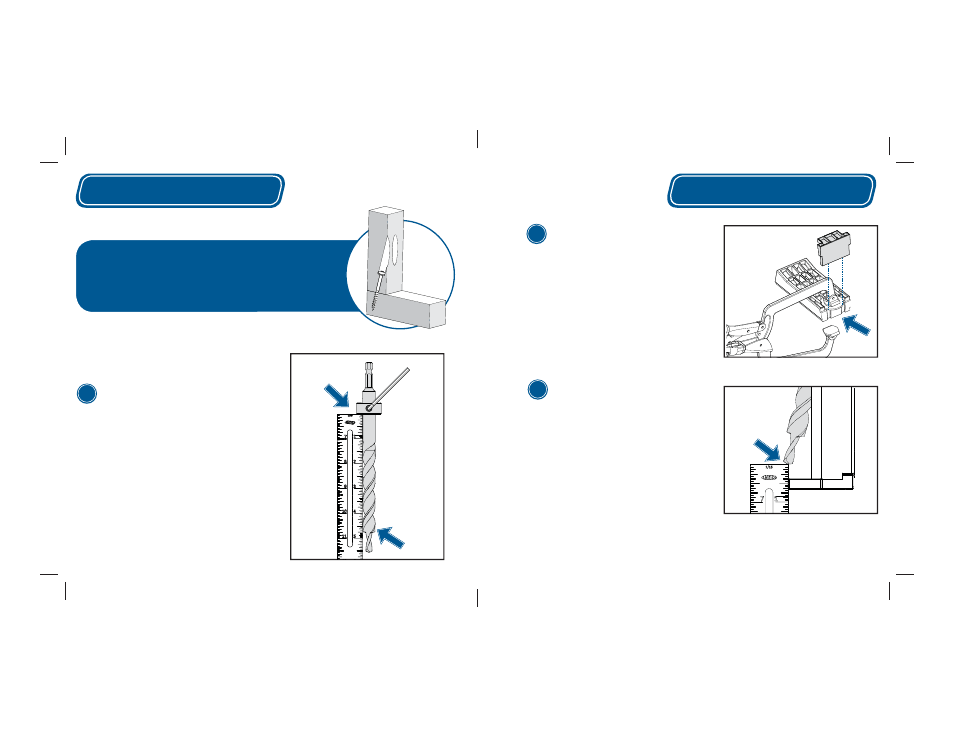
Check the Bit Setting
Slide the Kreg Jig
®
HD Drill bit into the Drill
®
Guide. With the Stop Collar resting on the
Guide, there should be about 3/8” between the
Stop Block and the tip of the drill bit. Adjust the
position of the Stop Collar, if necessary. With
both parts clamped together, the self-tapping
tip of the Kreg Jig
®
HD Screw easily cuts
®
through the last 3/8” of material in the drilled
piece and forms its own pilot hole in the mating
piece, tightly drawing the joint together.
Adjust the Stop Collar
Slide the Stop Collar onto the Kreg Jig
®
HD Drill Bit,
position it 4-3/4” from the shoulder of the bit, and
tighten the set screw with the included hex wrench.
4-3/4"