Pocket-hole placement, Repair applications – Kreg Jig K4 User Manual
Page 5
800-447-8638
www.kregtool.com
Pocket-Hole Placement
Along with the Kreg Jig
®
Settings, another important part of getting the
strongest possible Kreg Joint is to space your Pocket-Holes evenly across
the workpiece. Your Kreg Jig
®
features a patented 3-hole Drill Guide
which lets you do this in a wide variety of workpiece widths without the
need to reposition the workpiece after each hole is drilled. Use the guide
below to determine how to best clamp your workpiece and drill your
Pocket-Holes.
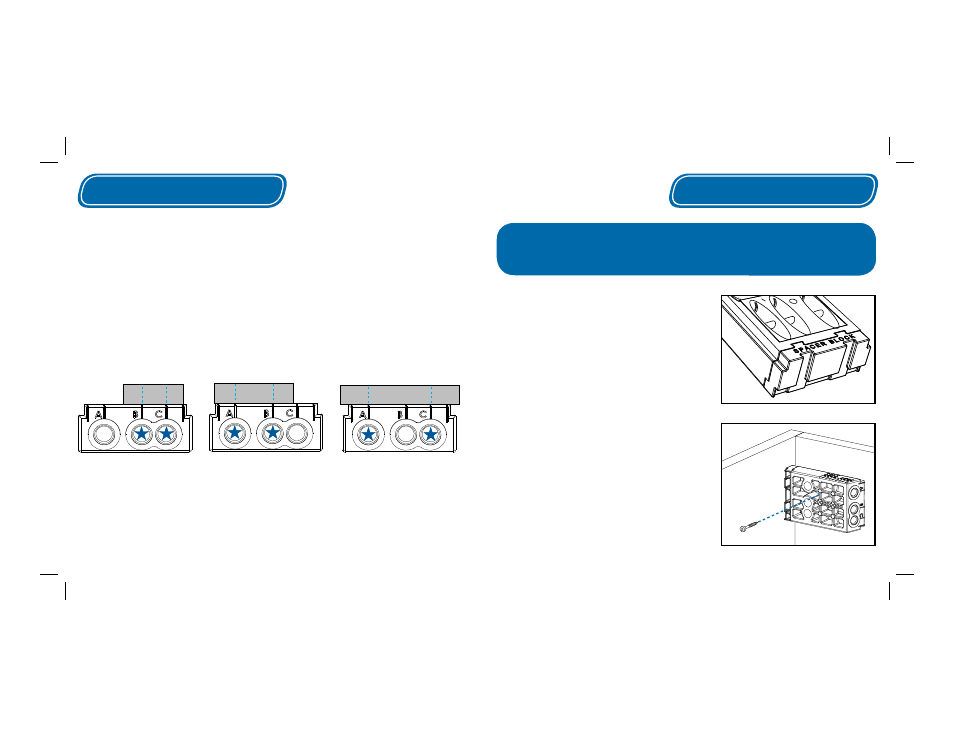
For panels, we recommend placing the fi rst Pocket-Hole roughly 2 inches
away from the exposed edge of the panel, and every 6” after that. When
drilling panels, you can use any of the Drill Guide’s three holes.
1” to 2”
Wide Material
2” to 3”
Wide Material
3” to 4”
Wide Material
Use B and C Holes
Use A and B Holes
Use A and C Holes
Repair Applications
When you bring the bottom of the Drill Guide to the
edge of the joint for a repair, the jig is set correctly
to center a screw in
1
⁄
2
”
material. If the joint uses
larger stock, you’ll need to compensate with the
included Spacer Block. Each Spacer Block you add,
compensates for another ¼” in material size. For
3
⁄
4
”
material, use 1 block. For 1” material, use 2
blocks, etc.
Additional blocks can be purchased from your local
Kreg Dealer.
In repair applications, when using the Drill Guide
separately, remember that you still have to set the
Depth Collar and ensure that the Drill Guide is
fi rmly secured to the workpiece using a bar clamp
or c-clamp. In certain situations where the use of a
clamp is not possible, you may also screw the Drill
Guide directly to the workpiece, as shown.
For repair applications, the Drill Guide can be removed completely
from the benchtop base, and taken directly to the problem joint
serving as a ‘mobile Kreg Jig
®
’.