Settings – Kreg Jig K4 User Manual
Page 4
800-447-8638
www.kregtool.com
Settings
Depth Collar Adjustment
To get the right Pocket-Hole depth, you’ll have to
adjust the position of the collar on the drill bit. Place
your bit inside the Depth Setting Gauge on the Kreg
Jig
®,
with the step of the bit at the marking which
matches your workpiece thickness, as shown. Slide the
Depth Collar towards the jig base and lock it in place
with the included Allen Wrench.
For 3/4” material, place the step of the bit
at the 3/4” marking and tighten depth collar.
To create the strongest joint possible, you’ll need
to set your jig to match the thickness of your
workpiece. The Kreg Jig
®
makes this easy, in just
three simple steps!
1
Settings
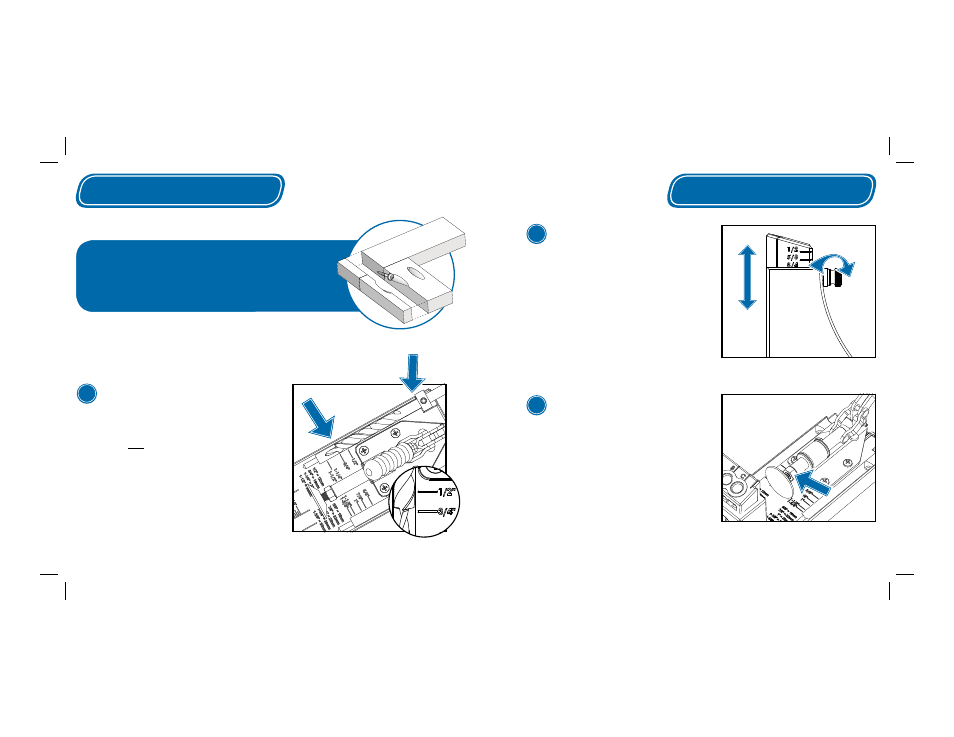
Drill Guide Adjustment
To ensure the exit-point of your screw is near
the center of the workpiece, (for the strongest
joint possible) you’ll need to adjust position of
your Pocket-Hole by raising or lowering the
Drill Guide’s height to match your workpiece
thickness. Loosen the Drill Guide Pin, lift the
Drill Guide until the correct mark is showing
just above the jig body, and re-tighten the pin.
Clamp Pad Adjustment
For a fi rm hold on the workpiece, you may
have to adjust the position of the clamp pad.
To do so, release the lock-nut, rotate the clamp
pad in or out, and test the hold by depressing
the toggle. Repeat this process until you get a
secure hold on the workpiece. Then, re-tighten
the lock-nut.
Drill Guide shown set for 3/4” material.
2
3
Release lock-nut, adjust clamp pad
position, test hold, and re-tighten lock-nut.