Standard Horizon HX-471S User Manual
Page 17
HX471S
Page 15
4.1.4 USING THE CD-25 CHARGER CRADLE
1. Turn the transceiver off.
2. Insert the DC plug from the NC-72 into the DC jack on the CD-25 rear
panel, then plug the NC-72 into the AC line outlet.
3. Insert the HX471S (with the battery pack) into the CD-25; the antenna
should be at the left side when viewing the charger from the front.
4. If the HX471S is inserted correctly, the Red “CHARGING” indicator will
glow. A fully-discharged pack will be charged completely in approximately
3 hours.
5. The Red “CHARGING” indicator will blink when charging is nearing
completion.
6. When charging is completed, the Red “
CHARGING” indicator will disap-
pear, and the Green “
FULL” indicator will glow. Disconnect the pack from
the CD-25, and unplug the NC-72 from the AC line outlet.
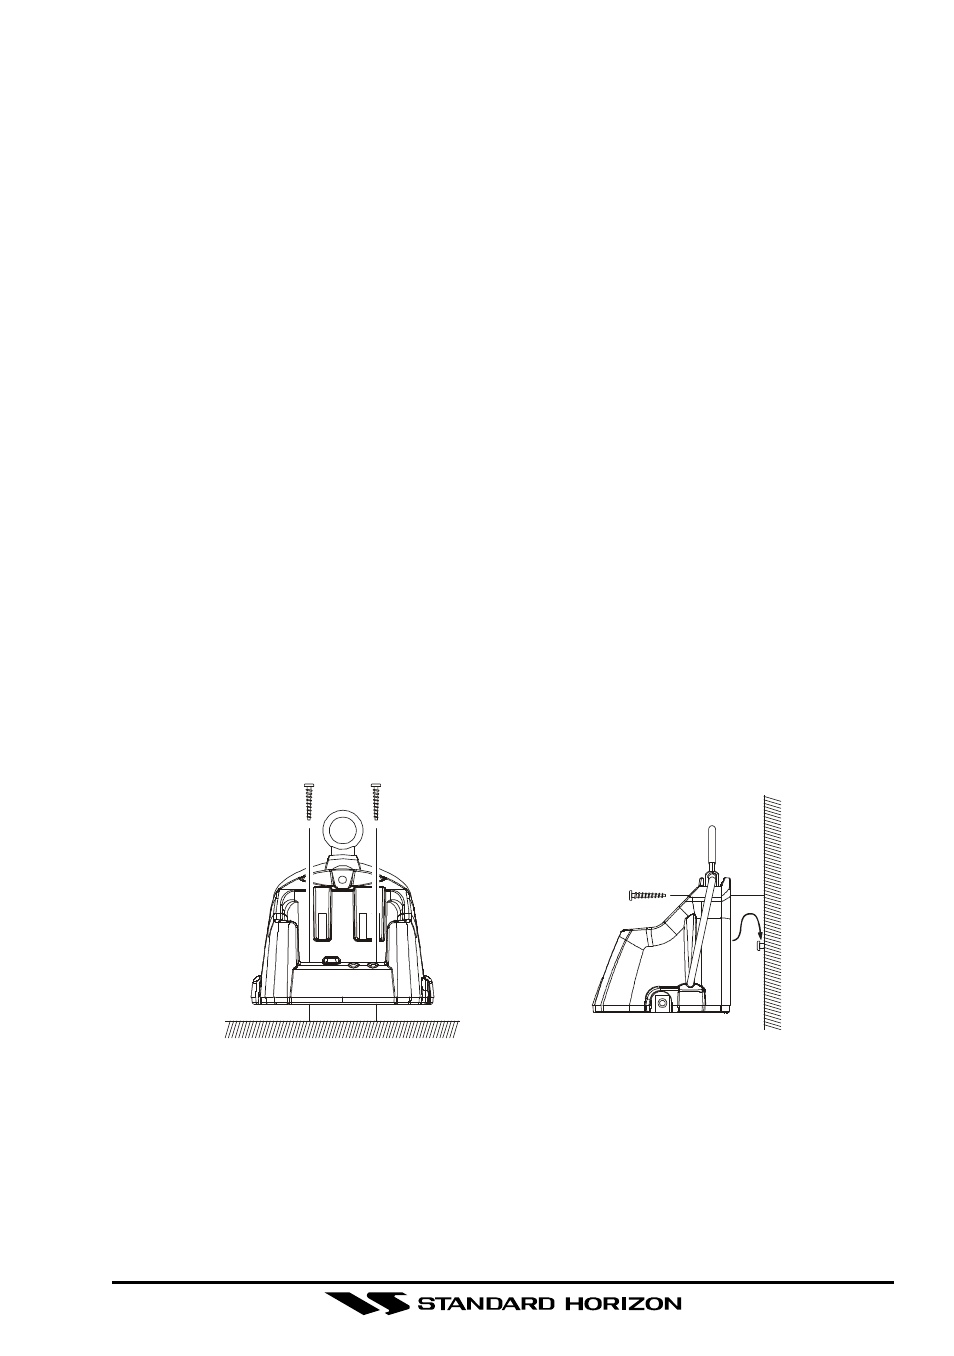
4.1.5 MOUNTING THE CD-25 ON THE VESSEL
The CD-25 is designed to be surface or wall mounted on a vessel which can
be connected to the charger and a GPS that supplies NMEA data for DSC
Distress transmissions.
If mounting on a vessel the CD-25 must be mounted in a location on the
vessel that is directly shielded from rain or splashes of water. After the loca-
tion is found mount the CD-25 using the supplied mounting screws.
CD-25 Desktop Mount
CD-25 Wall Mount