Kemppi Adaptive 150 User Manual
Page 9
MinarcMig™ Adaptive 150
8
© Kemppi Oy 0550
EN
Welding gun
The welding gun is already connected to the machine. The welding gun leads
the filler wire, shielding gas and electric current to the weld. When you press
the welding gun trigger, shielding gas flow and wire feed begin. The arc ignites,
when the filler wire touches the welded piece.
The gun neck can be rotated 360°. When turning the neck, always make sure
that the neck is twisted almost all the way to the bottom. This prevents damaging
and overheating the neck.
NOTE! If you use other than 0.8 mm diameter filler wire, change the
welding gun contact tip to match the wire thickness.
Shielding gas
The shielding gas used for steel wires is carbon dioxide or a mixture of argon
and carbon dioxide which replaces air in the arc’s area. Thickness of the welded
sheet and welding power define the flow rate of the shielding gas.
The machine is delivered with a 4.5 m long shielding gas hose. Connect the
bayonet socket of the shielding gas hose to the machine’s hose connector and
the hose connector end to the gas bottle’s control valve.
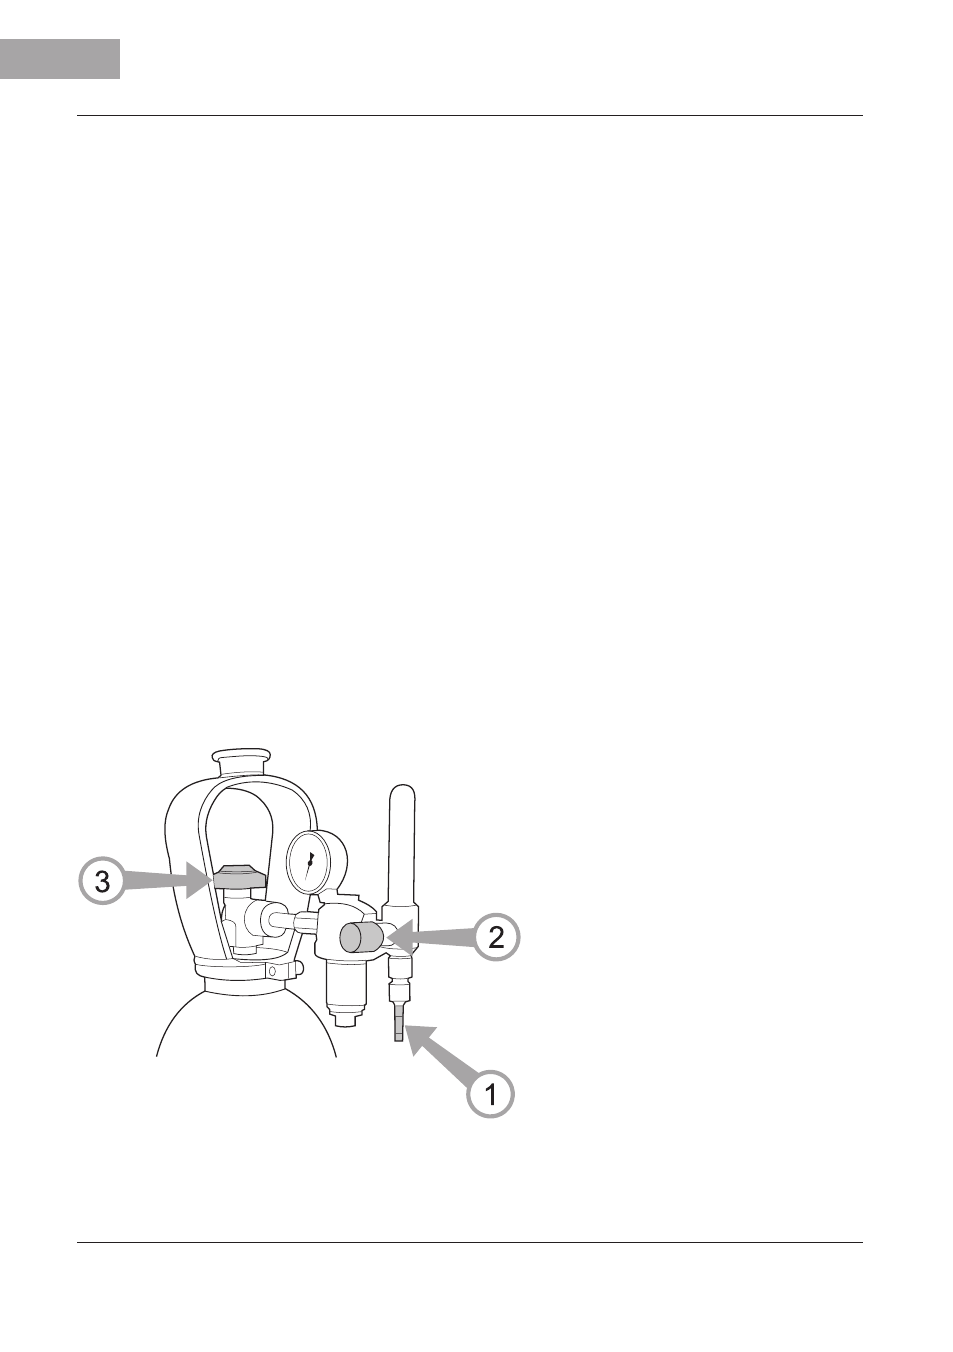
Figure 3.2. Connecting the gas hose to a typical control valve
1. Connect the hose to the gas
bottle’s control valve and
tighten the connector.
2. Adjust the flow rate with
the control valve screw. A
suitable shielding gas flow
rate is 8-15 l/min.
3. Close the bottle’s valve
after use.
NOTE! Use a shielding gas suitable for the material’s welding. Fix the gas
bottle securely in an upright position before installing the control valve.