Kemppi Protig 410 User Manual
Page 17
EN
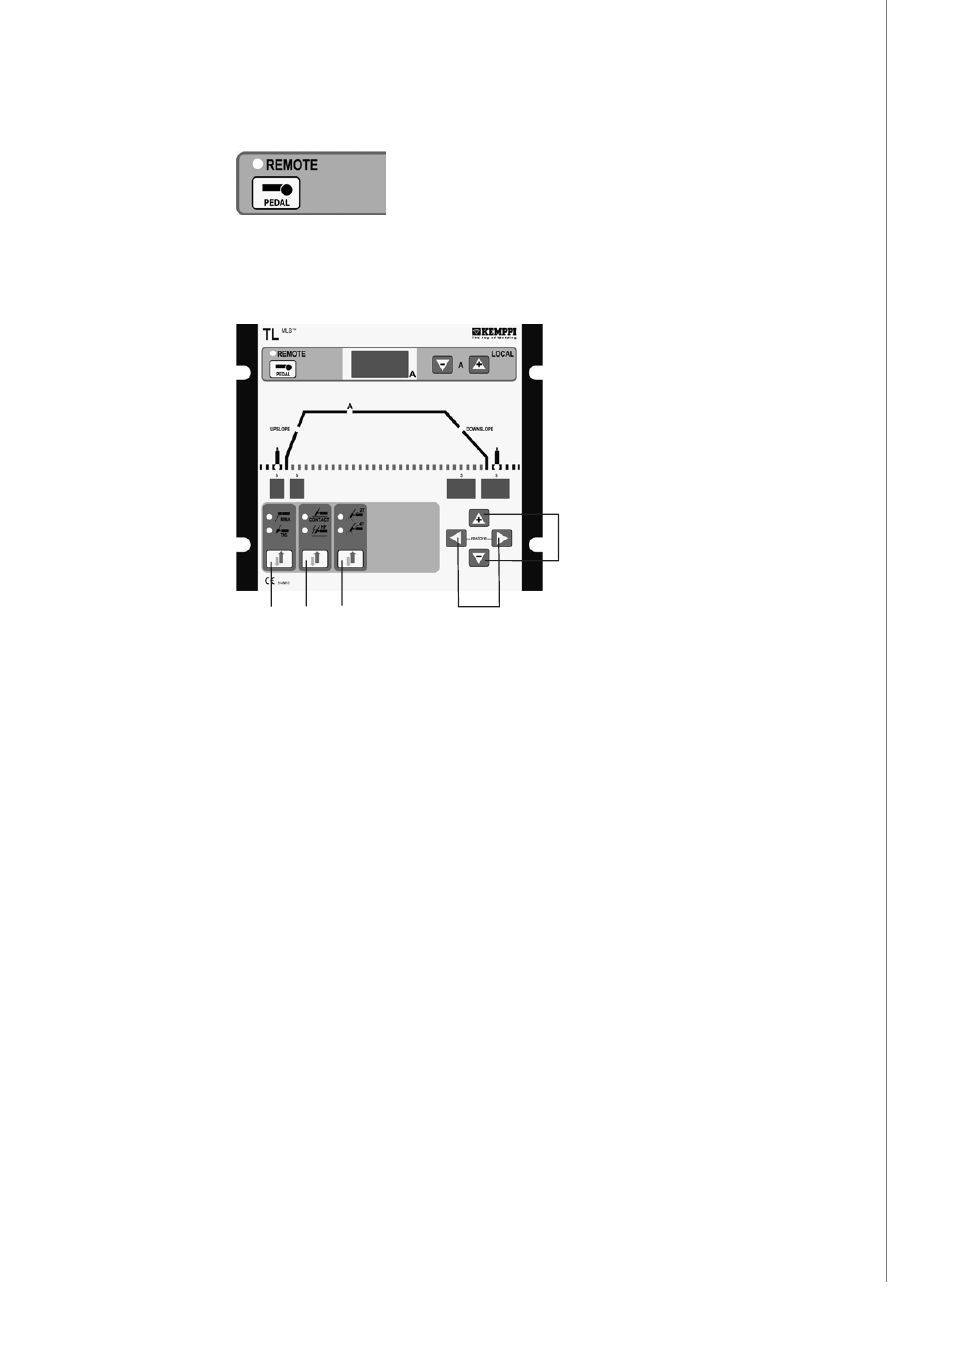
3.1.10 Local and remote control of welding current
Local control is carried out from +/- keys. Remote control unit R10 can be put into operation
by pressing the selection key for remote control.
3.1.11 Controls for TIG welding
1
2
3
4
5
Starting situation: Torch is switched, but start switch is not pressed.
1.
Select TIG welding.
2.
Select spark ignition.
3.
Select 2-function position.
4.
Press one or the other of arrow keys until light H23 will be lighted.
5.
Press the + or the - key and adjust the needed current value to display P23. You can test
suitability of current by welding and adjust current again if necessary.
6.
Press arrow key once to right, until lamp H24 will be lighted. Adjust the down-slope time
as suitable. Seconds are displayed in P24.
7.
Press again arrow key and H25 will be lighted. Adjust post gas time as suitable. Seconds
are displayed in P25.
8.
Keep pressing the arrow key, and adjust the pre-gas time and current up-slope time
correspondingly (H21 ja H 22).
Breaking of down-slope time at 2-function of torch is done by pressing down the switch,
when current starts to go up to set value with the same speed with which it had gone down.
At 4-function down-slope of current is stopped when torch switch is pressed down and down-
slope operation will be continued by releasing the switch. Intermittent up- and down-slope
operations are produced by pressing the switch for a short time.
15
Pr
oT
ig 410 H
yundai / © Kemppi O
y / 1135