Ivoclar Vivadent Stratos 200 User Manual
Page 15
6.4 Average orientation of dentulous
cases with the horizontal guide
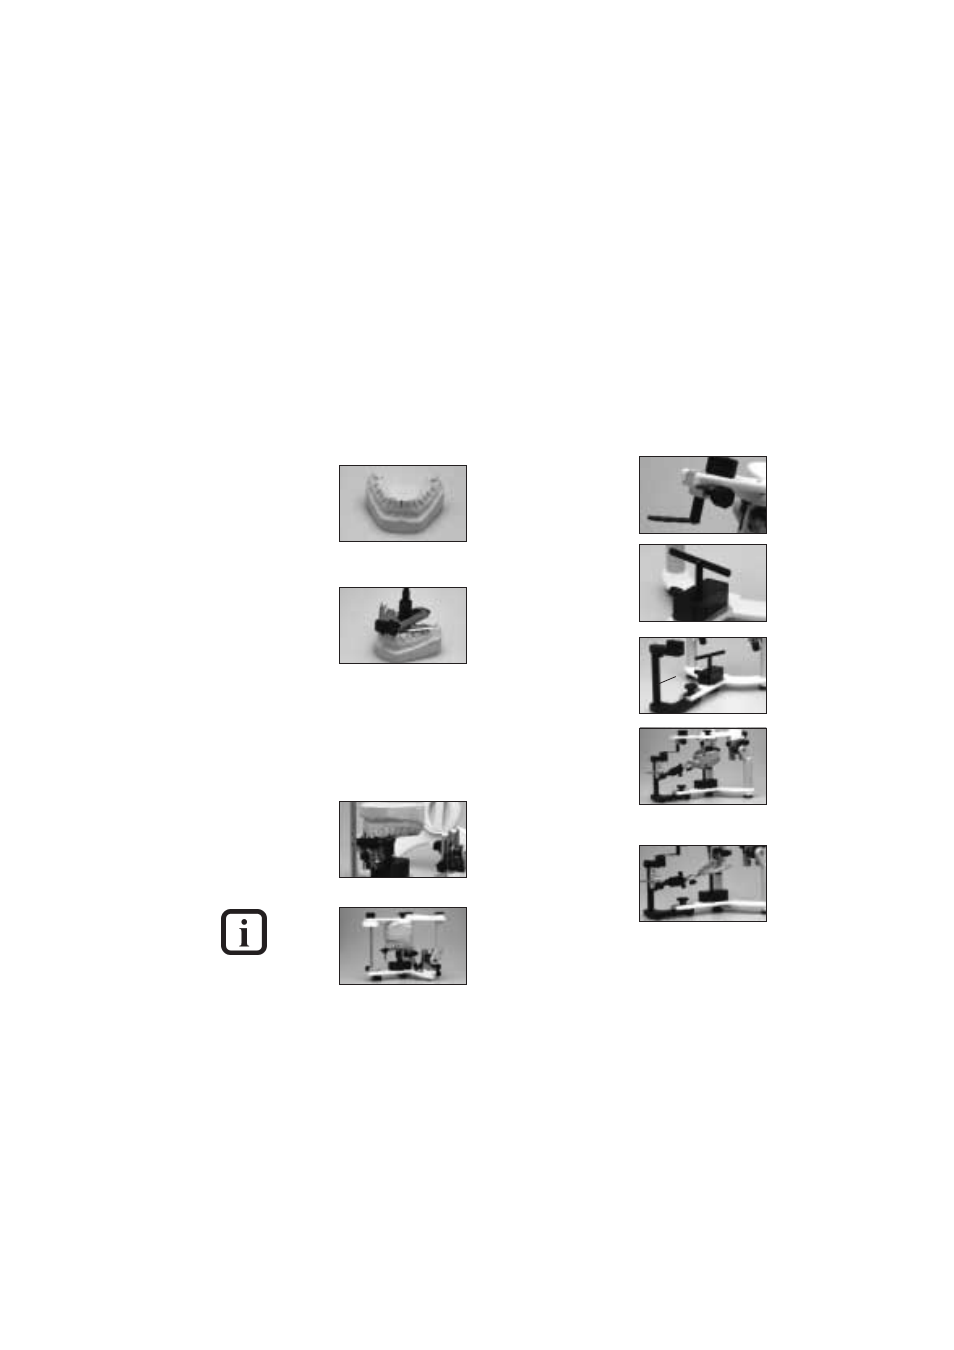
6.4.1
Return articulator to the initial set
position
• See page 34 for description
Remove the incisal indicator (1.3).
6.4.2
Transfer maxillary mesial
contact area vertically to
the mandibular model.
Mark the tips of both
distobuccal cusps of the
lower second molars. If
these molars are missing,
the first molars may be used instead.
• Put mandibular mesial
contact area behind the
incisal tip of the
symphysis fork.
• Adjust horizontal guide
in such a way that the
rear edges barely cover
the marked cusps of the second molars and establish
symmetry.
• The retromolar pads are used as reference points for
free-end surfaces, similarly to the
Trigonum retromolare in edentulous cases.
Subsequently, attach horizontal guide to the model with
e.g. wax or a rubber band.
6.4.3
Mount instrument carrier
to the upper frame (2.3).
Fasten horizontal guide in
place by means of the
knurled screw of the
instrument carrier.
Insert
horizontal
guide
completely
into the instrument carrier.
After that, apply some
plaster on the model and base block and close articulator
slowly.
6.4.4
Next, orientate maxillary model as usual.
6.5 Personalized model transfer with the
registration joint holder
6.5.1
Return articulator to the initial set position.
• See page 34 for description
Remove incisal indicator (1.2).
6.5.2
Mount the plane
indicator (50) instead of
the incisal guide rod (1.2).
6.5.3
Mount bite fork
support (51) to the lower
frame (2.2) by means of
the instrument carrier (40).
6.5.4
Insert registration joint
holder (52) instead of the
incisal plate (1.1) and
secure it.
6.5.5
Mount UTS registration to
the registration joint
holder and secure bite fork
with the bite fork support.
Example: occlusal
localizing tray
Example: UTS bite fork
(dentulous case)
36
52