Grandstream GVC3200 Quick Installation Guide User Manual
Page 6
7
8
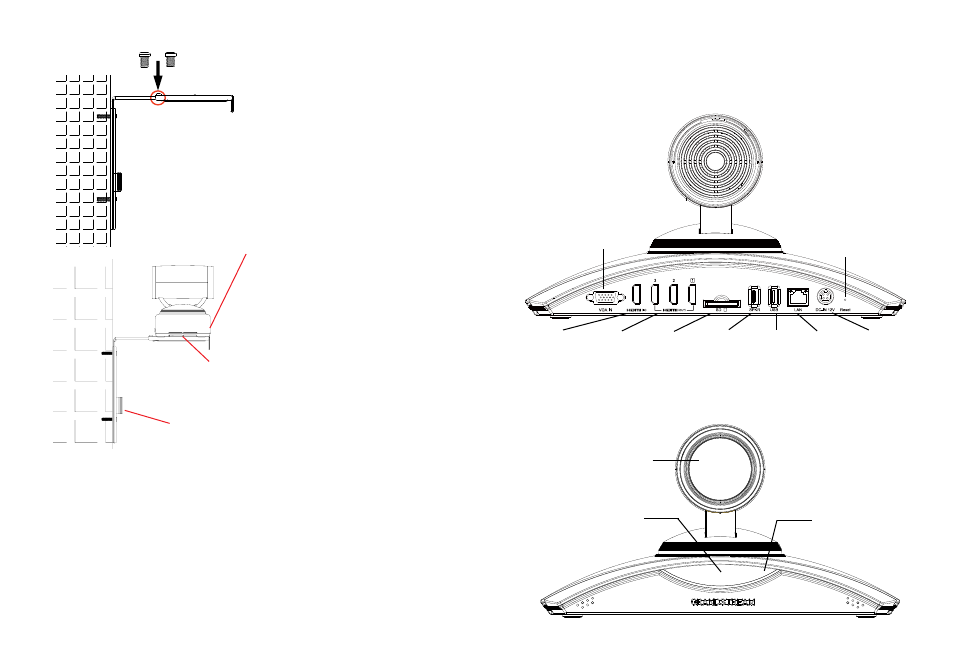
VGA IN
RESET
HDMI IN HDMI OUT
Port 1/2/3
SD Card
Slot
SPEAKER
Port
DC-IN 12V
LAN Port
USB Port
CONNECTING THE GVC3200
1. Connect the LAN port of the GVC3200 to the RJ-45 socket of a hub/switch or
a router (LAN side of the router) using the Ethernet cable.
2. Connect the HDMI [1] port of the GVC3200 to the HDMI port of the main display
device (e.g., TV) using the HDMI cable. Connect HDMI port 2 and then HDMI
port 3 if you have additional display devices.
Note: Please make sure to follow the port order when connecting HDMI port 1, 2
and 3. The GVC3200 will not work correctly if connecting HDMI port 2 or 3
without HDMI port 1 connected.
5. The OLED in the front of the GVC3200 will display booting up information.
Before continuing, please wait for the IP address information to show up on the
OLED. The display device (e.g., TV) will show the idle HOME screen with IP
address on the top status bar as well.
Lens
OLED. It shows IP
address information
after bootup. For example,
IP: 192.168.40.123
LED Indicator
11. Manage the wire harness with the Hook-and-loop
fastener on wall mount bracket Part B.
9. Place GVC3200 on the top of the
wall mount bracket Part A. On the
wall mount bracket Part A, the
locating pin should fit into the hole
on the bottom of the GVC3200.
10. Tighten the built-in screw on wall mount
bracket Part A to make sure the GVC3200
fits securely.
4. Connect the 12V DC output plug to the power jack on the GVC3200; plug the
power adapter into an electrical outlet.
8. Align Part A and Part B at the 2
holes as highlighted below. Install
screw Type 2 to each of the hole
and tighten it.
Note: “USB” port of the GVC3200 is not for connecting speaker. Connecting
speaker to “USB” port might cause speaker work improperly.
3. Connect the USB cable of the speaker to the “SPKR” port of the GVC3200.