Connect hydrograph, Start tests with hydrograph – Fluke Biomedical HydroGraph User Manual
Page 10
HydroGraph Software
Users Manual
2
System requirements:
• Windows XP, Windows 7 (32 or 64 bit), Windows 8 (64 bit).
• 1 GB RAM, 500 MB available disk space.
• CD drive (for installation)
• USB
port
Note
You must disable power save features (particularly on laptops) as
these can disrupt the connection with the Product. If the connection
is lost, the Product continues ongoing tests until the Product is
turned off. The Product will recover the results at power on. Then
you can import the results to HydroGraph.
Connect HydroGraph
1. Make sure the Product is NOT active on any channel when the software is
started. On the IDA-5, go to the Status All Channels screen.
2. On the PC, start the HydroGraph application.
3. Connect the Product to a PC with the supplied USB cable. HydroGraph
detects a Product connected to the PC.
4. The first time the Product connects to the PC, select the device name in the
left and right boxes of the connection dialog. Thereafter, HydroGraph keeps
the connection data.
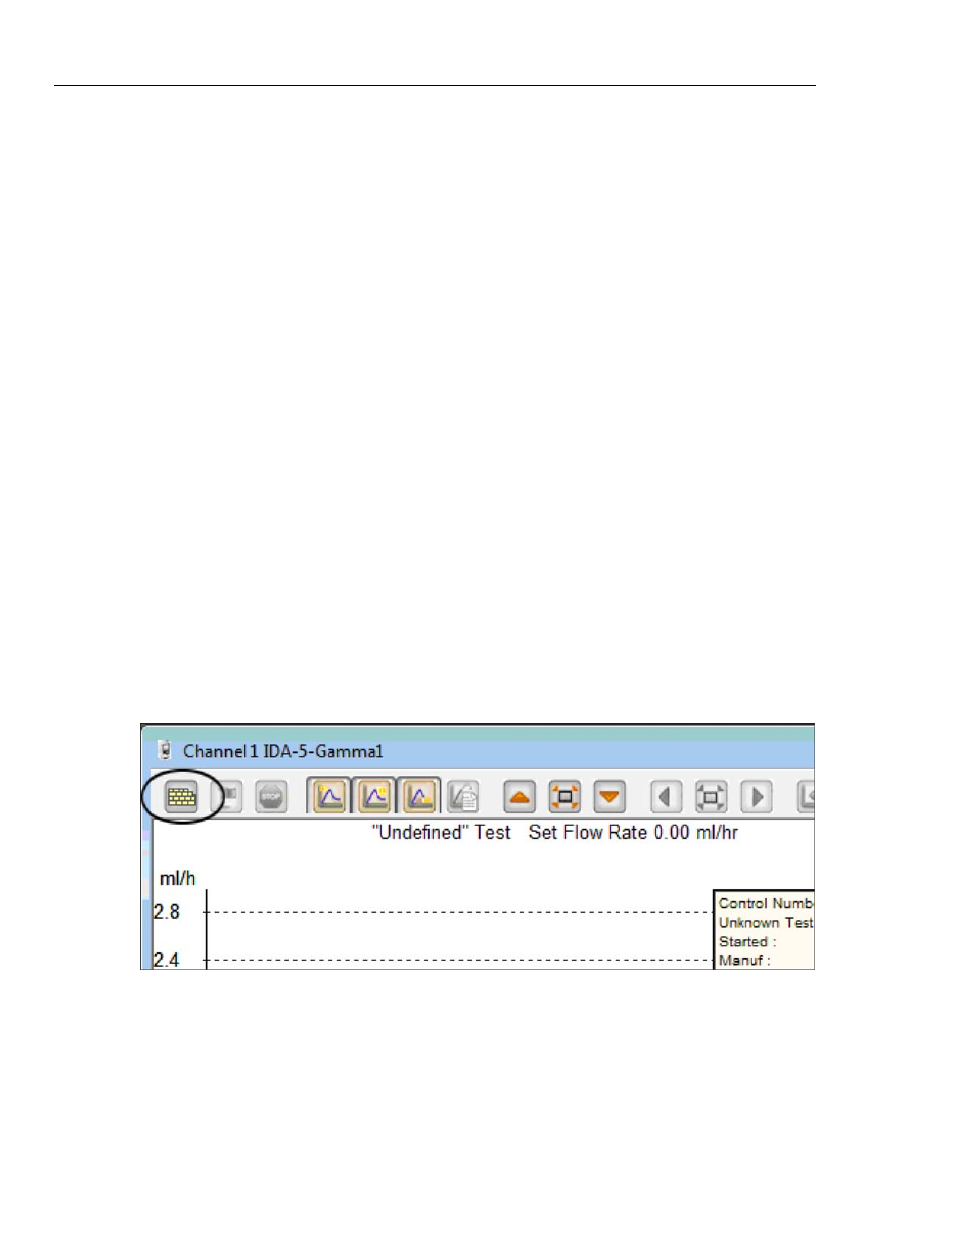
Start Tests with HydroGraph
In the window for the applicable channel, click the Test Setup button (see
Figure 2) to show the Test Setup dialog. The subsequent sections tell how to
start each test type.
hwh29.bmp
Figure 2. Test Setup