Assembly and installation (cont.) – Fire Magic DC430-XXR-75SM Island Enclosure User Manual
Page 7
7
REV 6 - 1409101305
L-C2-306
ASSEMBLY AND INSTALLATION - STEP BY STEP
CAUTION: Island components are heavy. CAREFULLY
handle all components during assembly.
Note: A DC430 grill island is depicted here. Your assembly
may slightly vary depending on model selected.
Island Base
Important: DO NOT fully tighten bolts until the island
base is leveled and squared. Hand tighten
until instructed to fully tighten.
1. Locate the island pieces in an appropriate location (refer
back to the LOCATION section if needed).
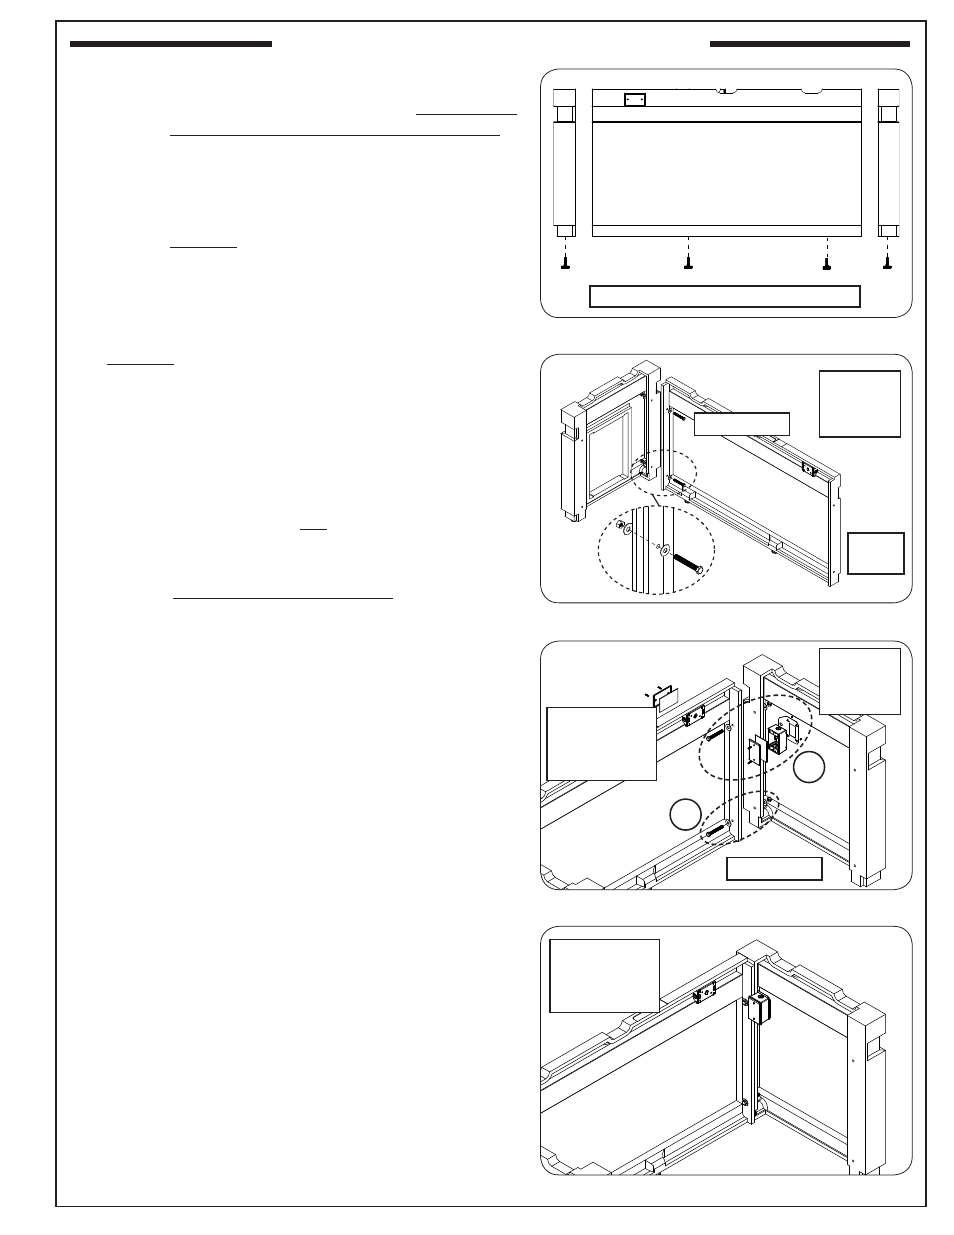
2. Carefully lay the front wall down and attach the levelers.
Repeat for the rear wall and two side walls. See Fig. 7-1.
Important: The levelers are required for ventilation and
leveling purposes.
3. Orient the rear wall and left wall as shown. Carefully
align the pilot holes, and insert the hardware in the order
shown. Hand tighten only. See Fig. 7-2.
Note: DO NOT fully tighten any bolts until all 4 walls are
set and the top surface is even.
4. Orient the right wall and repeat the hardware installation
process for the bottom hardware fi rst. Ensure the top
pilot holes are aligned.
An outlet box assembly is provided and requires
installation. Assemble the box as shown, then use the
hardware to secure both the top of the right wall and the
outlet box in place. See Fig. 7-3 and 7-4.
Note: Covers are provided for any outlets that will not be
used (if applicable).
Fig. 7-1 Attach levelers
Fig. 7-2 Assemble rear and left wall
Fig. 7-3 Assemble right wall and outlet box
Fig. 7-4 Right wall and outlet box installed
Attach levelers to bottom of all 4 walls
Hardware:
Bolts x 2
Nuts x 2
Washers x 4
ASSEMBLY AND INSTALLATION (Cont.)
(hand tighten)
DC430
shown
[covers are
provided for any
outlets that will
not be used]
A
B
[covers are
provided for any
outlets that will
not be used]
Hardware:
Bolts x 2
Nuts x 2
Washers x 4
(hand tighten)