Accessories – Fire Magic Aurora Combined Stand-alone User Manual
Page 26
26
THE DRIP TRAY
The drip collection system allows you to brush or scrape
excess dried residue from the grilling area directly into
the drip tray (see the DRIP TRAY section for more
information).
THE COOKING GRID LIFTER
Hold the grid lifter by gripping the center section with the
prongs pointing down (use an oven mitt or heavy glove
if the grill is hot). Insert the notched end of the grid lifter
into the cooking grid, in front of the midway point (front
to back; Fig. 26-3), and central (left to right; Fig. 26-4).
Twist the grill lifter (clockwise or counterclockwise) so
the handle is parallel to the grill rods. This “seats” the
spiked end of the grid lifter between two rods, enabling
you to safely lift out the grid. Lift slowly and adjust the
grid lifter, if necessary, for balance.
Placement of the grid lifter in cooking grid
Fig. 26-3
Fig. 26-4
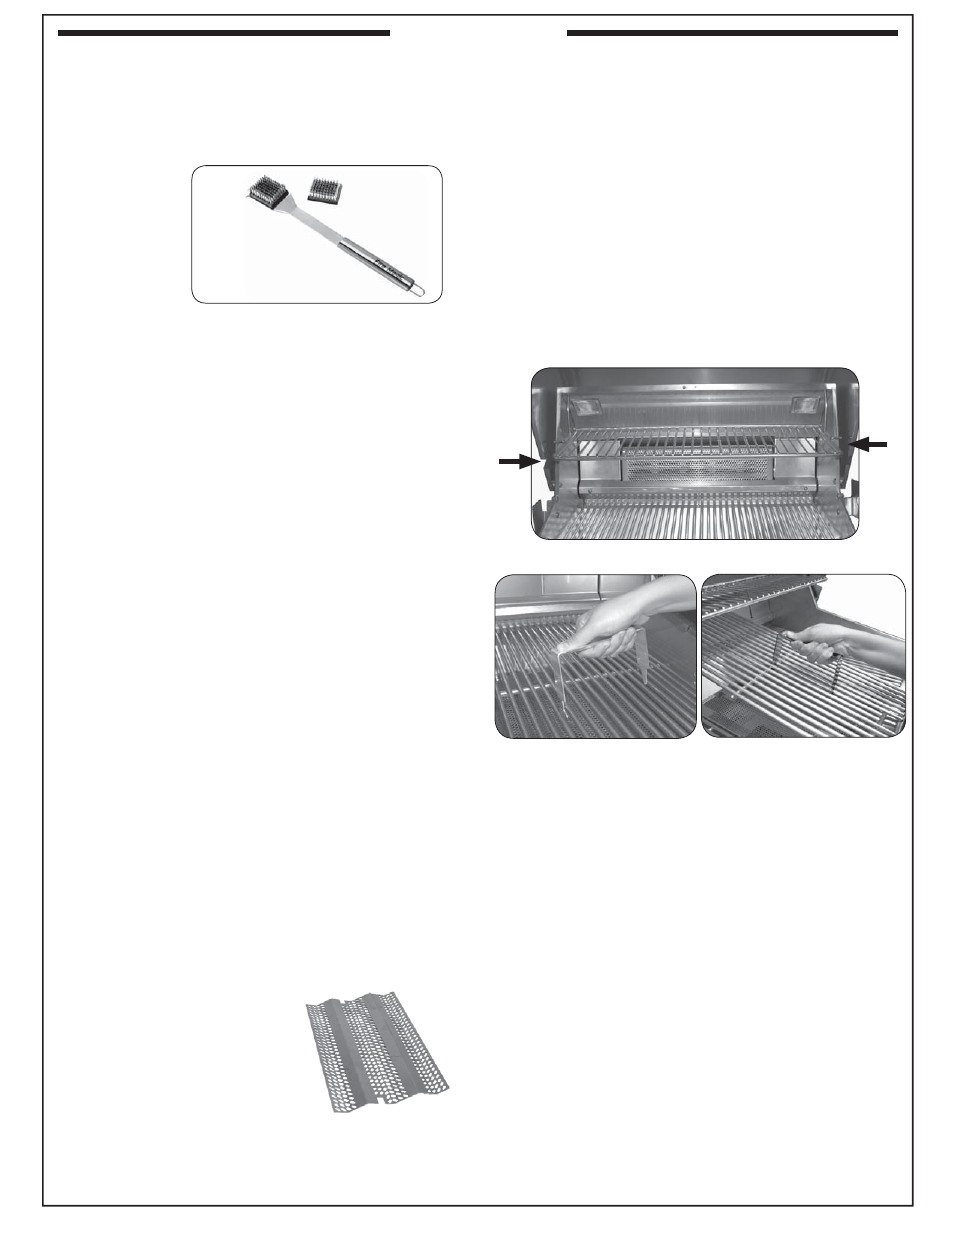
GRILL BRUSH (optional)
Purchase a Fire Magic
®
stainless-steel grill brush (sold
separately) to keep your grill cleaner. It comes with
scraper for large particles and a replaceable head with
brass bristles for overall cleaning.
Grill brush with replacement head
Fig. 26-1
WARMING RACK (if equipped)
The warming rack (Fig. 26-2) is packed separately.
To install the warming rack, lift the front of the rack up
slightly and insert the rack hangers into the two holes
in the back of the inner oven hood. Then lower the front
of the rack into a level position to lock the rack in place.
To remove the warming rack, lift up on the front of the
rack until the rack hangers pull free from their supporting
holes.
Note: Removing the warming rack before using the
rotisserie will leave more clearance for the
meat being cooked. (if applicable)
Fig. 26-2 Warming rack in place inside oven
Flavor grid
THE FLAVOR GRID(S)
Place each fl avor grid directly over a burner. The solid
areas of the grid should rest over the tabs found on the
burner. See Fig. 26-5. The slightly larger grids are
designed to be placed over the outside burners,
and the slightly smaller grid(s) are designed to be
placed over the interior burner(s).
Note: This allows heat from the burners to be evenly
distributed throughout the cooking area. The
fl avor grids heat and cool quickly, making the
grill very responsive to changes in heat from
the burners.
Fig. 26-5
ACCESSORIES