Install the sideburner shelf (if equipped) – Fire Magic Aurora Combined Stand-alone User Manual
Page 15
15
This shelf comes separate from the grill for
convenience in shipping. The sideburner
shelf must be installed using the following
instructions before hooking up the grill to a
gas source.
INSTALL THE SIDEBURNER SHELF
1. Remove the protective plastic from the grill,
sideburner, and sideburner lids by carefully
peeling it off with your fingers. Do not use
tools.
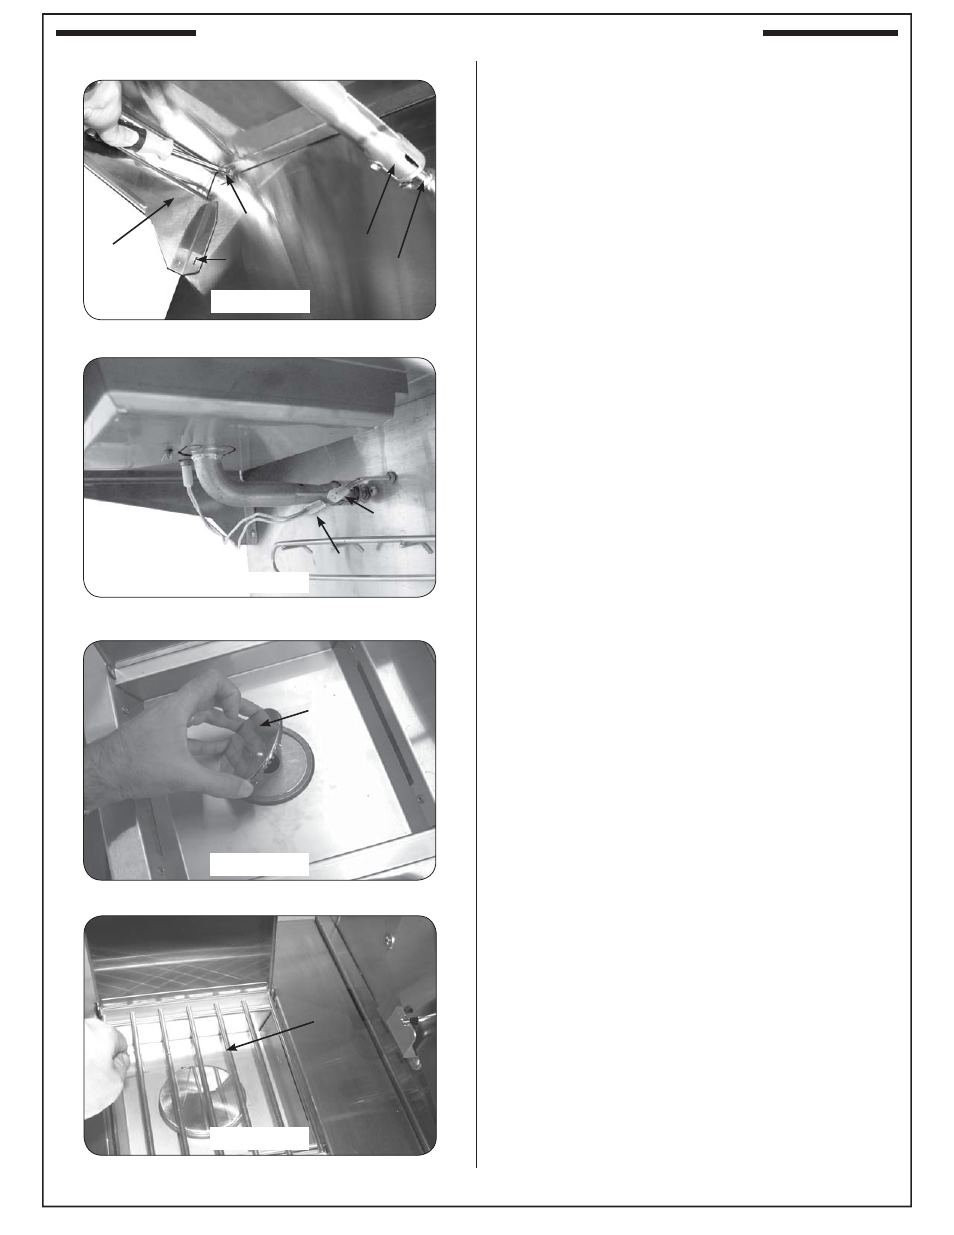
2. Hold the sideburner shelf up against the left
side wall of the grill so that the holes in the shelf
line up with the four (4) threaded screw holes
in the side wall and the air-shutter end of the
sideburner venturi tube fi ts around the brass
orifi ce protruding from the side of the cart.
WARNING: It is critical for safety and for the
proper function of the sideburner
that the sideburner venturi tube with
air shutter be centered around and
completely cover the gas orifi ce.
3. Insert and start screws with fi ngers and then
tighten using a Phillips screwdriver.
Important:
Take caution to not cross-thread
when tightening the screws.
Note: Upon completion, the air shutter must still
fi t around the brass orifi ce.
4. Connect the female connector on the end of the
hot surface ignitor wire to the male connector
coming from inside the grill.
5. Place the burner cap on top of the burner, as
shown in Fig. 15-3.
6. Place the grid so that it rests on the front
and back lips of the sideburner opening (Fig.
15-4).
7. Proceed to the section on AIR SHUTTER
ADJUSTMENT and complete the installation by
adjusting the air shutter. This will also test the
sideburner installation.
Air-shutter orifi ce placement - under shelf
Fig. 15-1
Connecting the ignitor wires
Placing the burner cap
Fig. 15-2
Fig. 15-3
Final look
Fig. 15-4
Screw
Hole
Male
Female
Brass
orifi ce
Air
shutter
Grate
Lid
Cap
Shelf
INSTALL THE SIDEBURNER SHELF (IF EQUIPPED)