Digital thermometer, Default screen, Setting a location temperature – Fire Magic Aurora Combined Stand-alone User Manual
Page 19: Fig. 19-2 orientation, Fig. 19-3 default screen detail, Fig. 19-4 location temp. screen (oven shown), Fig. 19-1 meat probe detail
19
DIGITAL THERMOMETER
MENU
SET
®
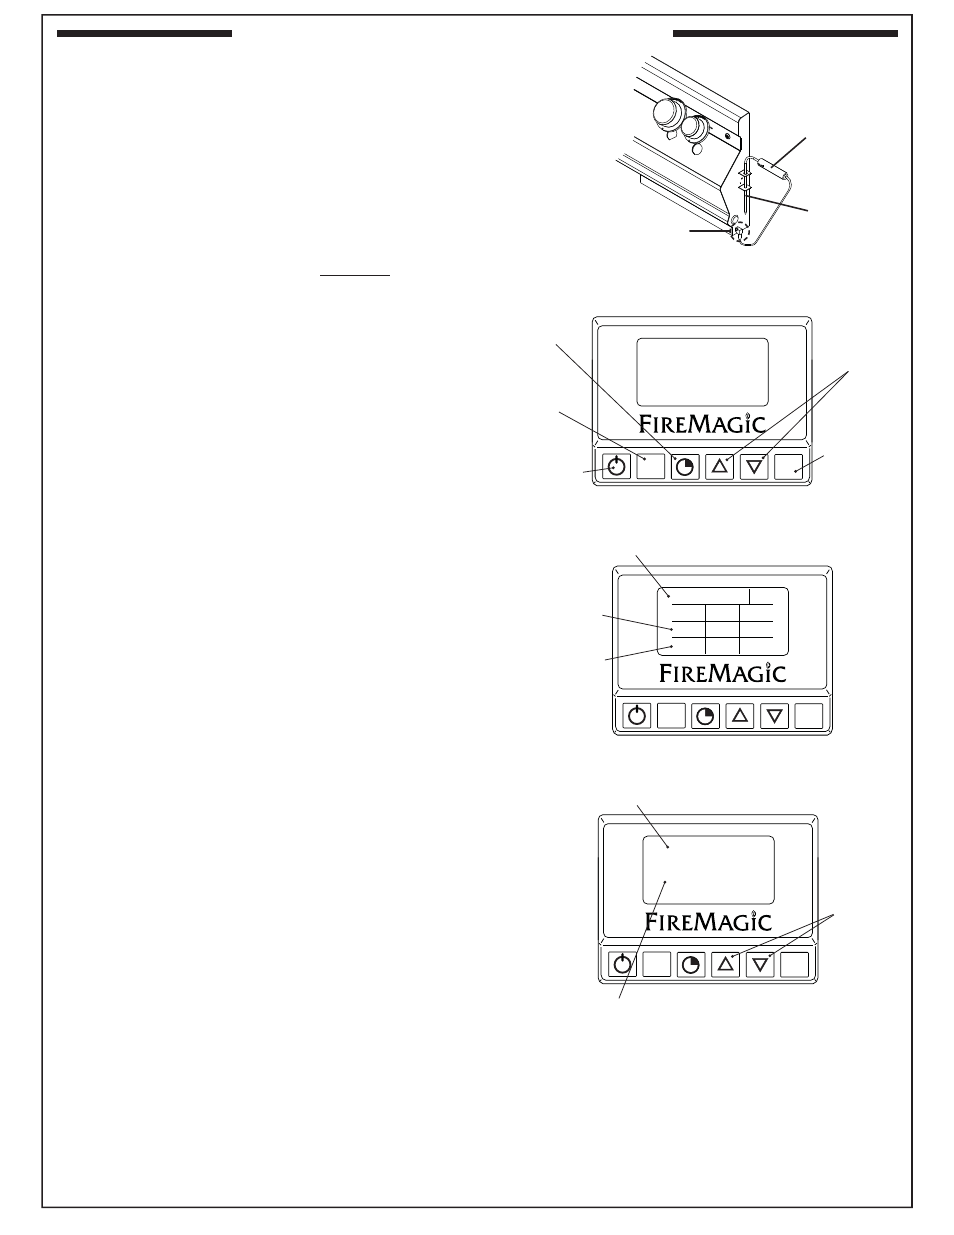
Fig. 19-2 Orientation
Arrows for
adjusting digits
SET button
for selecting &
confi rming
Display screen
Timer
button
Menu
button
MENU
SET
®
078
080
170
350
TEMP
SET
ACT
°F
MEAT
OVEN
TIMER
00:00
Fig. 19-3 Default screen detail
Time set via Timer
Meat probe
temp. info
Oven temp.
info
MENU
SET
®
OVEN
ACTUAL: 078
SET TEMP: 350
Fig. 19-4 Location temp. screen (oven shown)
Current location
Set this temp. as desired
Fig. 19-1 Meat probe detail
MEAT
PROBE
Meat probe handle
Meat probe plug
Power
button
Use arrows
to set
Your grill comes with a digital thermometer for oven and
meat probe temperature monitoring, and timed cooking.
Pressing the power button will turn on the thermometer. The
thermometer will automatically shut off after 5 minutes if no
temperature change is detected.
The thermometer is located on the control panel between
the control knobs.
Plug in the meat probe on the right side of the control panel
as shown in Fig. 19-1.
FOR BEST PERFORMANCE, GENTLY PRESS THE
BUTTONS. When turned on, accurate temperature readings
will begin after the thermometer has initialized. When turned
off, allow 5 seconds prior to turning back on.
Read the following sections completely regarding
thermometer operation. Refer to Fig. 19-2 for thermometer
orientation and button locations.
DEFAULT SCREEN
Press the power button to turn the thermometer ON. The
default screen will be displayed. Temperatures for the oven and
meat probe will be shown (Fig. 19-3). See below for options
under the default screen.
Setting a Location Temperature
1. Press the up/down arrow to switch to the desired location
(oven or meat probe). Location will be highlighted when
selected. Press SET.
2. The selected location’s temperature screen will be
displayed. Use the arrows to set the desired temp. The
actual temp. will also be shown. (See Fig. 19-4)
Note: PRESSING the arrows will adjust the desired
temp. by increments of one degree. HOLDING
them down (for several seconds) will adjust the
temp. rapidly.
3. Press SET to return to the default screen. Repeat as
necessary for other location.
The display will fl ash red and the alarm will sound (if set
to do so) when the oven / meat probe reaches its set
temperature. The alarm is silenced by pressing any button
on the thermometer.