Freestanding, Assemble a double sided solution – Elfa Freestanding User Manual
Page 5
www.elfa.com
Sida 5 av 5
Freestanding
Assemble a double sided solution
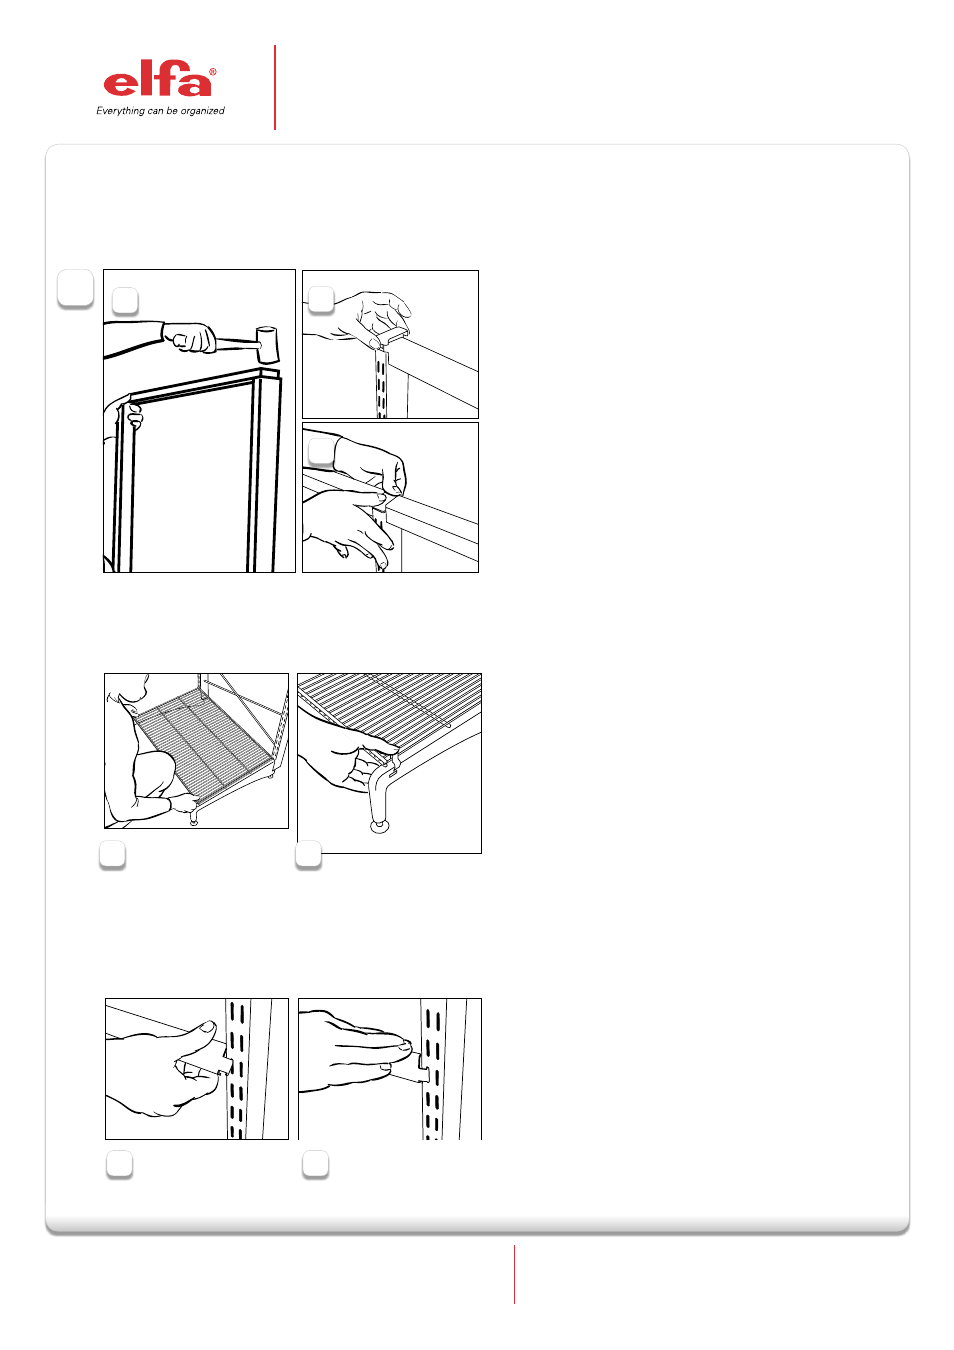
Insert upright into feet
–
Secure the stabilization bar by tapping both ends
into the top of the two uprights with a plastic mallet.
(Figure A)
–
Alternate tapping left and right ends until both are
locked into place.
–
Add end caps (included) at the top of the uprights for a
finished appearance. (Figure B)
If you have a longer solution, repeat above steps 1, 2 and 3
as necessary. After all of the sections are added, place end
caps and center caps (included) at the top of the uprights
for a finished appearance. (Figure B, Figure C)
–
Before adding other components, adjust levelers as
needed with the wrench included with the feet.
–
Lay the wire shelf across the span between the feet.
The support wires should run along the bottom of the
shelf.
–
Place the last shelf wire over the middle of each foot.
(Figure D)
–
Start at the back of the shelf. Slip the shelf clip over
the last shelf wire; it will snap into the notches on both
sides of the foot. (Figure E)
–
Repeat for all four corners of the wire shelf.
–
If your design calls for two shelves to share one foot,
begin by attaching the clips at the joined shelves first,
then clip the opposite ends of both shelves.
1
A
B
C
D
F
G
Continue: Assemble a double sided solution
To attach a wire shelf to the feet
To install back stop bar
Identify the top of the back stop bar as shown in Fig F.
–
Holding the back stop bar at a slight angle, slide the top
tabs of the back stop bar up into the upright. (Fig F)
–
Press the back stop bar down to lock it in place. (Fig G)
You can now install other components as directed in the
assembly instructions for Classic and Décor.
E
Elfa Lumi AB
Elfagatan 5, 593 87 Västervik
Tel: +46 392-389 10 Fax: +46 392-361 25. E-mail: [email protected]