Freestanding, Assemble a single sided solution – Elfa Freestanding User Manual
Page 3
www.elfa.com
Sida 3 av 5
1
Freestanding
Assemble a single sided solution
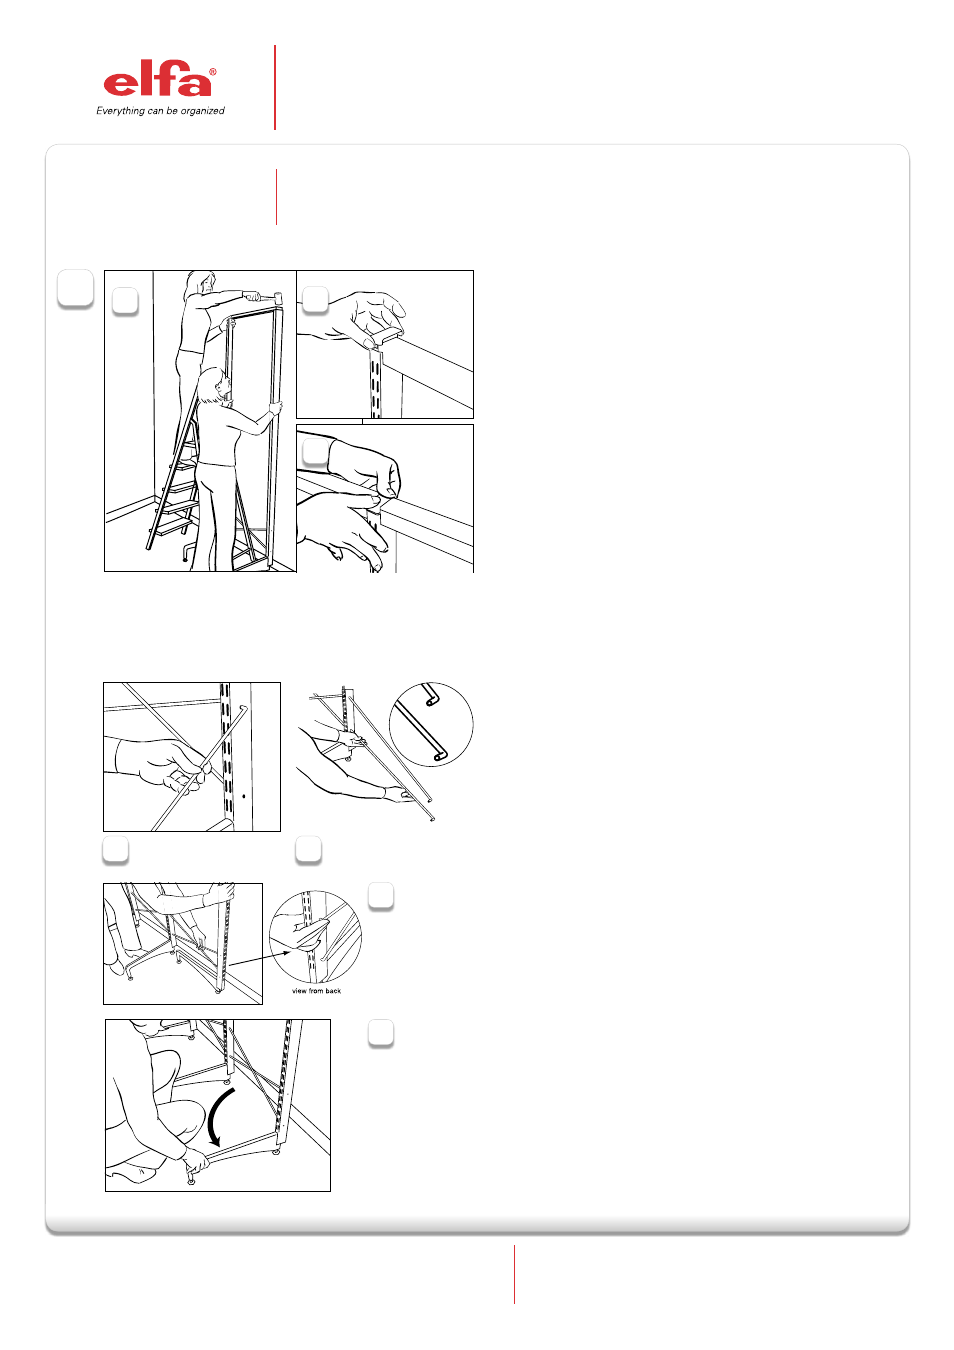
When assembling a 83”/2124 mm unit, use a ladder or step stool to reach the top of
the solution. Another person should hold the uprights in place as you tap the stabiliza-
tion bar into the top of the uprights.
NOTE
Insert stabilization bar
–
Stand the unit upright and position it at the desired loca-
tion against the wall.
–
Secure the stabilization bar by tapping both ends into the
top of the two uprights with the plastic mallet. (Figure A)
–
Alternate tapping left and right ends until both are locked
into place.
If assembling a wider solution, proceed to the next section.
–
If assembling a 2’/607 mm wide solution, you can now
add end caps (included) to the top of the uprights for a
finished appearance. (Figure B)
Install other components as directed in the assembly instruc-
tions for Classic or Décor.
–
Once you’ve added all components, adjust levelers as
needed with the wrench included with the feet.
–
Insert upright into foot as directed in Step 1.
–
Insert one crossbrace into the top hole on the side of
the upright to the completed section (FigureD); insert
the other crossbrace into the bottom hole. The bent tips
on the unattached end of each crossbrace should point
forward. (Figure E)
–
Position the third upright so that the foot points toward
the already completed section. (Figure F)
–
Insert the unattached ends of the crossbraces diagonally
into the third upright. (Figure E) Pull the third upright back
to the forward position (so that the foot is facing forward.)
This locks the crossbraces into place. (Figure G)
–
Add the stabilization bar as shown in step 3 above. Tap
the stabilization bar into the shared upright first, then the
third upright.
–
Alternate tapping left and right ends of the stabilization
bar until both are locked into place.
–
Repeat this process for additional sections.
–
Add end caps and center cap(s) (included) at the top of
the upright for a finished appearance. (Figure B, Figure C)
Install other components as directed in the assembly instruc-
tions for Classic or Décor.
–
Once you’ve added all components, adjust levelers as
needed with the wrench included with the feet.
D
F
G
E
A
B
C
Add a second section to a single sided solution
Elfa Lumi AB
Elfagatan 5, 593 87 Västervik
Tel: +46 392-389 10 Fax: +46 392-361 25. E-mail: [email protected]