Check and adjusting the knife to wear plate gap – DR Power 8 FPT User Manual
Page 21
CONTACT US AT www.DRpower.com 21
5. While applying a counterclockwise force with the Allen Wrench, apply heat
from a propane torch to the Screw to break loose the Loctite
®
securing the
screw.
NOTE: Remove the heat once the Screw has loosened and remove the Screw.
Tip: You may have to block the Flywheel in place while loosening the Screws
(Figure 22).
6. Repeat Steps 4 and 5 for the remaining two Allen Screws.
7. Remove the dull or damaged Knife and visually inspect the Chipper Disk Slot
and Knife mounting area and be sure they are clean. Metal burrs may need
filing so that the replacement Knife will be able to mount flush against the
Chipper Disk.
8. Apply Loctite
®
243 to the three new Allen Screws supplied with a new Knife or
to the original screws if replacing with a sharpened Knife.
9. Install a new or sharpened Knife and finger tighten the Allen Screws to hold
the Knife to the Chipper Disk.
10. Using a 3/16" Allen Wrench, tighten the center Screw, then tighten the outer
Screw, and finally tighten the inner Screw.
11. Double-check all three Screws for tightness one more time.
12. Reinstall the Access Cover.
13. Check the gap between the Knife and Wear Plate and adjust if required.
Check and Adjusting the Knife to Wear Plate Gap
When you replace the Knife, check and set the clearance between the Knife and
Wear Plate. Set this clearance or gap to 1/16" (Figure 23). If the gap between
the Wear Plate and the Knife is not set correctly, you will have excessive vibration
when chipping and the Knife will seem to be dull. The Wear Plate should have a
square edge and be free of dents or gouges. The Wear Plate can be hand
sharpened. Be careful not to overheat it during the sharpening process. This will
change the characteristics of the steel and you will then have to replace the Wear
Plate.
Tools Needed:
1/2" Wrench
7/16" Wrench
Gap Gauge (provided with machine)
1. Remove the Chipper Hopper by performing the steps on page 11 in the
reverse order.
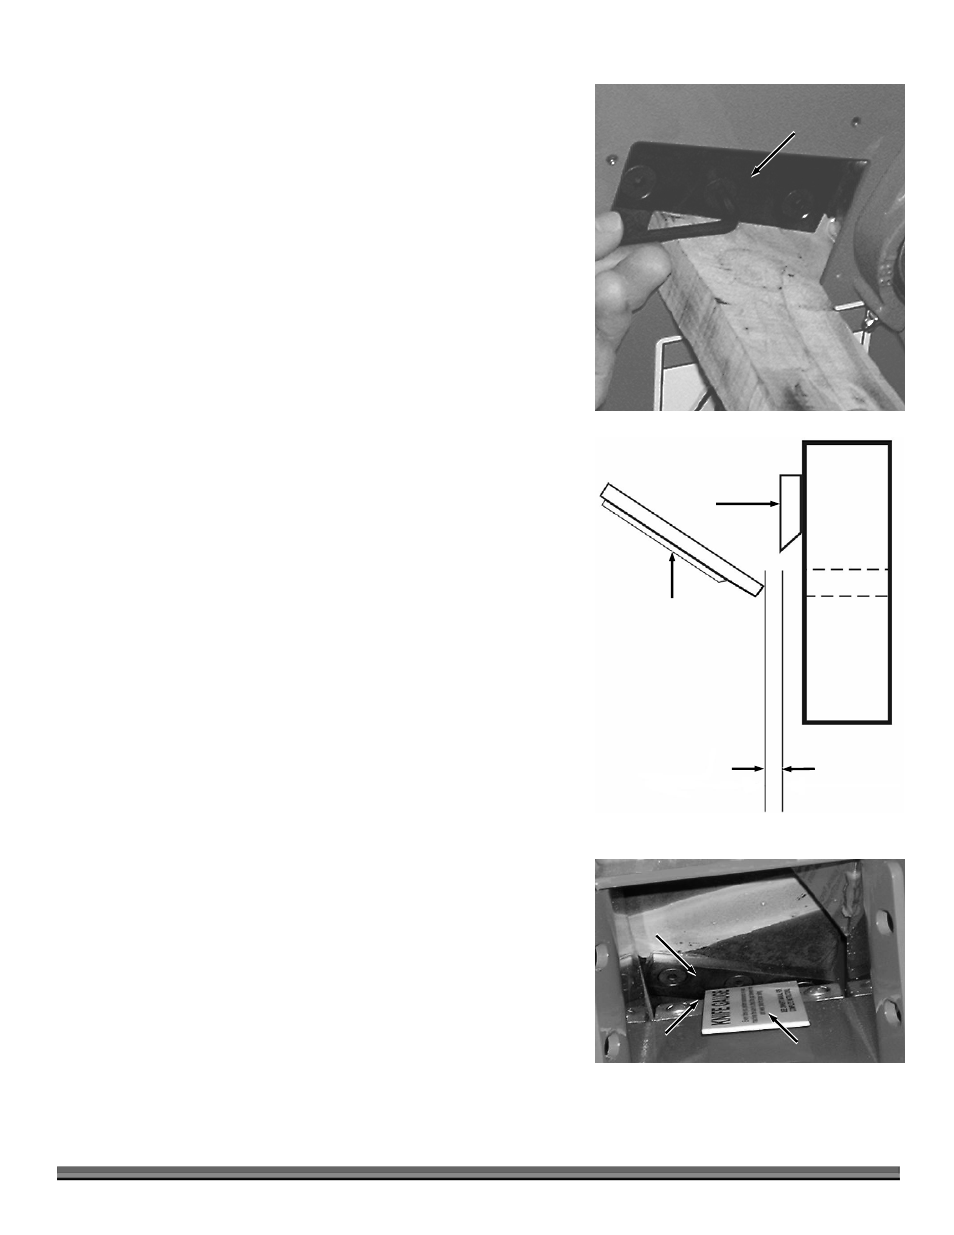
2. Using a stick, rotate the Chipper Disk until the Knife is opposite the Wear
Plate (Figure 24).
3. Slide the Gap Gauge between the Knife and Wear Plate (Figure 24). If the gap
is set correctly, the Gap Gauge will lightly touch both the Knife and Wear
Plate. If the gap is too small, you will not be able to get the Gauge between
the Knife and Wear Plate. If the gap is too large, there will be excess room
between Gap Gauge, Knife, and Wear Plate.
Knife
Wear Plate
Flywheel
1/16
"
Figure 23
Block
Knife
Figure 22
Knife
Gap Gauge
Figure 24
Wear Plate