500er owner’s manual – Diamondback 500ER User Manual
Page 13
500Er Owner’s Manual
13
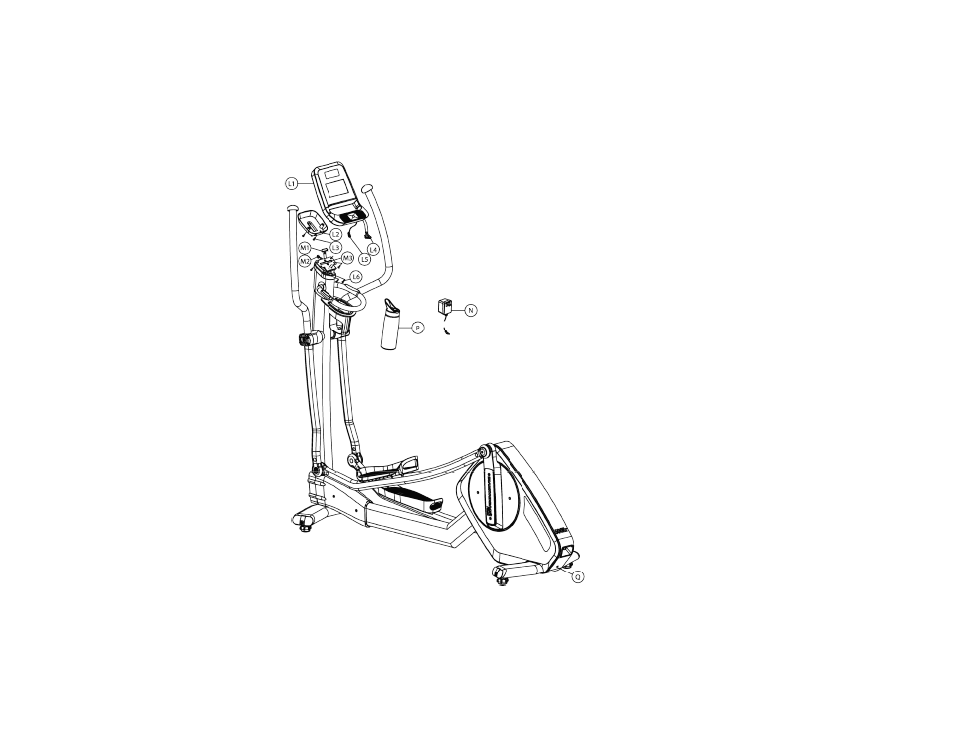
24. Remove the two (2) Philips screws (L3) and the
console hinge cover (L2) from the back of the console
(L1) and set aside.
25. Remove the four (4) Philips console mounting screws
(L6) from backside of the console (L1) and set aside.
26. While supporting the console (L1), carefully join
connectors L4 with M1 and L5 with M2. Apply firm
pressure to ensure positive engagement.
27. Reinstall the four (4) Philips machine screws (L6)
through the underside of the tilting console hinge
plate (M3) and into the correct holes in the backside
of the console L1.
28. Tilt the console rearward, and align the hinge cover
(L2) with the appropriate holes in the backside of the
console. Reinstall the two (2) Philips wood screws
(L3).
29. Place the water bottle (N) in the holder.
30. Plug the power adapter (P) into a 120 volt outlet. Plug
the other end into the input jack (Q).
31. Check the stability of the unit. If required, adjust the
leveling feet to eliminate any rocking of the unit while
in use. Lock the feet in place by tightening the nut
upward (counter‐clockwise) against the frame.