Modify templates – Daktronics Standard Video Media Kit User Manual
Page 5
7
5
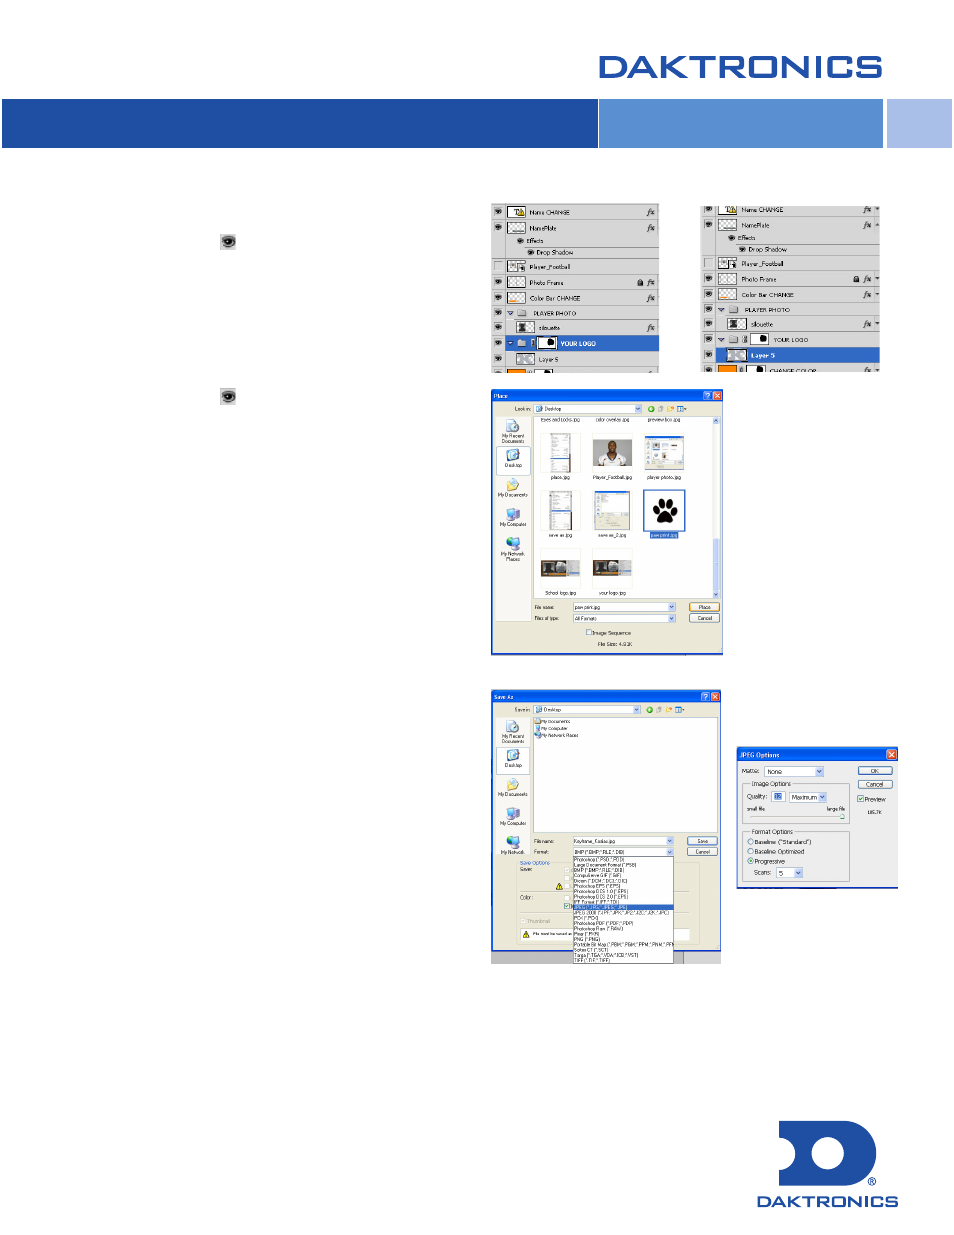
Adding your school logo in the background:
• Click on the “Eye” ( ) for YOUR LOGO layer and a
default logo will pop up.
• Click on the arrow in the layer and be sure the layer
containing the default logo is selected.
• Go to File > Place.
• Find the file containing the logo and click Place.
• Adjust size and placement, then double-click to place.
• Click on the “Eye” ( ) to remove the default logo; this will
ensure it does not appear but your school logo will appear.
8
When all adjustments to the template have been made:
• Go to File > Save and save as a “.psd”, to save the
changes to your template.
• Then go to File > Save As and save as a “.jpeg”,
to create the individual player headshots for your display.
• In the JPEG Options window, move the slider bar all the
way to the right to select Maximum quality.
• Click OK.
9
Repeat steps 4 through 8 to input additional players’
information and photos, and save each one as a JPEG.
DD2062337 Rev 01 061512
Copyright © 2011-2012 Daktronics, Inc.
Modify Templates