Cybex 18000-FT-325 Bravo User Manual
Page 14
14
Cybex Owner’s Manual
Install individual weight plates one at at time
1. Position each weight plate so wide edges of bushings face upward and narrow edges of
bushings face downward.
CORRECT
Wide bushing
edge faces upward
The narrow bushing edge
must face downward.
WRONG
2. Install lifting post.
3. Snap guide rods in to position.
Cable routing
1. Place a small amount of loctite® on BHSCS and inside threads of ball stop.
2. Secure cable to ball stop using a 1/8” Allen wrench.
3. Reconnect handle, pulley and cable to platform on both sides.
4. Position pulley mount parallel to the top weight.
5. Pull down on pulley mount until cable is tight.
6. Verify cable is still routed through all pulleys.
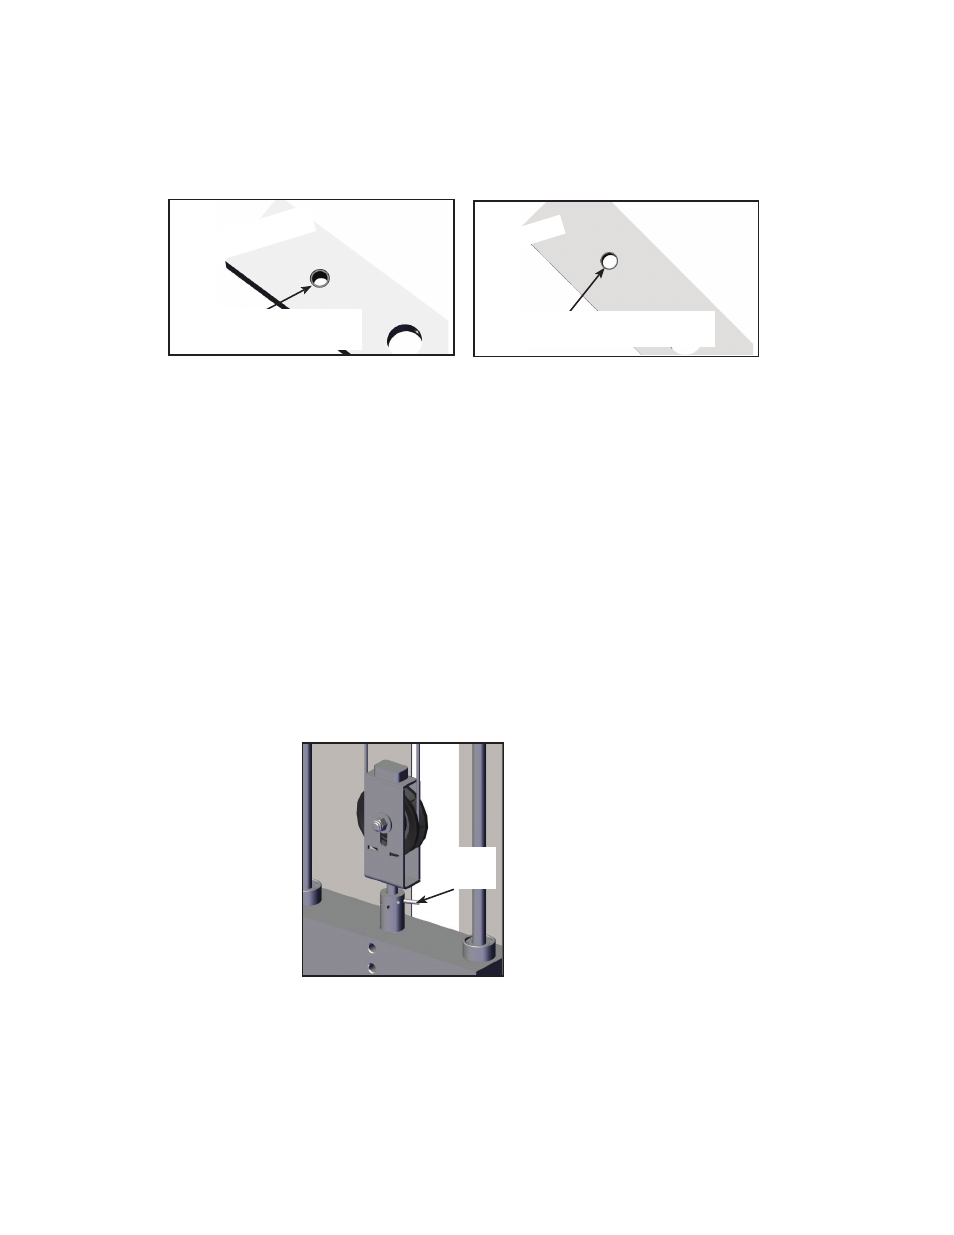
7. Attach pulley mount to lifting post with spiral pin using a hammer and 3/16” pin punch.
Spiral
pin
8. Lift top weight up and down simulating normal operation (without selecting any resistance).
9. Verify the cable is moving smoothly.
Install back panels
Verify proper operation
- 19001 Big Iron Half Rack 19011 Big Iron Half Rack 19021 Big Iron Multi Rack 19031 Big Iron Multi Rack 16240 Free Weight Power Cage 16185 Free Weight Dip Chin Leg Raise 16010 Free Weight Olympic Bench 16600 Free Weight Circuit Step 16200 Plate Loaded Hack Squat 16121 Plate Loaded Smith Press 16101 Plate Loaded Overhead Press 16105 Plate Loaded Overhead Press 16080 Plate Loaded Chest Press 16190 Plate Loaded Incline Press 19041 Big Iron Power Rack 19051 Big Iron Power Rack 18010 Bravo Press 16230 Free Weight Squat Rack 16180 Free Weight Leg Raise Chair 18022 Bravo 18020 Bravo Pull 18021 Bravo Pull