Temperature monitoring getting started, How to change modes after initial set-up – CompX eLock Temperature Monitoring Programming User Manual
Page 2
Temperature Monitoring
Getting Started
1.
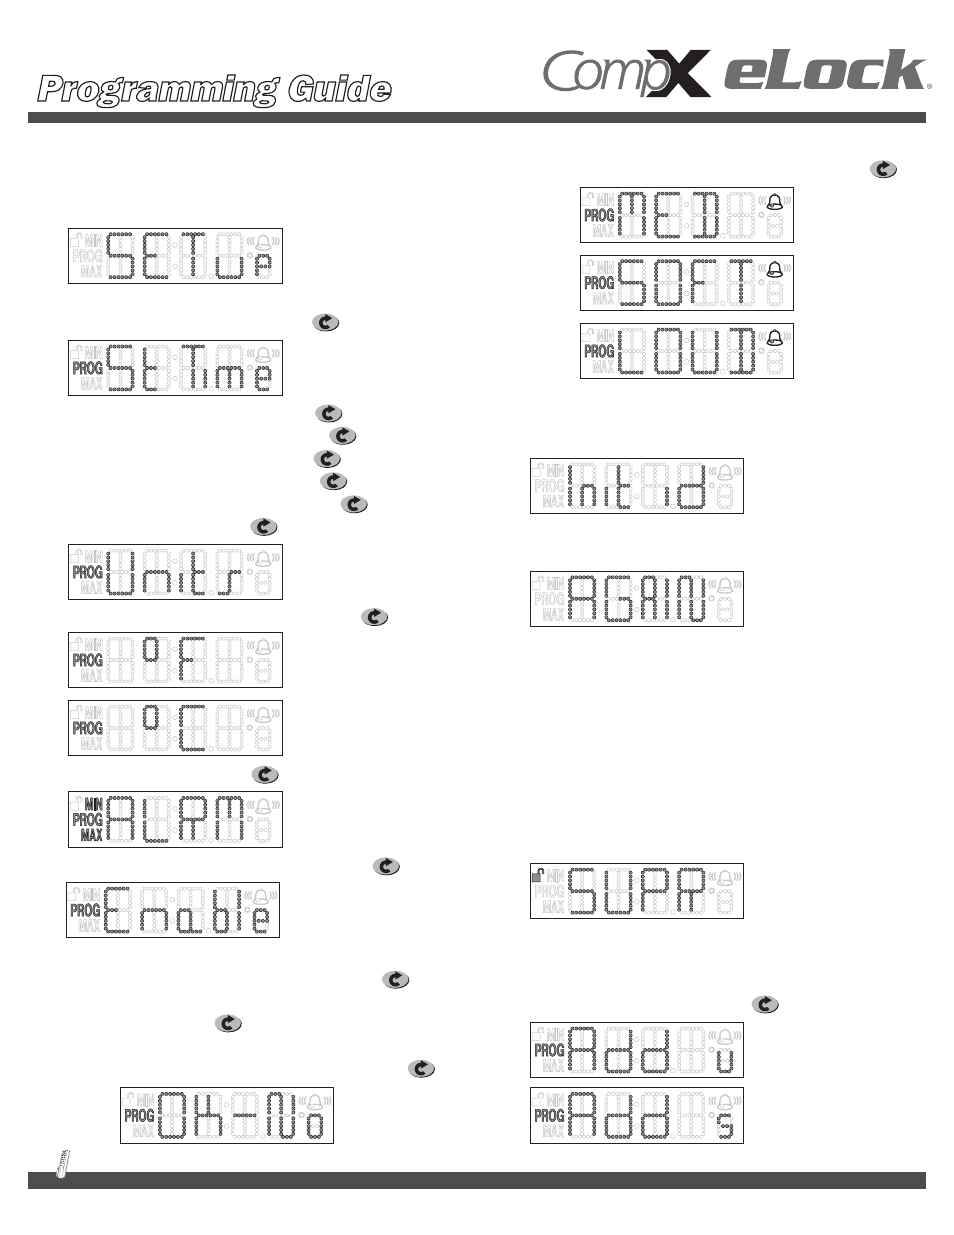
Unit is shipped in “Set-up” mode. Once 6AA batteries
(not included) are installed, the LCD will say “SET up."
2.
Press and hold # (about three seconds) to get started.
3.
LCD will display ST Time (set time). Hit .
4.
Set Year using up and down arrows. Hit .
5.
Set Month using up and down arrows. Hit .
6.
Set Day using up and down arrows. Hit .
7.
Set Hour using up and down arrows. Hit .
8.
Set Minutes using up and down arrows. Hit .
9.
Display will show “Units." Hit .
10. Choose ˚F or ˚C with up and down arrows. Hit .
11. Display will show “ALRM." Hit .
12. Enable or disable alarm with up or down key. Hit .
a. If enabled, minimum degrees will appear.
Adjust using up and down arrows and hit .
b. Adjust Maximum degrees using up and down
arrows and hit .
c. If you want to disable the alarm, press the up or down
arrow until it says “Enable – Okay No” and hit .
d.
Adjust speaker volume, 3 possible settings, LOUD,
MED, SOFT, by using up and down keys and hit .
13. The unit will display “Init ID” which is prompting you to program
the initial credential. Remember, the first credential is always
a Supervisor and goes into Slot 001.
14. Enter PIN or present card followed by #.
15. Unit will display “AGAIN” for confirmation of the code / card.
16. Enter PIN or present card followed by # again.
17. The unit is now successfully initialized. The LCD display will
alternate time and temp.
How to Change Modes
After Initial Set-up
Adding users or AdditionAl supervisors:
1.
Enter supervisor code/card and press #. Display will show “Supr.”
2.
Press and hold # (again) for about three seconds.
3.
Display will show “Add u” which means add user. If you use
the up or down arrow, the display will show “Add s” which
means add supervisor.
4.
Pick either “Add u” or “Add s” and hit .
2