Installer mode, Configuration – Cloud Electronics CDR-1B User Manual
Page 15
CDR‑1 & CDR‑1F Installation Guide v2.0
15
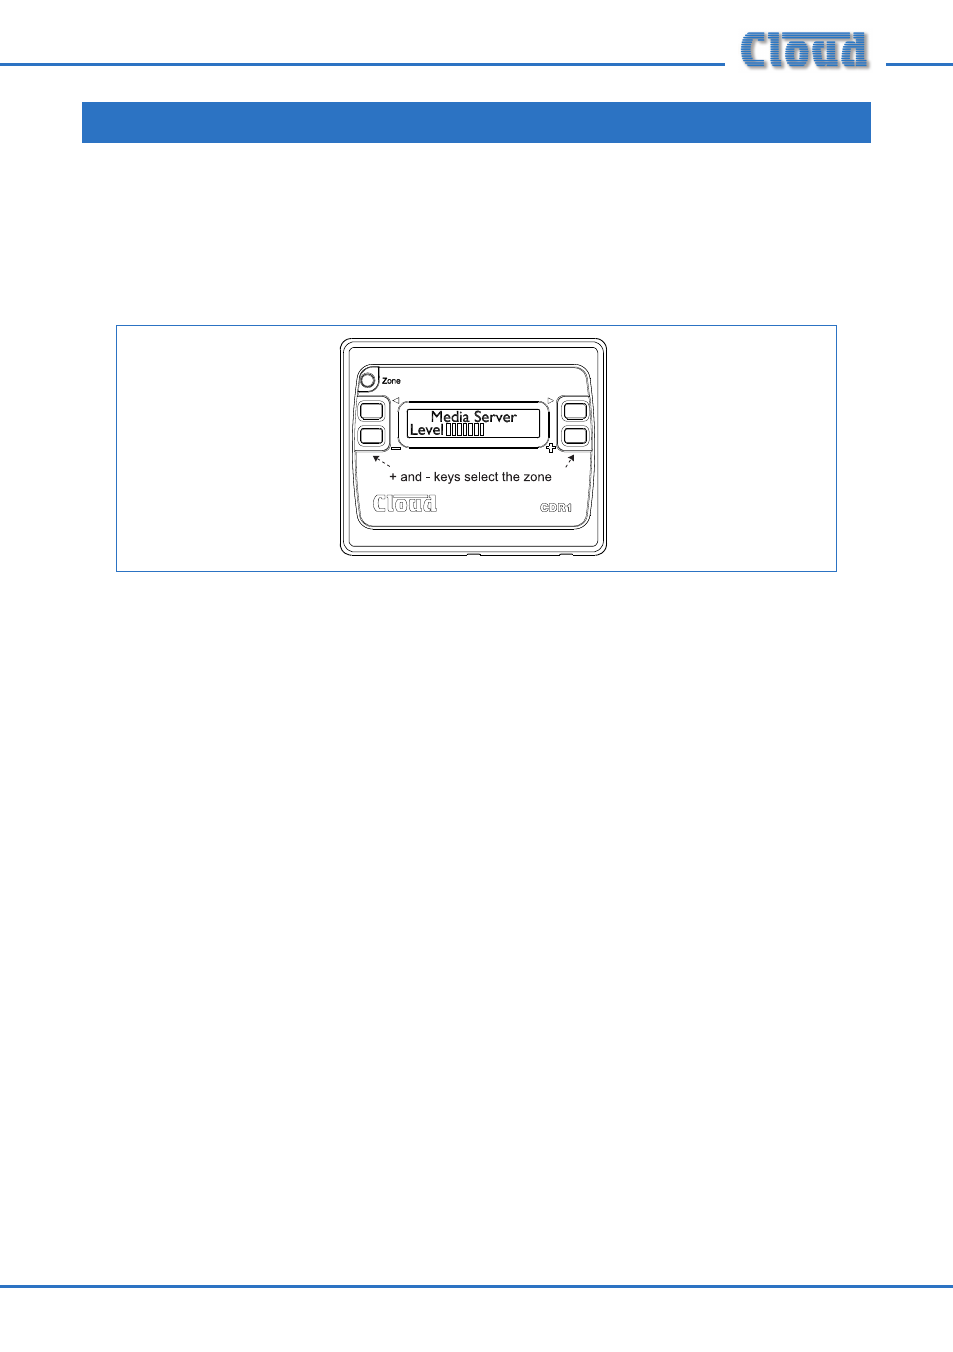
Each CDR must be assigned to a zone; this will normally be the zone in which it is
physically located. As shipped from the factory, a CDR has no zone assigned, and when
powered for the first time it will first display the backlight/contrast adjust screen, and
then prompt for a zone assignment before continuing, as shown below:
Use the + and – keys to scroll to the zone required, unless Zone 1 is correct. Press the
ZONE button to accept the assignment (the display changes to the Set Key screen);
after a few seconds, the CDR will enter normal User Mode, with the zone assignment
confirmed.
If it is necessary to change the zone assignment at a later date for any reason, this can
be done by putting the CDR into Installer Mode (see below).
Installer mode
To put the CDR in Installer Mode:
•
Remove the CDR from its back box or mounting position by removing the two M3
screws at the bottom of the housing in the case of the CDR-1, or by removing the
two front fixing screws in the case of the CDR-1F. Retain the screws.
•
Remove power from the CDR, either by powering the system down or removing
the POWER IN connector.
•
Move jumper J1 from OFF to ON
•
Reapply the power
Configuration