Step 2, Step 3, Source connection – Cetacea Sound Astronaut 002 User Manual
Page 7: Power connection
11
12
Step 2 |
Source Connection
Power Connection
|
Step 3
PLEASE READ THIS GUIDE THOROUGHLY & VISIT OUR WEBSITE FOR ADDITIONAL INFORMATION
www.cetaceasound.com
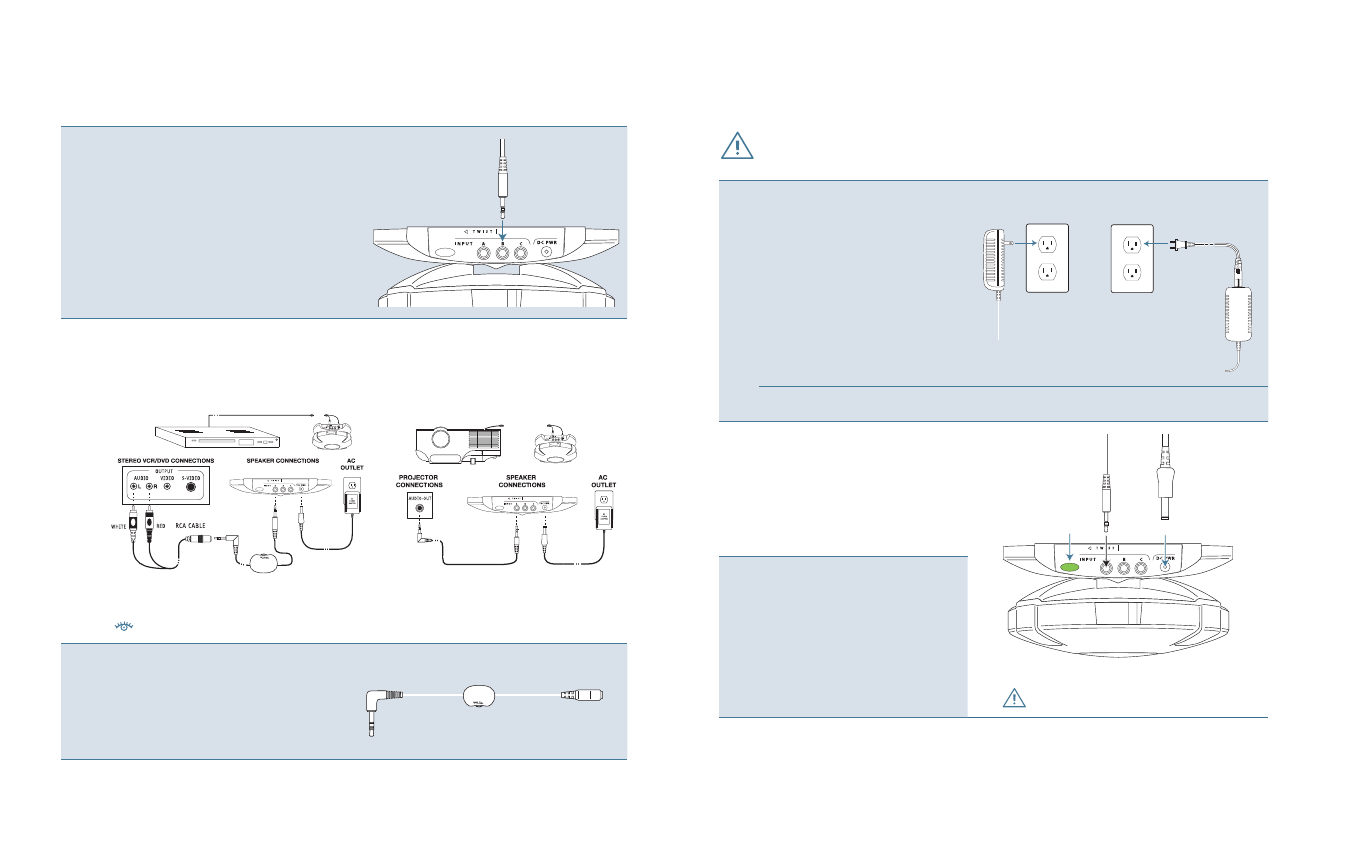
Step 2
Source Connection
2-1
Cables & Connections
Connect the source to the Astronaut with
high quality cables and connectors. The
Astronaut has a built in 3-channel mixer
and any input (A, B, or C) can be used.
Jacks are 3.5mm minis.
2-2
Connection Diagrams
Stereo VCR/DVD Connections
(Line Level - Fixed Output)
Projector Connections
(Variable Output)
NOTE: Some equipment may have variable output. Not all projectors have suitable audio outputs.
See website for additional connection diagrams.
2-3
Volume Control
If using a variable output, control the
volume at the source. If using a fi xed
output as the source, an in-line volume
control or mixer can be used instead.
In-line Volume Control, #AB-163
Step 3
Power
Connection
DO NOT CONNECT SPEAKER TO POWER UNTIL AFTER STEPS 1 & 2 HAVE
BEEN COMPLETED AND AT LEAST ONE SOURCE CABLE IS CONNECTED.
3-1
High Voltage Connection
Wall Mount Power Supply
#FW-PSE1515W
Choose this power supply when the AC outlet
is near the mounting location. Typically, the
power source is shared with and located near
a projector.
Desktop Power Supply
#FW-PSE1515D
Choose this power supply when the AC outlet
location requires AC power extension cables.
Wall Mount
Desktop
NOTE: We offer optional length power cords for long-run applications and other custom installations (refer to page 6).
3-2
Low Voltage Connection
The low power barrel connector
"J" can now be plugged into the
speaker. Plugging/unplugging this
connector will turn the speaker
on and off.
J
K
3-3
Power Up
When the connector barrel is
plugged into the speaker the
internal
GREEN
light "K" will turn
on, indicating the speaker is on.
Turn on your sound and adjust
the volume.
MAKE SURE ALL SOURCE CABLES ARE CONNECTED
BEFORE PLUGGING IN POWER BARREL.