Timekeeping, Operation guide 3047 – Casio Модуль 3047 User Manual
Page 9
Operation Guide 3047
9
Battery Power Indicator and Recover Indicator
The battery power indicator on the display shows you the current status of the
rechargeable battery’s power.
Battery power
indicator
Level
1
2
3
4
5
Battery Power Indicator
Function Status
All functions enabled.
All functions enabled.
Illumination, beeper tone,
receive operation, and sensors
disabled.
All functions disabled.
All functions disabled.
All settings revert to factory defaults.
(Charge Soon Alert)
l l l l
ll
ll
ll
ll
ll
ll
l l
l l l l l
l l
l
l
l
ll
ll
ll
l
l
l
l l
l l
(Charge Soon Alert)
l l ll
lll
ll
ll
ll
ll
ll
l l l l l l
• The flashing
LOW
LOW
LOW
LOW
LOW
indicator at Level 3 and the CHG indicator flashing at
Level 4 tell you that battery power is very low, and that exposure to bright
light for charging is required as soon as possible.
• At Level 5, all functions are disabled and settings return to their initial
factory defaults. Once the battery reaches Level 2 (M) after falling to Level
4, reconfigure the current time, date, and other settings.
• Display indicators reappear as soon as the battery is charged from Level 5
to Level 2.
• Leaving the watch in direct sunlight or some other very strong light source
can cause the battery power indicator to show a reading temporarily that is
higher than the actual battery level. The correct battery power indicator
should appear after a few minutes.
• If you use illumination or the alarm a number of
times during a short period, RECOV appears
on the display and the illumination, alarm,
hourly time signal, and sensor operations
become disabled until battery power recovers.
After some time, battery power will recover and
RECOV will disappear, indicating that the
above functions are enabled again.
Recover indicator
• Even if battery power is at Level 1 or Level 2, the Digital Compass Mode,
Barometer/Thermometer Mode, or Depth Gauge Mode sensor may be
disabled if there is not enough voltage available to power it sufficiently. This
is indicated by RECOV on the display.
If battery power goes low while a measurement operation is in progress,
the value produced by the last successful measurement operation remains
on the display. Attempting a measurement operation while battery power is
too low will cause the display to go blank.
Sensor operation should resume when battery voltage returns to normal levels.
• If RECOV starts to flash on the display when you enter the Depth Gauge Mode
(before starting measurement), the log data date will not be recorded if you
start measurement after RECOV disappears from the display. In this case, exit
and re-enter the Depth Gauge Mode, and then start the measurement again.
• If RECOV starts to flash while a Depth Gauge Mode depth measurement
operation is in progress, the measurement operation will continue. Though
the elapsed measurement time will be recorded in log memory, maximum
depth and water temperature values are not. In this case,
xx
.
x
is displayed
in place of the maximum depth and water temperature. After you surface
from your dive, hold down D for about three seconds to exit the Depth
Gauge Mode to clear RECOV.
• If RECOV appears frequently, it probably means that remaining battery
power is low. Leave the watch in bright light to allow it to charge.
Charging Precautions
Certain charging conditions can cause the watch to become very hot. Avoid
leaving the watch in the areas described below whenever charging its
rechargeable battery.
Also note that allowing the watch to become very hot can cause its liquid
crystal display to black out. The appearance of the LCD should become
normal again when the watch returns to a lower temperature.
Warning!
Leaving the watch in bright light to charge its rechargeable battery can
cause it to become quite hot. Take care when handling the watch to
avoid burn injury. The watch can become particularly hot when exposed
to the following conditions for long periods.
• On the dashboard of a car parked in direct sunlight
• Too close to an incandescent lamp
• Under direct sunlight
Charging Guide
After a full charge, timekeeping remains enabled for up to about five months.
• The following table shows the amount of time the watch needs to be
exposed to light each day in order to generate enough power for normal
daily operations.
• Since these are the specs, we can include all the technical details.
• 6 minutes of time calibration reception per day
• Display on 18 hours per day, sleep state 6 hours per day
• 1 illumination operation (1.5 seconds) per day
• 10 seconds of alarm operation per day
• 1 direction reading (20 seconds continuous measurement) per day
• 30 seconds of Barometric/Thermometer Mode measurements per day
• Stable operation is promoted by frequent exposure to light.
Approximate
Exposure Time
5 minutes
24 minutes
48 minutes
8 hours
Exposure Level (Brightness)
Outdoor Sunlight (50,000 lux)
Sunlight Through a Window (10,000 lux)
Daylight Through a Window on a Cloudy Day (5,000 lux)
Indoor Fluorescent Lighting (500 lux)
Recovery Times
The table below shows the amount exposure that is required to take the
battery from one level to the next.
• The above exposure time values are all for reference only. Actual required
exposure times depend on lighting conditions.
Approximate Exposure Time
Level 5
Level 4
Level 3
Level 2
Level 1
2 hours
13 hours
6 hours
4 hours
66 hours
30 hours
8 hours
134 hours
60 hours
83 hours
- - - - - -
- - - - - -
Exposure Level
(Brightness)
Outdoor Sunlight
(50,000 lux)
Sunlight Through a
Window (10,000 lux)
Daylight Through a
Window on a Cloudy
Day (5,000 lux)
Indoor Fluorescent
Lighting (500 lux)
▲
▲
▲
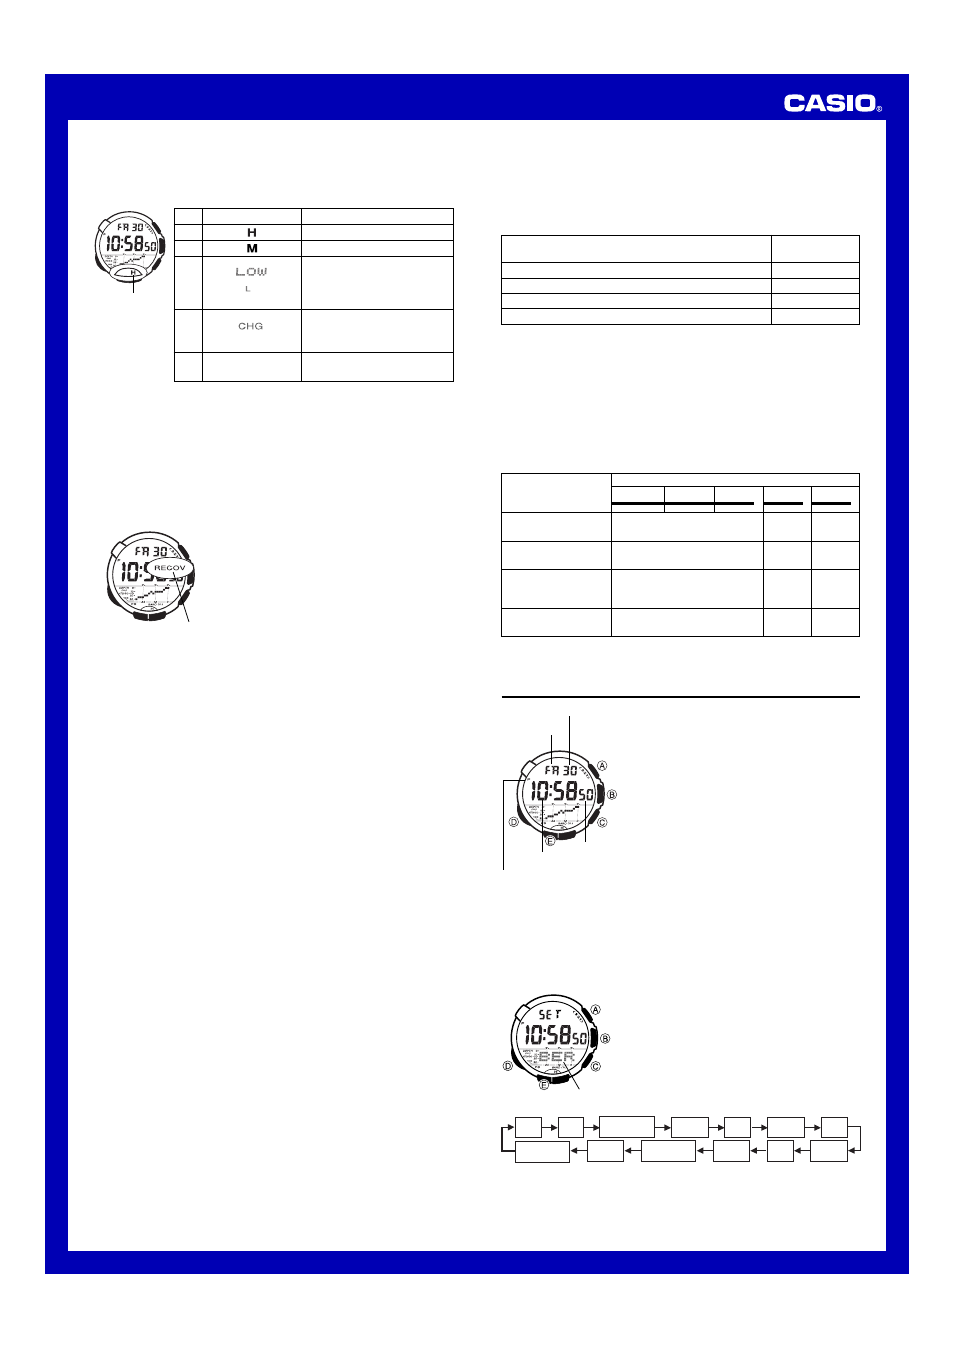
Timekeeping
Use the Timekeeping Mode to view the current
time and date. You also need to enter the
Timekeeping Mode to configure timekeeping
settings, as well as the following settings.
• Power saving on/off (“To turn Power Saving on
and off”)
• Temperature unit (“To specify barometric
pressure and temperature units”)
• Depth unit (“To specify the depth unit”)
• Barometric pressure unit (“To specify
barometric pressure and temperature units”)
Hour : Minutes
PM indicator
Seconds
Day
Day of week
Setting the Time and Date Manually
Make sure you select your Home City code before you change the current
time and date settings. World Time Mode times are all displayed in
accordance with the Timekeeping Mode settings. Because of this, World Time
Mode times will not be correct if you do not select the proper Home City code
before setting the time and date in the Timekeeping Mode.
To set the time and date manually
1. In the Timekeeping Mode, hold down E until
the city code starts to flash, which indicates
the setting screen.
2. Press D to change the flashing contents in
the sequence shown below to select other
settings.
l l l
ll
ll
ll
ll
ll
ll
l l
l l l l
City
code
Seconds
Hour
12/24-Hour
Format
Minutes
Year
DST
Month
Day
Power
Saving
Temperature
Unit
Barometric
Pressure Unit
Depth
Unit
City
Code