Belshaw Adamatic HG18C Glazer User Manual
Page 18
Belshaw Bros., Inc.
• www.belshaw.com • Phone 206-322-5474 • Fax 206-322-5425
2
MN-1753EN
HG / HGEZ Standard & Under Counter TS
Refer to photos and assembly drawings as
needed. Numbers in ( ) refer to Figure 1 unless
otherwise noted.
1. Unpack the Glazer completely and wash all
parts with mild soap.
2. Place the cover brackets (12 & 13) on one
side of the frame. Item 12 hangs on the top
rail of the frame underneath the edge of the
kettle. Item 13 hangs on the lower rail of the
frame.
3. Install the kettle into the frame with the glaze
trough over the braking casters.
4. Screw the drain (6) onto the bottom of the
kettle drain hole. Make sure it is closed.
5. Snap the glaze diverter (5) on the edge of the
glaze trough, in the center.
6. Place the screen support into the kettle; the
long side supports toward the glaze trough.
Figure 1-4. Applicator frame connector.
7. HGEZ: Mount the applicator frame on top of
the kettle, inserting the two "buttons" on the
applicator frame into the holes on the screen
support (Figure 1-4).
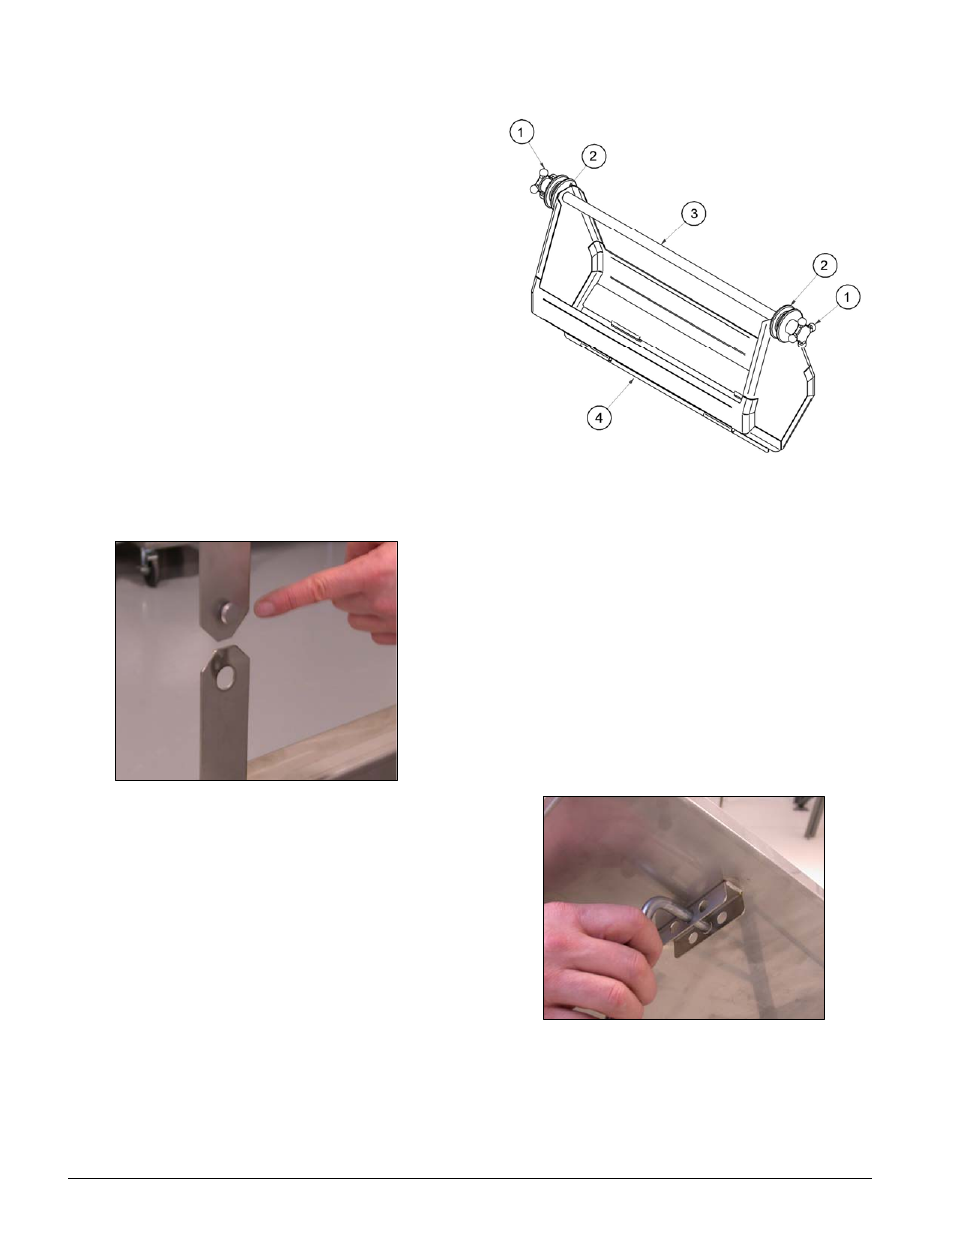
8. Assemble the glaze applicator.
a. The handles (1), rollers (2), and shaft (3)
are attached to the top of the glaze
applicator. See Figure 1-5.
b. Install the applicator gates (4) by
inserting the tabs, curving upwards, into
the applicator slots from the inside and
rotating to hold in place.
Figure 1-5. HGEZ Glaze applicator
9. HGEZ: Put the glaze applicator on the
applicator frame, making sure it glides
smoothly on the rails.
10. Hang the lower drain tray brackets (14) on
the opposite side as the cover brackets (side
drain tray) or on the end away from the glaze
trough (end drain tray).
11. Hook the drain tray onto the upper frame
above the brackets.
12. Install the drain tray support rod. Insert the
cross bar of the rod into the lower brackets
and hook the ends into the desired hole on
the bottom of the drain tray (Figure 1-6).
Figure 1-6. Drain tray hook.