Setting the #5 dip switch, Setting the #8 dip switch to off – WaveWare Adaptive Serial LED Clock User Manual
Page 16
ALPHA Serial Clock Manual
10
Setting the #5 DIP switch
If the #5 DIP Switch is turned on, the clock will operate in slave mode,
regardless of the setting of the master/slave switch.
To change the #5 DIP switch settings:
1.
Unplug the adapter from the wall outlet.
2.
Use a Phillips screwdriver to remove the back plate from the serial clock.
3.
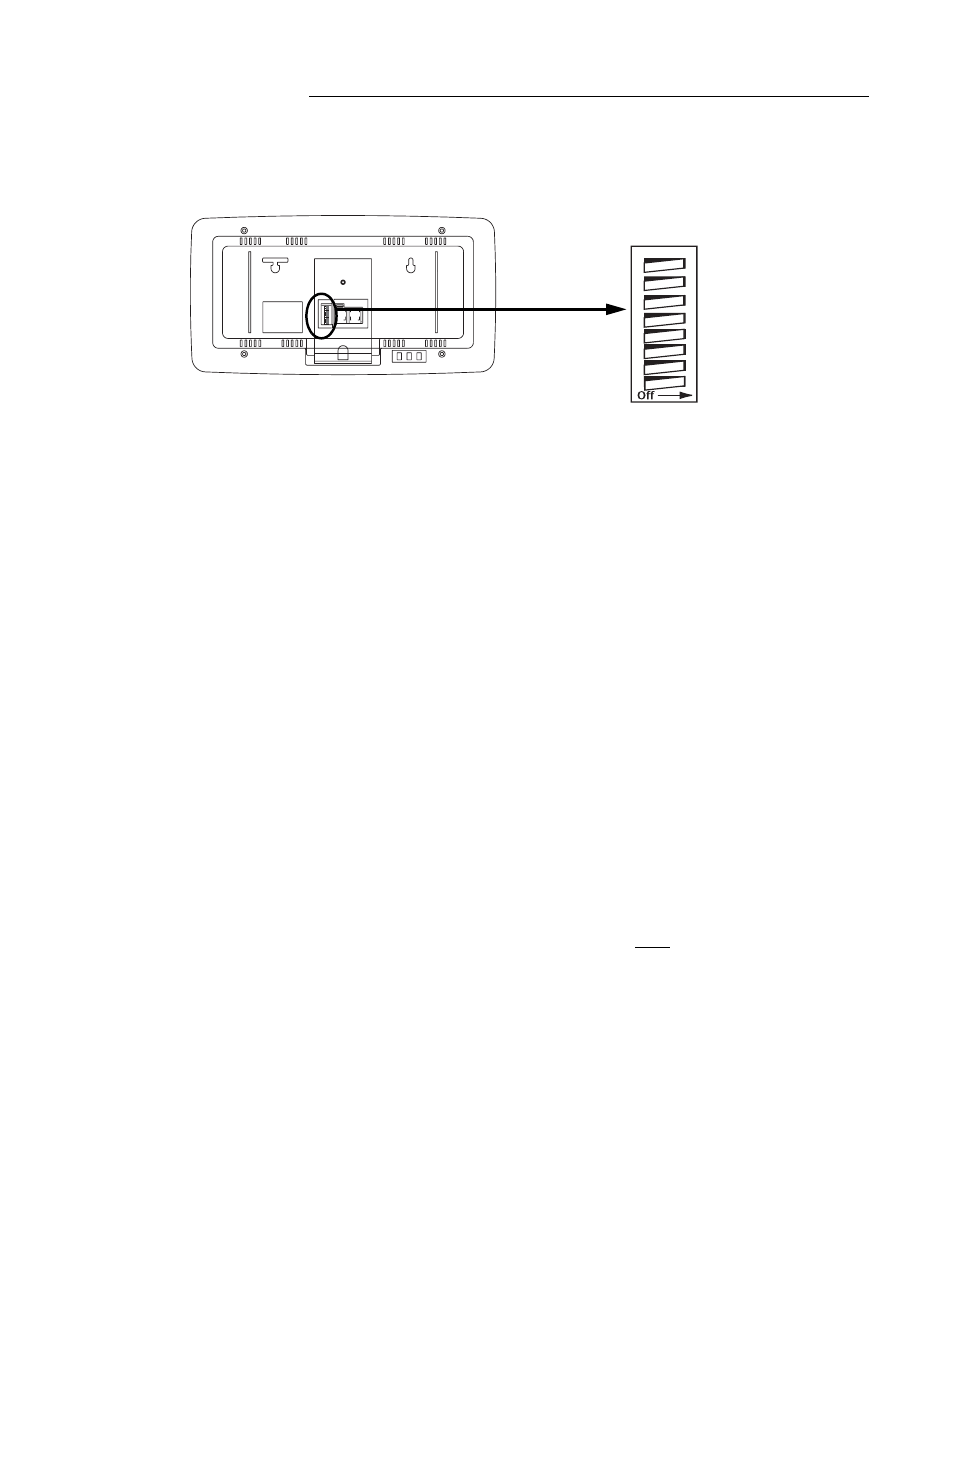
Locate the #5 DIP switch (See Figure 6: Setting the DIP Switches).
4.
Use the tip of a pen or small screwdriver to turn the DIP switch ON or OFF. The
clock is set to OFF when the clock is shipped from the manufacturer.
5.
Reattach the back plate to the serial clock.
6.
Plug the adapter into a 120V outlet.
NOTE: Steps 1 and 6 (above) must be done in order for changes to
the DIP switch settings to take effect.
Setting the #8 DIP switch to OFF
If the #8 DIP Switch is turned on, the clock will not operate properly.
So, if #8 DIP switch is on, turn it off this way:
1.
Unplug the adapter from the wall outlet.
2.
Use a Phillips screwdriver to remove the back plate from the serial clock.
3.
Locate the #8 DIP switch (See Figure 6: Setting the DIP Switches).
4.
Use the tip of a pen or small screwdriver to turn the #8 DIP switch OFF.
5.
Reattach the back plate to the serial clock.
6.
Plug the adapter into a 120V outlet.
#5 DIP Switch
Figure 6: Setting the DIP Switches