Wall mounting, Countertop or desk mounting – WaveWare Adaptive Serial LED Clock User Manual
Page 14
ALPHA Serial Clock Manual
8
Wall mounting
1.
Locate the keyhole slots on the back of the clock, at either end. The slots are placed
six inches apart (See Figure 1: Serial Clock—Rear Panel on page 1).
2.
Install two #8 screws into the wall/mounting surface, six inches apart. Use the type
of screws and anchoring methods appropriate for the mounting surface. For
example, use wood screws if you are mounting to a wood surface. (These screws
are not supplied.) Make sure that the heads of the screws are placed at least 3/8 of
an inch from the wall.
3.
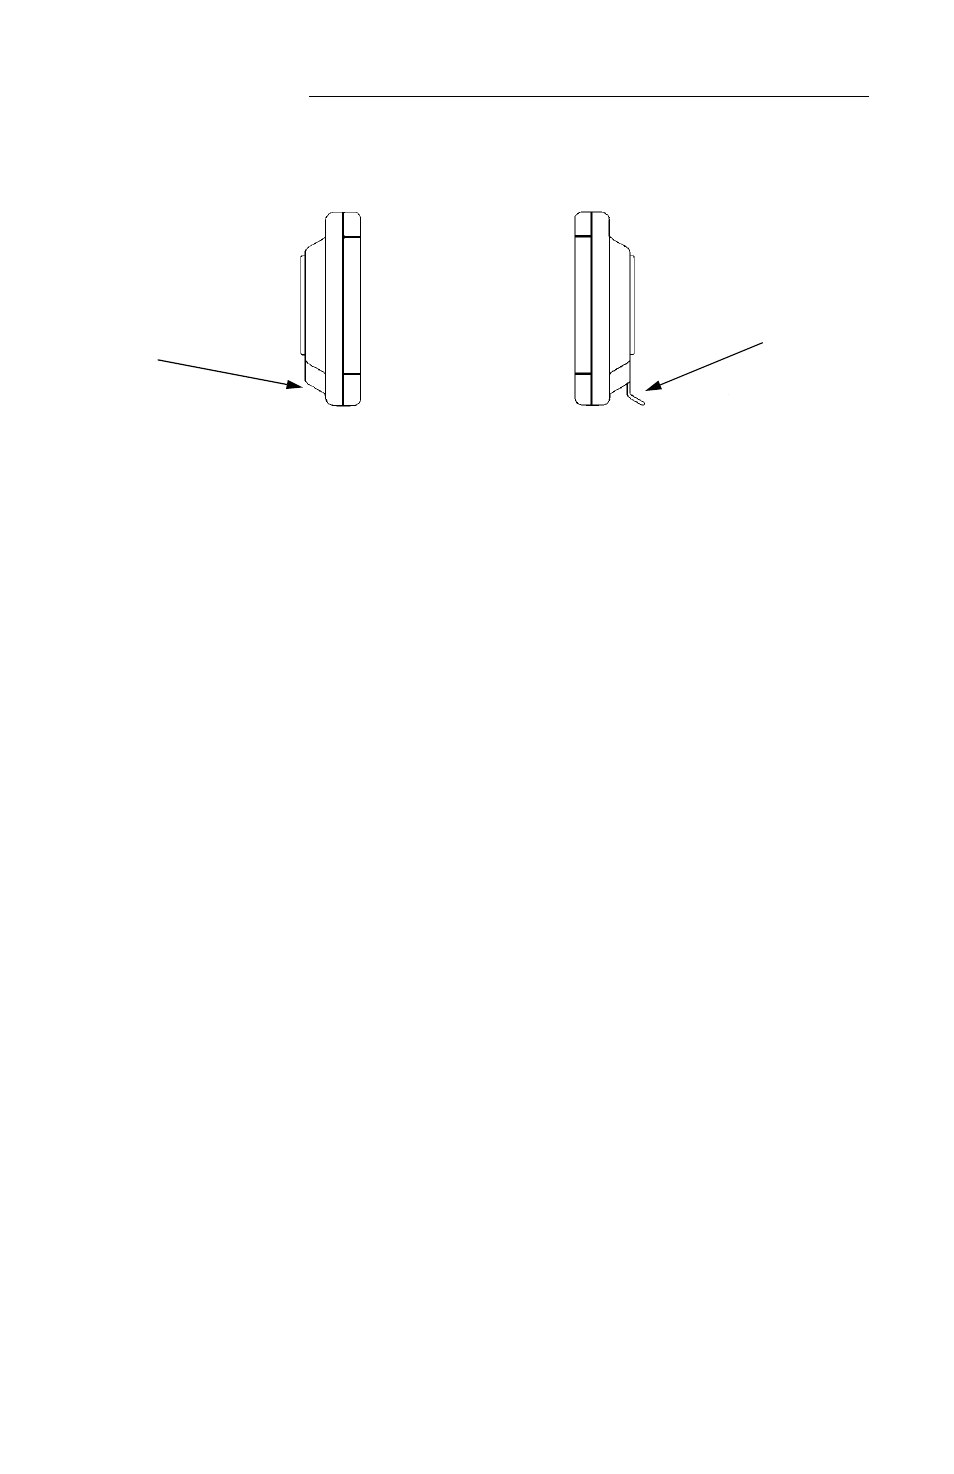
Insure that the plate and the feet are facing in, towards the backside of the clock
(See Figure 4: Serial Clock—Side View).
4.
Hang the clock on the two screws located on the wall/mounting surface, using the
keyhole slots.
Countertop or desk mounting
1.
Remove the screw and plate on the backside of the clock (See Figure 1: Serial
Clock—Rear Panel on page 1).
2.
Turn the plate over so that the “feet” protrude out (away) from the backside of the
clock (See Figure 4: Serial Clock—Side View). The plate can be adjusted up or
down to obtain the desired viewing angle.
3.
Replace the screw and stand the clock upright.
Plate is flush with
backside of
clock—”feet” are
hidden.
Plate is
reversed—”feet”
are facing out.
Wall Mounting
Countertop Mounting
Figure 4: Serial Clock—Side View