Paxton Superchargers Dodge Viper RT/10 User Manual
Page 26
9-2
P/N: 4809646
©2006 Paxton Automotive
All Rights Reserved, Intl. Copr. Secured
17FEB06 v2.0 92-96Viper(4809646v2.0)
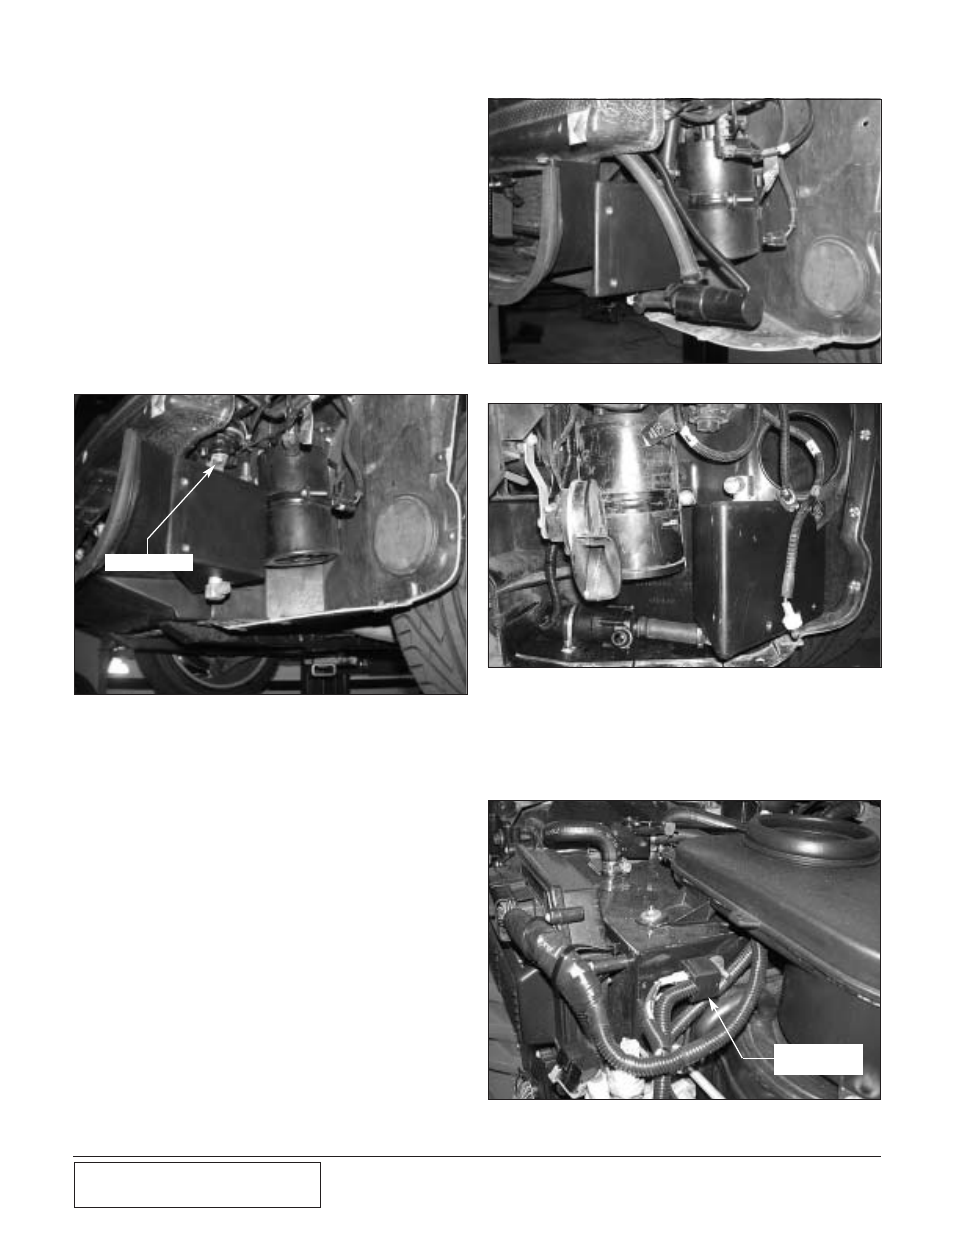
4.
(1992-1995 Model Year Reservoir
mounting.) Mount the water pump relay
at the location shown in Fig. 9-e on the
passenger’s side of the vehicle in front
of the PCM.
1B.
('96 Model Year Vehicles:)
Using sealant, install a 90° fitting into
the top and bottom of the water tank.
Place the water tank on the supplied
template (see Fig. 9-k-2, at the end of
this section) and position as far
inboard as possible. Verify that the cho-
sen location will not interfere with the
bumper cover when it is installed, hold
the template in place, remove the tank
and drill a 5/16" hole in the inner fend-
er that corresponds with the brass insert
in the tank.
2.
Use two of the supplied 1/4" screws
and washers to secure the reservoir.
C.
CAC Water Pump Wiring And
Installation
1.
Cut a piece of the supplied hose to con-
nect the bottom of the reservoir to the
inlet of the water pump.
2.
The pump outlet should point up and
toward the front of the vehicle.
3.
Install a plastic clamp on each hose
connection and tighten. (See Fig. 9-d.)
Fig. 9-c — ('92-'95 Model Year Shown)
Fig. 9-d.1 / (1992-1995 Model Year Reservoir Mounting)
Fig. 9-e
WATER
PUMP RELAY
HORN BRACKET
B.
Reservoir Installation
Fig. 9-d.2 / (1996 Model Year Reservoir Mounting)
1A. ('92-'95 Model Year Vehicles:)
Using sealant, install a straight fitting
into the top of the water tank (this is
the side that has the large 1"NPT blind
hole). Install a 90° fitting in the bottom
of the tank. Bend the factory horn
bracket up as shown in Fig. 9-c to pro-
vide clearance. Place the water tank on
the supplied template (see Fig.9-k1, at
the end of this section) and position as
close to the frame as possible. Once a
satisfactory position is located, hold the
template in place, remove the tank and
drill two 1/4" holes on the radiator
shroud that correspond to the brass
inserts in the tank.