Future Automation SPS User Manual
Page 14
In
st
al
la
ti
o
n
:
S
ta
ge
9
Page 13 of 28 // email [email protected] tel: +44 (0) 1438 833577 fax: +44 (0) 1438 833565
SPS SPLIT V & H - Sliding Panel System Split Vertical & Horizontal
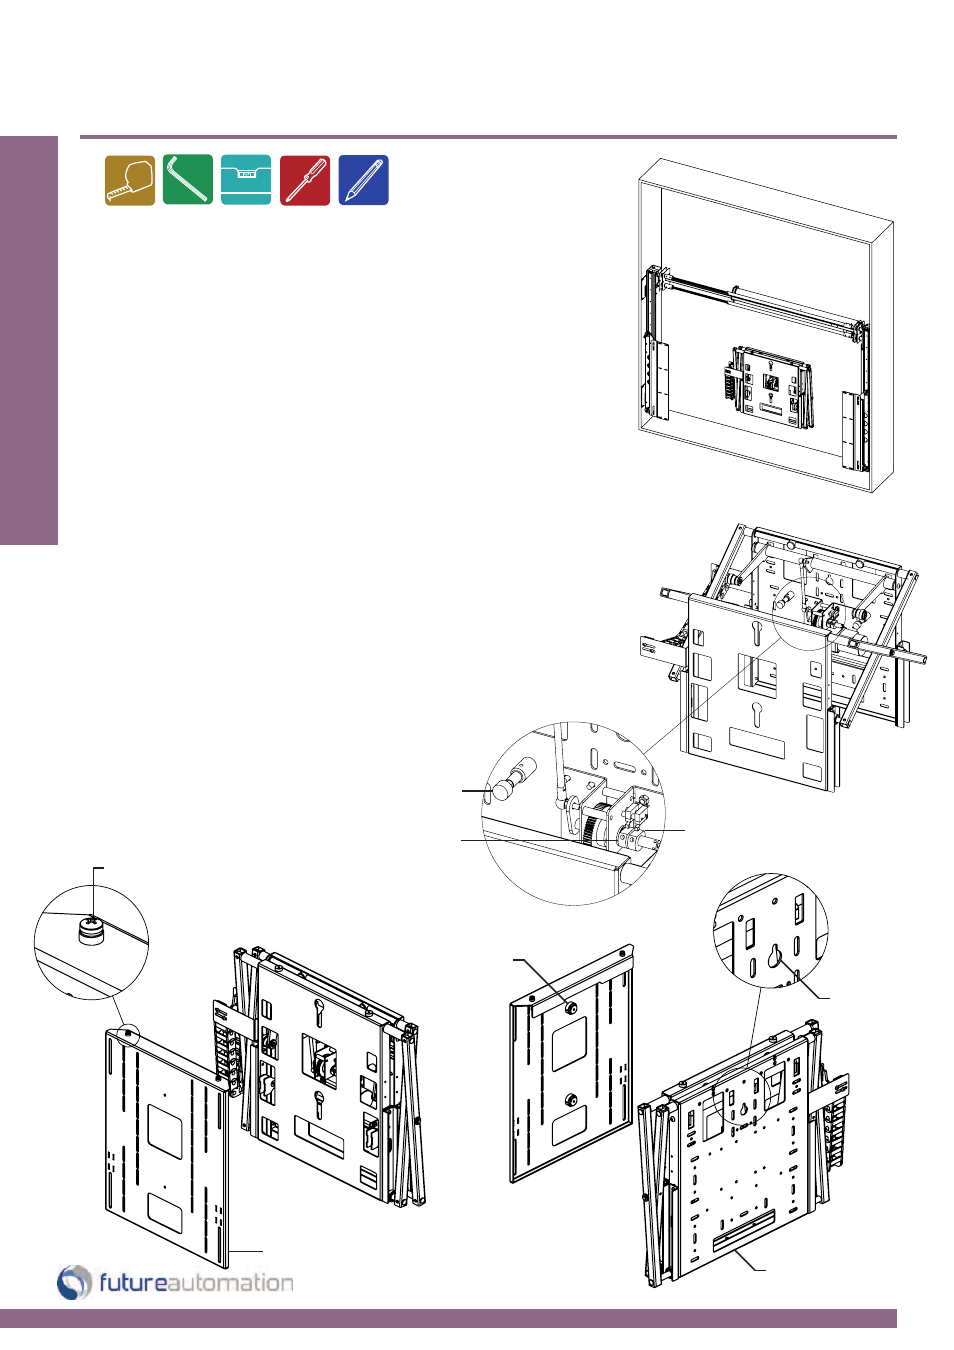
Option A - Mounting the Screen Advance Unit
Firstly remove the SA screen mount plate by loosening the 2
M6 bolts on the top face. To detach the screen mount plate
lift off using the mount toggles.
Mark where the SA unit needs to be mounted on the wall
and then mark a hole for the key-hole mount, fix a screw into
the wall with the head protruding
approximately 10mm [0.4”].
Mount the SA mechanism over the protruding screw and
check positioning, then with the mechanism in the in position
fix through the front plate with the square clearance holes
provided.
Attach the screen mount plate to the rear of the screen and
then using the mount toggles again, lower back on to the SA
mechanism. Fix the M6 bolts through the top face to lock in
place.
To change the out position move the outer cam to adjust the
advance travel.
Locking Bolts
Screen Mounting plate
Screen Mounting
Toggles
Key Hole
Mount
Mount Plate
In Limit Stops
In Cam - Factory Set
OUT Position Cam
With the mechanism in the out position press B to pulse out
to the service mode and then manually pull out fully.
Push back and press A to pulse the push
arm back into the out position.